My first attempts at making pulled pork a year or two ago were extremely delicious, but totally inauthentic. I used, dare I say, a slow-cooker. You can check out the horridly bad photos of that early Shared Appetite post here: slow-cooker pulled pork. Over the past couple of years, my affinity for making a more authentic version of Pulled Pork grew hungry... especially after attending the Big Apple BBQ Block Party in NYC and having numerous conversations with some BBQ enthusiast friends. Purchasing a smoker really wasn't in the cards, being that my now wife and I were saving big time for our wedding and I just obtained a super awesome gas grill. I needed to figure out how to smoke up some pork shoulders in an authentic way... on an inauthentic gas grill.
The results were... well, you take a look:
My brother and sister-n-law got me the Big Bob Gibson's BBQ Book by Pitmaster Chris Lilly over the summer for my birthday, so I was excited to try the Eight-Time World Championship Pork Shoulder recipe for my first attempt at real 'cue.
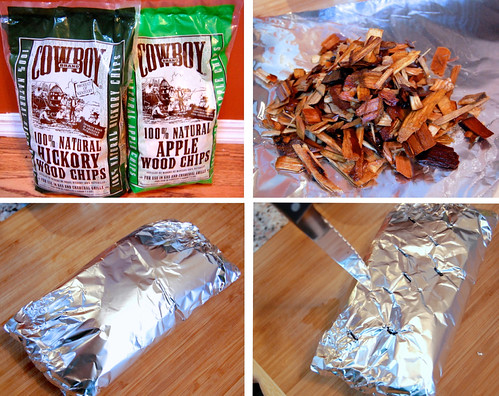
Let's first talk about wood. You can use wood chunks or wood chips. I found a nice variety of wood chips at the local "home improvement warehouse", and picked up a bag of both Hickory and Apple wood chips. If you only wanted to use one type of wood, go with Hickory, which is Bob Gibson's wood of choice. According to Lilly, "smoldering hickory wood gave his meat a depth of smoke flavor unmatched by other woods." If you can't find wood in a store near you, Amazon.com is a good place to start.
If you are using wood chips, which I used, you need to create a bunch of foil wood chip packets. Place a small handful of wood chips in the middle of a piece of aluminum foil. Fold over and create a seal, and then pierce several openings in the top of the pouch with a sharp knife. You are probably going to need about 8 packets for the entire smoking process.
The first time I made a smoked pork shoulder, I read that it was important to soak the wood chips for at least an hour before putting them on the grill. This way the wood chips don't catch on fire and burn up. You want them to smolder and smoke, not burst into flames.
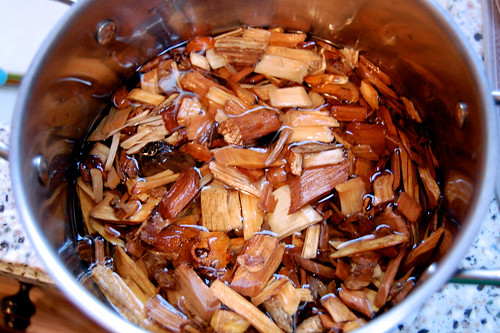
But then after talking to some BBQ enthusiasts and checking out this great article, Mythbusting: Do I Have To Soak My Wood, I was enlightened that it was in fact, a myth. Soaking the wood chips really doesn't do anything. That's good in my book... one less thing to worry about! The second time around I didn't soak the wood chips at all, and they still smoldered and smoked perfectly on the grill.
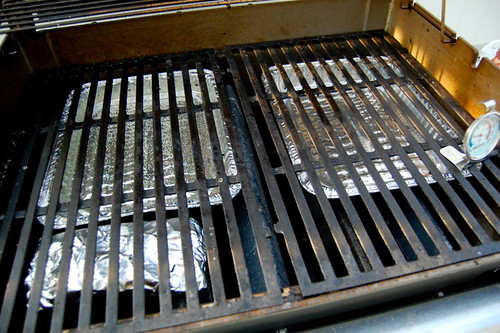
Onto the set up of your gas grill. The #1 most important tool you need for this project is an oven thermometer placed on the grill grates. After reading some articles on the subject and testing it out myself, I found that the built-in thermometer on your grill hood really is useless. It was constantly 50° off from the actual temperature on the surface of the grill grates.
You are also going to need two disposable aluminum-foil shallow roasting pans. Place them underneath your grill grates, directly on the flavorizer bars (the things that cover and protect the actual burner tubes). Fill the one on the left with water. You will need to refill this water pan throughout the process, probably every 2-4 hours as the water evaporates. What's the purpose of the water pan? The water absorbs heat and helps keep temperature fluctuations to a minimum. (Note: The water should not boil... if it is boiling, the grill is too hot).
The foil packet of wood chips should be placed directly in front of the water pan, directly on the flavorizer bar(s).
You want to set up your grill for indirect cooking. This means that only one side of the grill will be ignited, and the meat will be placed on the void side, away from the heat. In this case, we are heating the left side of the grill only (the side with the water pan and wood chip foil packet). Start by turning on just the left-most burner on the lowest setting possible. Close the lid and let it come up to temperature. For smoking, you want to try to stabilize the heat between 225-250°. If it is close but not quite at 225° yet, try bumping up that burner a little bit. If it's not close to 225°, try turning on the adjacent burner on its lowest setting. Remember, the magic range you're looking for is 225-250°. You may have to tweak the burners throughout the process, as outside temperature, rain, wind, etc. can all affect the inside of the grill.
For instance, at some points I just had the left burner on the lowest setting. Some points I had to increase the heat of that burner to maintain the 225-250° range. When it was really cold or windy, I had to additionally turn on the adjacent burner on the lowest setting. Experiment with your grill and tweak as necessary.
Okay, onto the actual pork shoulder...
The first time I made this recipe, I could only find a 10-ish pound pork shoulder. Ideally, you want to get a whole pork shoulder, about 16-18 pounds of meat (which I definitely did the 2nd time around by ordering it ahead of time from the local butcher).
Cut off a lot of the visible fat (you can leave some) and the hide/skin from the underside of the shoulder.
Using a meat syringe to add a liquid injection, which increases the moisture in the pork and allows its flavors to permeate the meat, is optional. The first time around, I didn't have meat syringe and left this part out. If you have a meat syringe, go for it! For the injection, combine ¾ cup apple juice, ½ cup each water and sugar, ¼ cup salt, and 2 tbl. worcestershire sauce. Stir until the sugar and salt dissolves, then load up the meat syringe and inject the meat at 1-inch intervals from the top side of the pork shoulder only. Use the entire solution (if you have the full 16-18 pounds of meat).
Lastly, create a dry rub by combining ½ tbl. brown sugar, 1 tbl. regular granulated sugar, 2 ¼ tsp. garlic salt, 2 ¼ tsp. Kosher salt, ½ tbl. paprika, 1 tsp. chili powder, and an ⅛ tsp. each dried oregano leaves, cayenne pepper, ground cumin, and black pepper. I just eyeballed the measurements and it came out great. Apply the dry rub all over in an even coating, patting so the rub adheres.
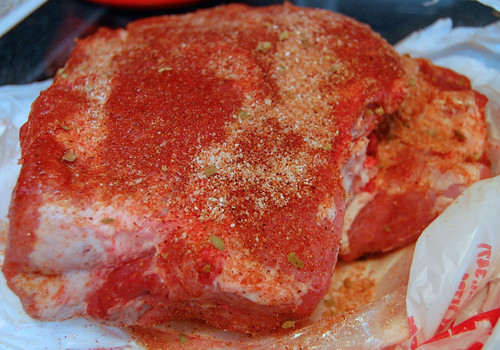
The pork shoulder should be placed directly over the empty disposable aluminum pan on the right. It will catch all the drippings melting off the slow-cooking shoulder. Remember, this is the void side of the grill. Only the left-hand side of the grill is ignited.
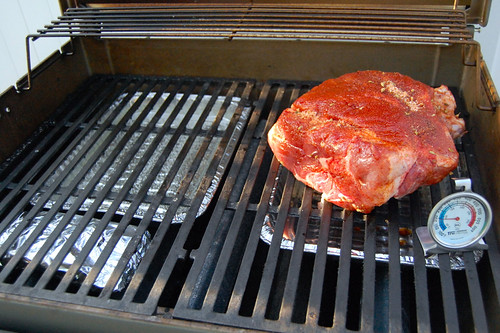
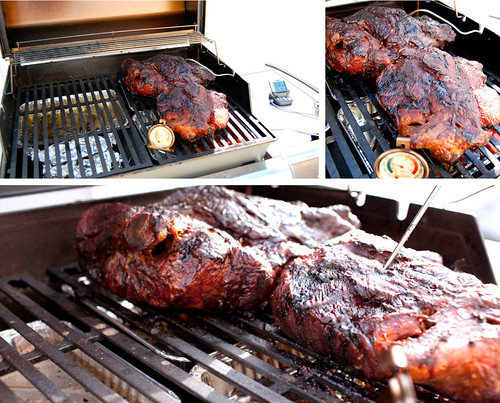
Maintain the temperature between 225-250°. Add water to the water pan as it dries out and add a new foil packet of wood chips when the one on the grill runs out. You will know when it is time to replace the packet when smoke no longer comes out. After about 12-13 hours, that pork shoulder will look glorious and triumphant, kind of like this:

The second time I smoked some pork shoulder, I wised up and did 2. If you are going to go through this whole process, you might as well get the most bang for your buck (the finished pulled pork freezes well and reheats well). Also, in the picture below you will notice a metal spike sticking out of the pork shoulder with a long wire. This is a Polder Probe Thermometer. Simply put the probe into the center of the pork shoulder (not touching the bone) and set it to 195°. It will start beeping like crazy when it reaches that temperature, which makes it super easy to know when your pork shoulder is ready!
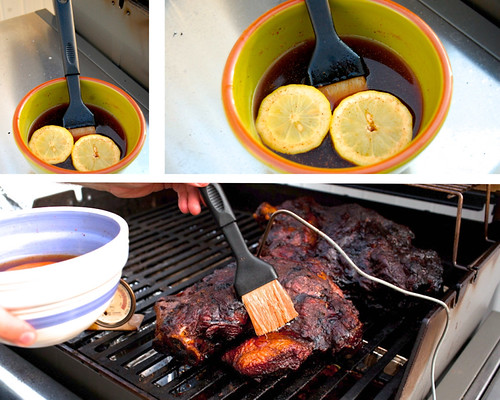
After the 12-13 hours, you are going to want to start basting it with a Vinegar Mop. I ventured away from Big Bob Gibson's exact recipe a bit, making a vinegar mop by combining 2 cups apple cider vinegar, 1 tbl. ancho chile powder (not really spicy, just a smoky flavor), ½ tbl. salt, and 2 slices of lemon. You need to make this vinegar mop ahead of time to give the flavors time to meld. Big Bob Gibson's recipe recommends making it at least 24 hours ahead of time, although I typically make it at the same time I make the dry rub and injection.
Baste the pork shoulder(s) about every hour until the pork is done, reaching that 195°.
Just a word of warning: At some point during the process, you will probably experience "THE STALL". This is the point during the cooking process where the temperature of the pork doesn't rise, at all, for several hours. The internal temperature of your pork shoulder might even decrease a few degrees during this time. It is a normal part of the process and a whole article dedicated to it here (Thanks James!). If you are running short on time, growing impatient, and want to get through THE STALL quicker, wrap your pork shoulder in aluminum foil at that point. Either way, the stall will pass and you will get to that 195° eventually!
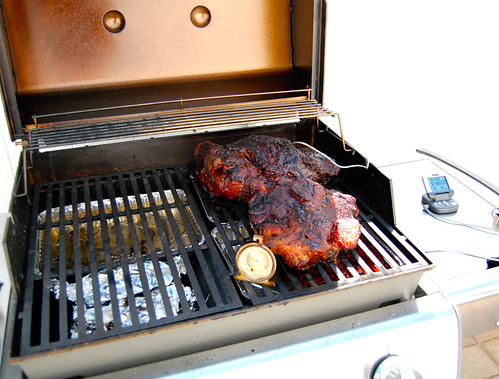
And here you have it, after about 16-18 hours, this pork is done!
Transfer the pork shoulder(s) to a cutting board or sheet pan and let it cool for about 30 minutes. Give the bone a good tug and it should release easily. As you being pulling and shredding the pork with your hands, remove any visible pockets of fat. You may want to put on some rubber gloves if the meat is too hot.
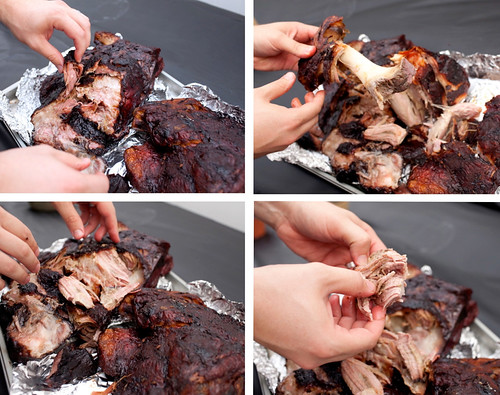
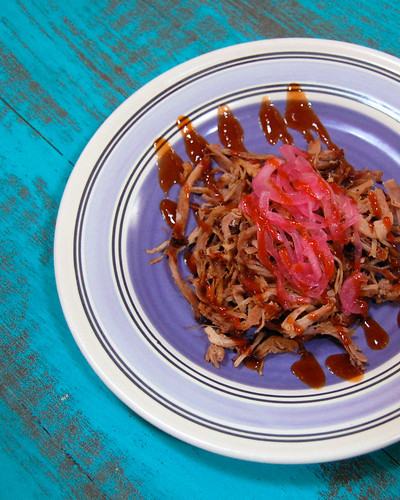
Time to eat...
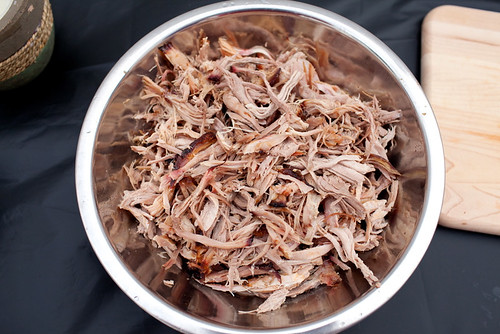
Serve it with some pickled red onions: Combine ½ cup apple cider vinegar, 1 cup water, 1 tbl. sugar, and 1 tsp. salt. Stir to dissolve sugar and salt. Pour over thinly sliced red onions and let sit at room temperature for 1 hour. You can make them ahead of time and store in the refrigerator for about 2 weeks.
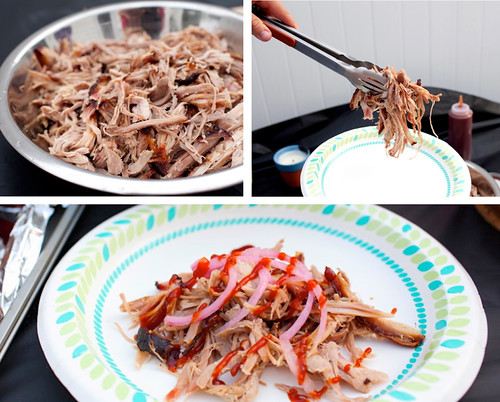
You of course also need some good BBQ sauce! I made Big Bob Gibson's Memphis-Style Championship Red Sauce. You can find the recipe for that below.
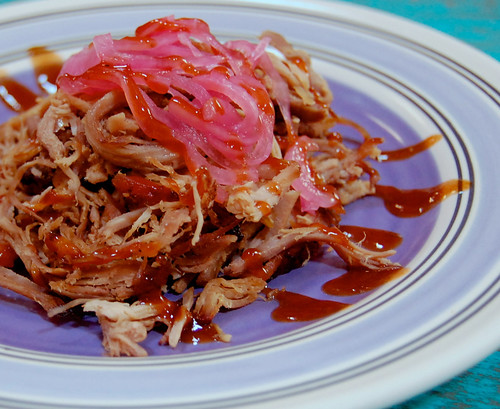
And the best thing about pulled pork is that it lasts for meals and meals, and reheats very well low and slow in the oven wrapped in aluminum foil.
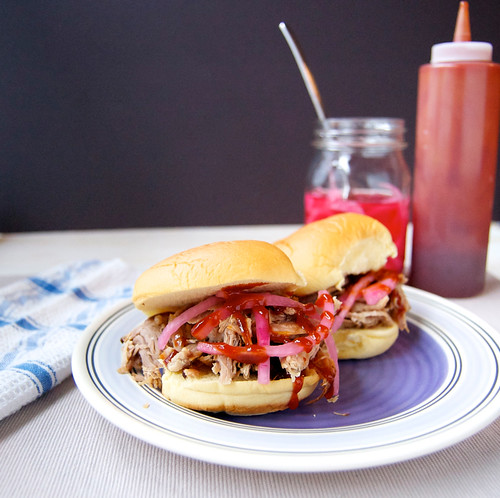
Of course making some pulled pork sliders is also a fantastic treat.
And as that pulled pork is almost gone, you can stretch it to another entire meal by making some pulled pork quesadillas! I make them with either monterey jack or pepper jack cheese.

Yes, smoking a pork shoulder for pulled pork is a long, labor intensive process. Yes, it takes pretty much an entire day. And yes, it is 100% totally worth it. I typically start the process on a Friday night, waking up every 2-ish hours to change the wood chip packet and fill the water pan. That way it is ready for a big Saturday dinner feast. Trust me, it's worth it!!!
PrintEight-Time World Championship Pork Shoulder
Ingredients
- 1 (16-18 pound) Whole Pork Shoulder
Dry Rub
- ½ tablespoon Brown Sugar
- 1 tablespoon Granulated Sugar
- 2 ¼ teaspoons Garlic Salt
- 2 ¼ teaspoons Kosher Salt
- ½ tablespoon Paprika
- 1 teaspoon Chili Powder
- ⅛ teaspoon Dried Oregano Leaves
- ⅛ teaspoon Cayenne Pepper
- ⅛ teaspoon Cumin
- ⅛ teaspoon Black Pepper
Injection (optional)
- ¾ cup Apple Juice
- ½ cup Water
- ½ cup Sugar
- ¼ cup Salt
- 2 tablespoons Worcestershire Sauce
Vinegar Mop (adapted)
- 2 cups Apple Cider Vinegar
- 1 tablespoon Ancho Chile Powder
- ½ tablespoon Salt
- 2 slices Lemon
For Garnish
- Pickled Red Onions
- Memphis-Style Championship Red Sauce
Instructions
- Set up your grill for indirect cooking as described in post above.
- Make the vinegar mop by combining its ingredients and letting sit at room temperature in a small bowl. Chris Lilly suggests making it at least 24 hours ahead of time and storing it in a tightly sealed container to really let the flavor meld, but I have just been making it right at the beginning of the cooking process and it comes out great that way too.
- In a small bowl, combine the dry rub ingredients. I usually just eyeball the measurements and it comes out great. Mix well and set aside.
- If using the injection: In a separate mixing bowl, combine all the injection ingredients and blend until the sugar dissolves. Using a meat syringe, inject the meat evenly at 1-inch intervals from the top side of the pork shoulder only, using the entire amount of the injection solution.
- Apply the dry rub to the meat in an even coating, patting so the rub adheres.
- When the heat on the grill reaches and stays steady at 225°, place the pork shoulder on the side of the grill opposite the heat source and close the lid. Cook for 16 - 18 hours, give or take, until the internal temperature of the meat reaches 195°. Add the wood chip foil packets about every 2 hours and refill the water pan as necessary. After 12-13 hours of cooking, begin basting the shoulder with the vinegar mop every hour.
- Once the pork shoulder reaches 195°, remove from grill and let rest on a cutting board for 30 minutes. Pull the pork by hand, discarding visible fat.
Memphis-Style Championship Red Sauce
- Yield: 4 cups 1x
Ingredients
- 1 ¼ cups Ketchup
- 1 cup Water
- ¾ cup Apple Cider Vinegar
- ¾ cup Tomato Paste
- ¾ cup Brown Sugar
- ⅔ cup Corn Syrup (if you have it, if not, no worries)
- ½ cup Pure Maple Syrup
- 4 tablespoons Honey
- 3 tablespoons Molasses
- 4 teaspoons Salt
- 4 teaspoons Worcestershire Sauce
- 1 tablespoon Applesauce (I typically just use Apple Juice)
- 1 ½ teaspoons Soy Sauce
- 1 ½ teaspoons Liquid Smoke (I omit this)
- 1 teaspoon Onion Powder
- ¾ teaspoon Cornstarch
- ½ teaspoon Dried Mustard Powder
- ½ teaspoon Cayenne Pepper
- ¼ teaspoon Black Pepper
- ⅛ teaspoon Garlic Powder
- ⅛ teaspoon White Pepper (I didn't have this and omitted it)
- ⅛ teaspoon Celery Seed
- ⅛ teaspoon Ground Cumin
Instructions
- Combine all ingredients in a medium saucepan and then bring to a boil over medium-high heat. Reduce heat and simmer over medium-low heat for 10-15 minutes. Allow to cool, then transfer to a tightly covered jar or plastic container. Store refrigerated for up to 2 weeks.



wayne says
sound good I am trying it wed
Chris says
Sounds great! When's dinner Wednesday?! I'll be there, haha. Let me know how it turns out and enjoy!
Darlene says
This looks absolutely delicious! I just moved into my new condo with free natural gas, purchased my new BBQ last weekend and now I have something worthy to try on it! Ill be sure to save some for you Chris!
Chris says
Awesome Darlene! Yes, save me some haha! Let me know how it goes 🙂
Erina says
Trying this recipe with pork I shot in Oklahoma back in December...just in time for Superbowl!
Chris says
Oh wow very cool! Let me know how it goes!
Warren says
This is an EPIC post! Haha, thanks for taking the time to go through the entire process, and the pictures make everything look so amazing! I just got a propane smoker this year, I will have to give this whole pulled pork thing a try. Those quesas have my mouth watering!
Chris says
Thanks Warren! You definitely need to try pulled pork on your smoker! It's awesome!
Lauren says
Hey Chris, Just found this post and it looks delicious! I just purchased a smoker and am thinking of tweaking this recipe for the smoker - any suggestions? Lastly, how many people does a 16-18lb pork shoulder feed? I will probably be doing this for July 4th so there will be plenty of mouths to feed. Thanks!
Chris says
Thanks so much for the question Lauren. I purchased an electric smoker too last summer and have made this pork shoulder a bunch of times. It's pretty much the same process... get the smoker to that magic temperature (225-250) and maintain that temp, fill with wood chips every now and again (my electric smoker can only handle a certain amount of wood at a time, so I have to refill it every 2 hours or so). I stop using wood chips about 12 hours in or so. It'll take the same amount of time to cook as if it were on a gas grill (16-18 hours or so).
Hmmm, is the pork shoulder the only thing you're serving? It's tough to say. I did some poking around some bbq forums for you and it seems like you should plan on 1 to 1.5 uncooked pounds of meat for each person (because once cooked that will equal about 1/2 pound of meat per person). So I would say a 16 pound pork shoulder will feed 12-16 people. I normally also cook up some other bbq essentials... burgers, dogs, chicken, so in that case your pork shoulder will go a lot further. Have a lot of fun! Hope it turns out great!
Lucas Gascon says
Looks delicious!!! Planning to attempt this over the weekend! Probably a silly question but was wondering how much water u put in the foil pan at a time?
Chris says
I just fill it up about 3/4 of the way full and refill as it evaporates. Good luck! Hope it comes out awesome!
Mattias says
Hi Chris,
Very well written guide to pulled pork, will try this coming Saturday for the first time! A question though.. I assume that the 16-18 hour cooking time applies to a pork shoulder that is 16-19 pounds?
I will probably start of with something smaller (8-10 pounds), and just want to check (for planning) if I can expect it to ready in lets say 10-12 hours?
Thanks for all the info!
/ Mattias
Chris says
Hi Mattias, I'm honestly not entirely sure. I don't think it would take that short of time... maybe 14 hours-ish. I would try to google it and see what you can come up with. I know I've done picnic cuts before (which is about that 10 pound range), and it still took about 14 hours. Happy smoking!