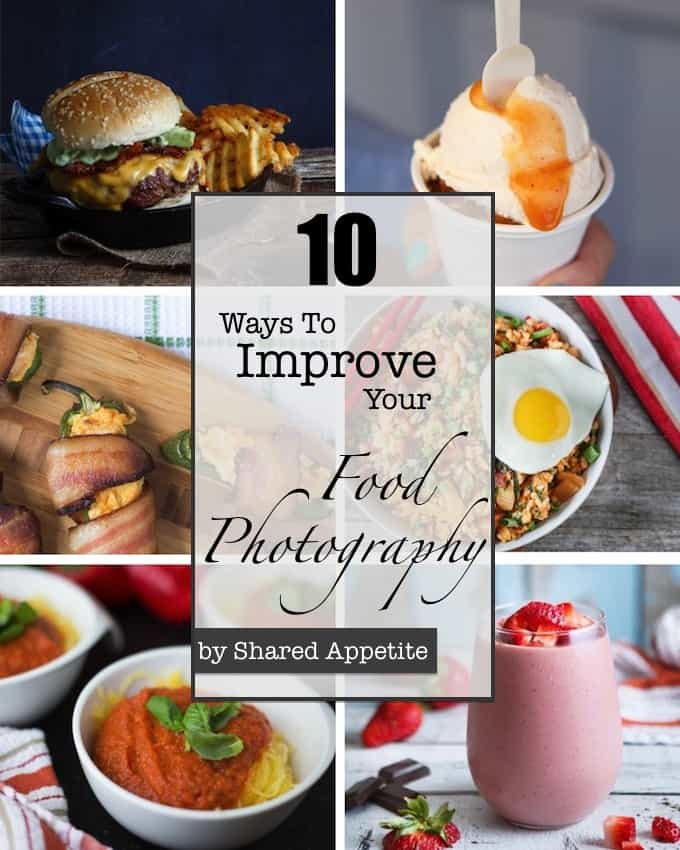
A few tricks and tips to jumpstart your way to photography stardom... Top 10 Ways To Improve Your Food Photography.
I don't feel completely worthy to write this post. I'm a small fish plankton in a very large pond. There are food photographers out there that are so much, much more talented than I. People I look up to. People who's photographs inspire and motivate me. Like Katie. And Naomi. And Tieghan. And Matt. And Marcus. The list goes on and on.
But then I realize, heck, maybe someone out there, in their own little corner of the interwebs, could possibly-kinda-maybe fast forward through the painful mistakes I made make behind the camera and fast track their way to photography stardom.
Just do me a favor. If you make it big... take me along for the ride. I'd like to meet famous people at swanky parties and stuff like that.
Thanks.
I can still remember my early posts.... confidently holding my point and shoot camera stuck in automatic mode, using the ever-so-romantic orange glow of kitchen overhead tungsten lights and the perfectly diffused built-in camera flash that made the food glisten ever so slightly.
Yes, that's what sarcasm in print looks like.
I was totally an idiot when it came to photography. Actually, you can't even call what I did photography. It was food murder. With one click of a button, I swiftly took all life and beauty from what was on the plate. Wait, I can prove it to you. Check below the legitimate terribleness (is that even a word?), and how I am very slowly making progress.
Then... and Now
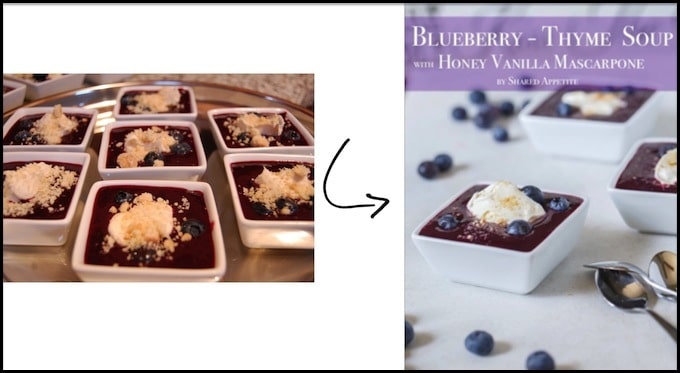
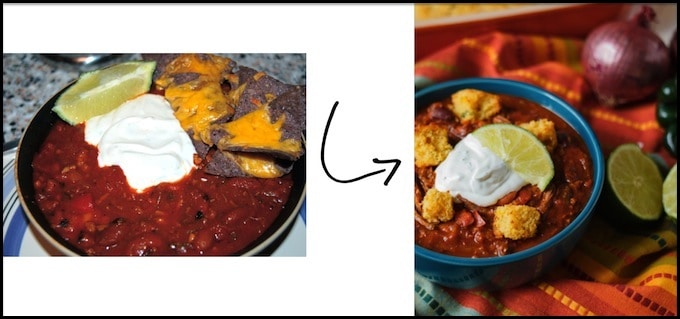
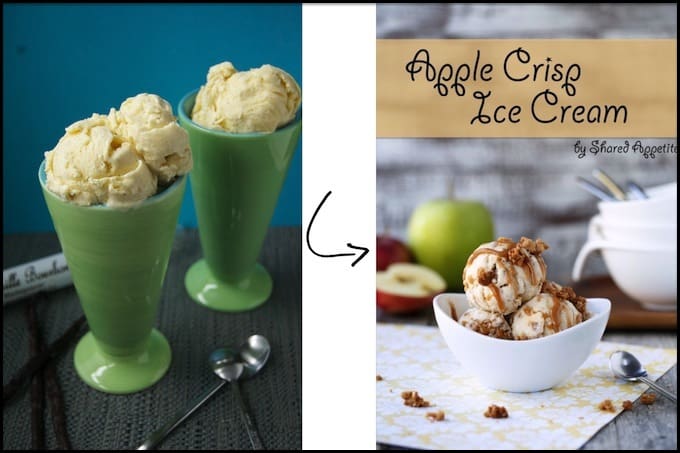
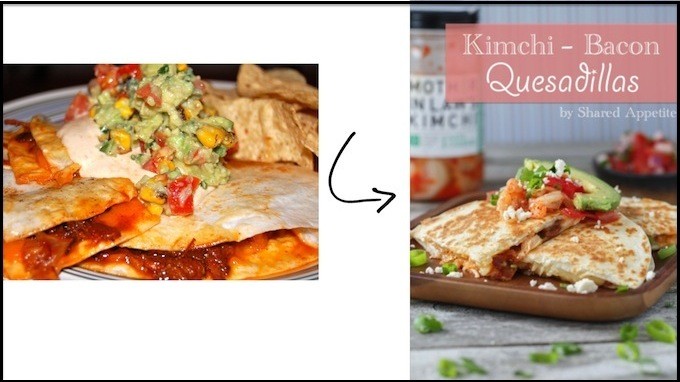
Oh my gosh. I can't even. What was I thinking back then?
Apparently not much.
So if you're new to all of this, you might find my An Introduction to Food Photography helpful. Or boring. Or both. Once you endure that snooze-fest super duper helpful tutorial, here are the top 10 ways I improved my food photography.
1) Natural Light.
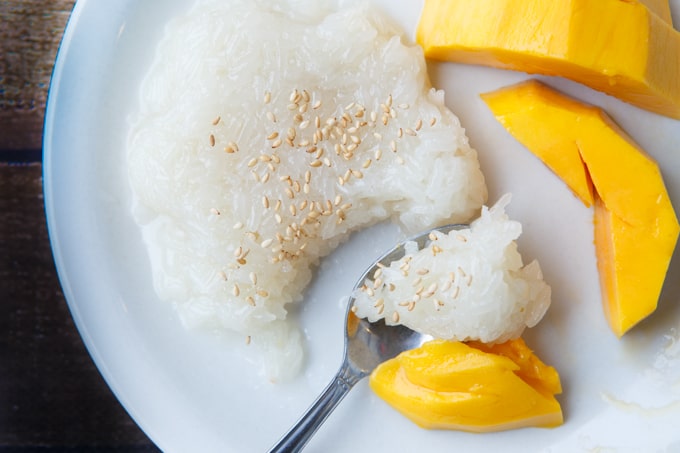
If you have one of those built-in flashes on your camera... I'm sorry. It's useless. In fact, that's the most common weapon used in order to commit food murder. If we were playing Clue, it would sound like...
Me, in the kitchen, with the built-in camera flash.
Those overhead high-hat lights you have turned on in your kitchen. Yea, those are no bueno either.
The #1 way to improve your food photography? Find great light.
My wife and I just moved into a new house. The first thing I did with my camera was test out the light in numerous different rooms and windows at various times of day. It’s amazing how utterly different the food looks in different areas and at different times.
The way the sun enters your home. The size of your windows. How many windows you have in the room. Heck, even the paint color on your walls can influence your photographs.
Get the lighting right, and your photos will instantly improve.
Personally, I enjoy light that is pointed and one directional (lighting the food from the left, right, or behind). When light comes from every direction, such as a place in your house with windows on several sides of the room, the image never seems to come out as well for me.
There’s a tiny window in our kitchen that I thought was going to be absolutely useless, but it’s actually one of my favorite spots to shoot. The light is super pointed, so it’s fun to play around with illuminating just a specific part of my frame.
Once you find that great light, remember that you can manipulate it with black foam core boards (to block light from hitting certain areas of your frame) and white foam core boards (to bounce light back into the frame and fill out some shadows).
2) Use a Tripod and Remote Trigger.
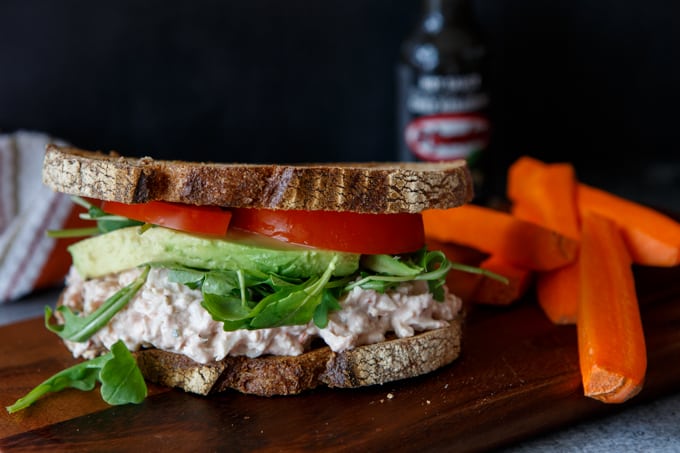
One of the biggest things I've changed in my food photography over the last year? Consistently using a tripod and remote trigger.
A while back, I felt like using a tripod was majorly annoying and limiting. It was a pain in the rear to set up, and if I wanted to photograph at a different angle, I needed to adjust the entire tripod. Ain't nobody got time for that.
But honestly, the extra 60 seconds it takes for me to set up my tripod has made a tremendous difference. With the camera in a fixed position, I can work on setting up the frame exactly how I see it in my head.
This is how I used to shoot...
ThrowCarefully place props and food on a backdrop.- Look through lens.
- Test shoot for exposure and prop placement.
- Put down camera to move food and props to where I think it should be.
- Pick up camera. Test shoot. Now my angle and position is slightly different, so still not happy.
- Put down camera to move food and props to where I think it should be.
- Grrr, still not right.
- Repeat over and over until I give up, just shoot a bunch of images, and pray to the food gods that one image will be acceptable.
Yea, obviously not the best workflow. I wasted so much time, was never entirely happy with the images, and since I was shooting handheld, had to keep my ISO on the high side (or have a ton of light coming through the window) to get the proper exposure.
Here’s my process now:
- Set up camera on tripod for either an overhead shot, straight on shot, or ¾ shot.
- Plug in remote sensor and put remote trigger in my pocket.
- Set up plate and other props while maintaining that fixed camera location on the tripod.
- Test shoot for exposure and prop placement.
- Add food. Test shoot for exposure and make little adjustments to props as needed.
- Using remote trigger, have hands free to jump-start my hand modeling career (i.e. pour dressing, drizzle syrup, or hold a fork or glass), or to hold foam core boards to manipulate light.
And since I'm on a tripod, I don't need a ton of light coming into the room and can keep my ISO down (which gives a clearer image and improves the color).
For those interested, here's the camera remote and trigger I use. It's all of $20. And it rocks my socks.
3) Embrace Messiness and Shadows.
The old me wanted the food to look perfect. Everything just so in the exact right spot. But you know the phrase, "it looks too good to eat?!"
Yea, that's not what I want to achieve in my images. The reaction I want to get when someone looks at a photo on Shared Appetite?
- Ermagherd I want that so bad right now.
- ::immediate drooling::
- I want this for dinner.
- Pinning!!!
I always try to make the food look natural, complete with drips, spills, and other imperfections. Controlled messiness can be good.
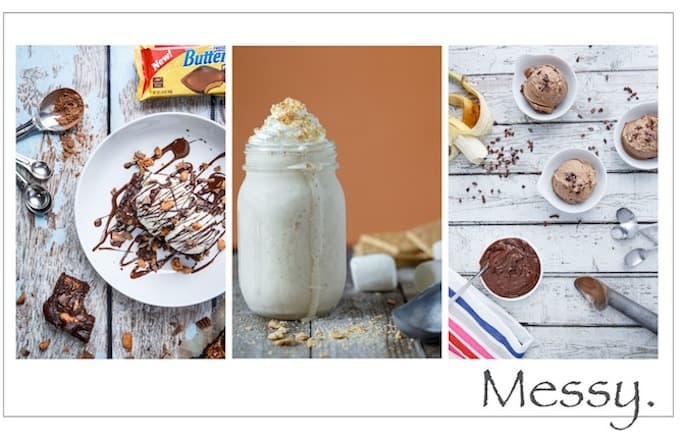 When Tyler and I are photographing weddings, our goal is to capture natural moments. Dramatically over-posed images make us cringe. Now that doesn't mean we don't pose couples. We do. But the emphasis is always on natural situations and comfortable body angles. The same goes for food. I want my photographs to make sense... naturally.
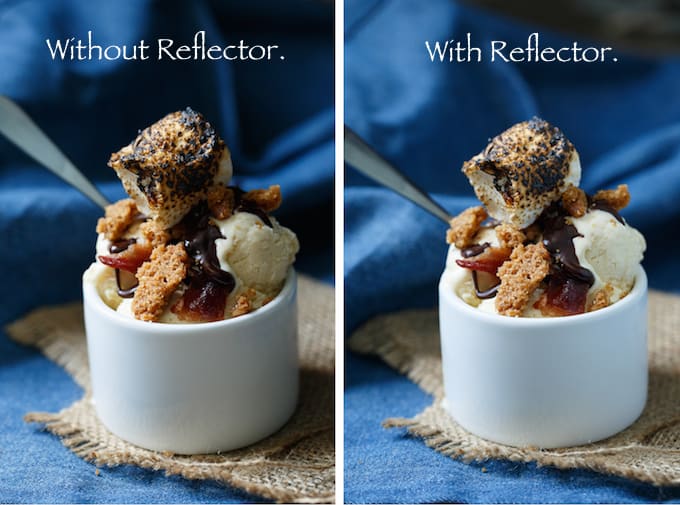
On the same lines of making food look pretty... shadows are my newest friend in photography. I love playing with shadows. When I first started, I felt like I wanted everything to be big and bright. Now I love to embrace mydark side 🙂 You can see below what happens to a photo with a white reflector bouncing light back onto the image vs. no reflector. It's a personal preference really...
4) Get Lightroom.
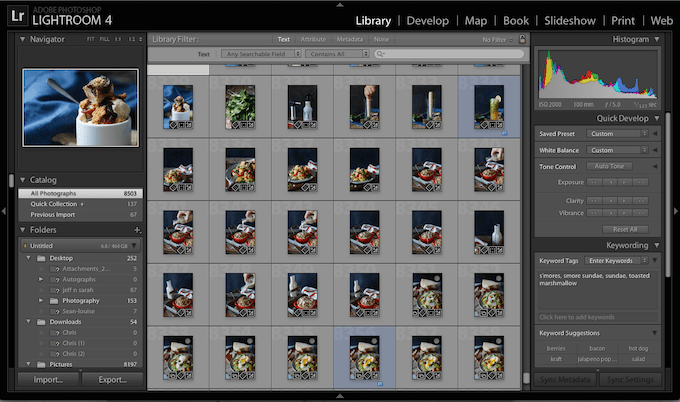
I used to edit all my photos in iPhoto... a simple stock application that comes pre-loaded on the Apple computers. #amateurhour
Guys. Lightroom is the bomb dot com. All my photos are edited using Lightroom
. It's incredibly user friendly (unlike that Photoshop thingy I still have yet to learn to use) and you can do SO many things with it.
Here's a little inside peek. The photo on the left is straight out of camera. The photo on the right is what the finished photo looked like after editing in Lightroom...
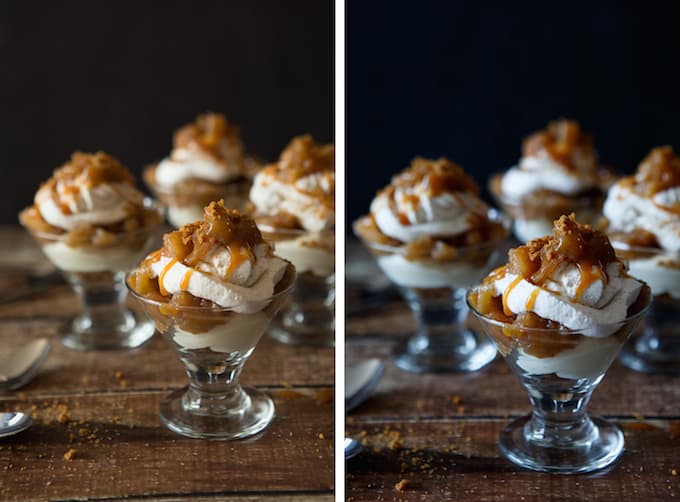
Big freaking difference, right? Lightroom is a really fantastic investment that I really, really recommend.
5) A Few Quality Props.
There was a time in my life that I wanted to hoard every single serving dish, utensil, and other cutesy kitchen item I found. The lady at Home Goods knew my name.
Guess where the majority of that stuff is right now? Taking up space in a closet somewhere. Not being used.
Don't get me wrong. I'm still a HUGE fan of props It's just that in the recent year, I found myself relying on certain props over and over again. Ones that really seem to photograph well, are versatile, and match my style.
So now I really try to be super selective in my prop purchases. I love to try to find props that will provide good contrast and will provide lots of different textures. Textures and layers typically equal great photos.
Smaller plates and bowls are usually better when it comes to photography. It's easier to fill the plate and maintain a small scale photography set-up.
You can see a few of my favorite props in the images below (and if you look through all my posts in the last year, you'll probably notice that they make appearances in almost all of them)...
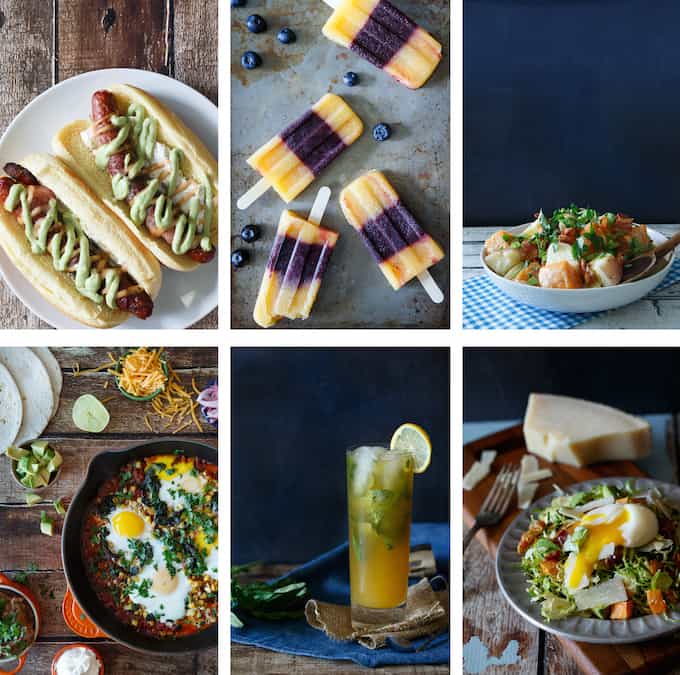
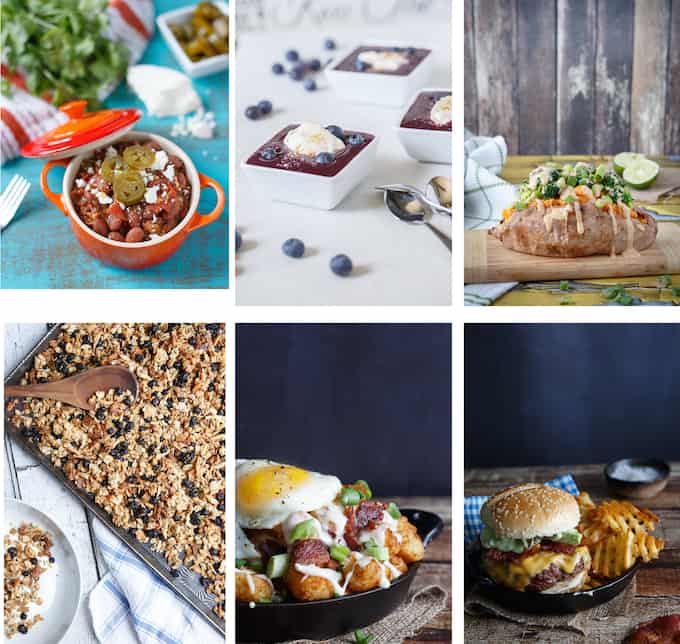
Let's break it down. Here's what I end up using 99% of the time:
- mini cast iron skillet (about 5-6" wide...)
- little burlap cloth
- vintage looking fork (garage sale find!... can find on eBay also)
- shallow white bowl
- cool looking small metal/pewter plate (found on eBay)
- random scrapbooking paper with cool patterns
- little mini dessert bowls
- one highball glass
- wooden spoon
- small white plate
- three trusty kitchen towels
- a few good backdrops
Let's talk backdrops. You totally have some options. Some people like to shoot on their marble or granite countertops. Go for it if you can, but most times the natural light in a kitchen is scarce. I've seen some really beautiful images shot on marble countertops though.
What I used early on were some DIY backdops. I wrote up a little post about it here... How To Make Your Own Food Photography Backdrops. Basically I used old fencing or store-bought plywood (cut up into strips) from Home Depot and then got my painting skills on.
I've also found success in using scrapbook paper and metal baking trays.
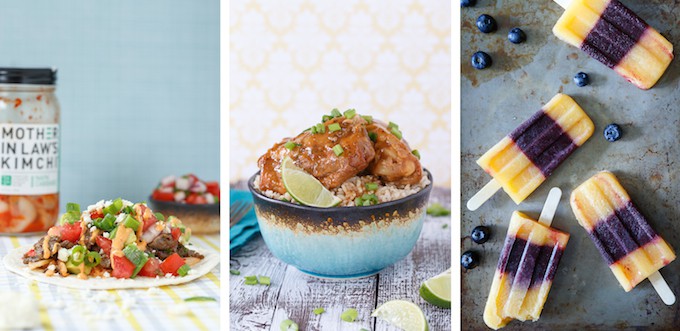
99% of the time at this point, though, I'm using vinyl backdrops that are made to look like wooden boards. I got mine from Swanky Prints on Etsy. They are relatively cheap, are super easy to move around, wipe down, and transport. Although I definitely like the look of that authentic distressed barn wood type backdrop, this is a really great and convenient alternative.
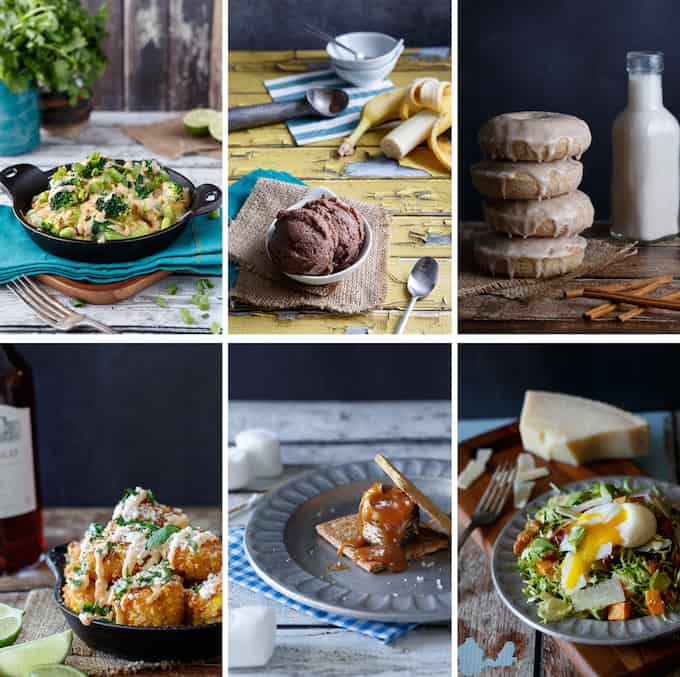
And I'm constantly on the look out for my next big prop/backdrop find. Garage sales and thrift stores are great places for great looking pieces at cheap prices!
6) Set Up Your Shot Before Food Is Ready.
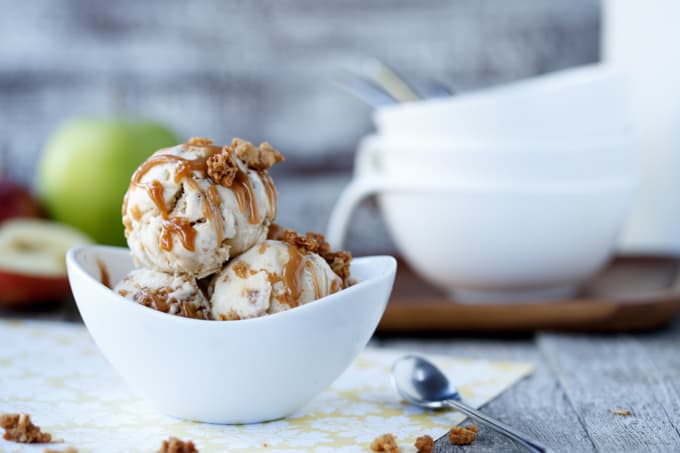
The old me didn't plan very well. #typeAfail
Ugh... the ice cream is melting already!!! How am I supposed to photograph this?!
I've quickly learned that a successful shoot is all about the planning. Unless I'm shooting something that can sit around without melting. coagulating, or looking downright nasty (i.e. cupcakes, etc), I make sure to plan out my frame prior to the food being done.
I set up the camera on a tripod at a location in the house where the light is just right. I get my backdrops and props in place. I think about color palette (when I actually remember to), textures, and trying to make the scene look natural and not overly posed or forced.
And then I use a stand-in for test shots. It's perfect for those quickly deflating/melting/runny things that never seem to cooperate for us food photographers. For drinks, I might stuff the glass with some paper towel. For ice cream, some balled up wax paper in the bowl. You get the idea.
I use those test shots to make sure my exposure and all that technical stuff is in order and to make sure I'm happy with my frame (i.e. all my props are in the exact spot I want them). Then all I need to do is plate the food and get my shot.
A few tips...
- Ice Cream and Frozen Treats - to avoid a melting catastrophe, I scoop ice cream ahead of time and lay them all out on a wax-paper lined baking tray. That tray then goes into the freezer until really firm. Then I use those frozen scoops to photograph. For ice pops, I remove them from the mold, then freeze them in a single layer on a baking sheet until rock solid. If at any point the ice cream/popsicles start to melt on me while photographing, I take a 20 minute recess and put 'em back in the freezer. A pain, yes. But worth it in the end.
- Meats - it's all about that glisten and shimmer. Right when meat is done cooking, it has a bit of shimmer to it due to the fat/oil on it's surface. Once it rests a bit, that glisten fades and you're left with dry-looking meat in your photographs. To regain that glisten, you can play with brushing on a very little amount of oil to wherever you want that glisten to happen.
- Fresh Veggies/Fruit - it begs for a little spritz of water. Not a dunk in water, but a fine mist or couple droplets of H2O on fresh produce makes them look way more appetizing and "fresh".
- Melted Cheese - is your melted cheese getting all gross and coagulated as it sits waiting to be photographed? Use a kitchen torch to lightly melt it again.
7) Compose Dish At Level Photographing.
This is a tip that picked up along the way from someone that does some food styling for Chef Jamie Oliver. It's simple, but it was one of those palm to forehead type moments for me.
Sometimes the hardest part of making food look great isn't the props or the backdrop. It's the actually food on the plate. Food styling is a full-time job all in itself. Us food bloggers need to cook, photograph, write, AND food style.
So when you are plating your food, do so on the level at which you want to photograph it. Shooting from overhead? Then layer your ingredients looking straight down on the plate. Want a straight-on shot? Then get on the same level when plating your food. Look at it from that perspective and it really, really helps.
When choosing at what angle to photography, think about the shape of the food. If it's piled high like a stack of donuts or a sandwich, you may want to emphasize that with a straight-on shot. If you are shooting a bowl of soup, you really can't do straight-on because all you'll see is the side of the soup bowl. ¾'s or overhead might be the best. And when it doubt, experiment!
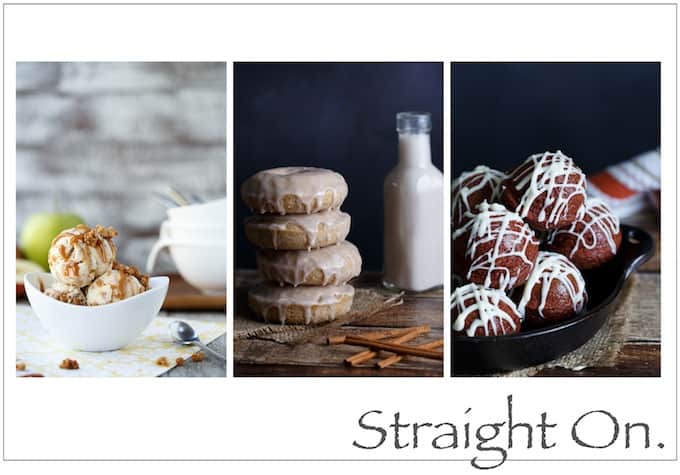
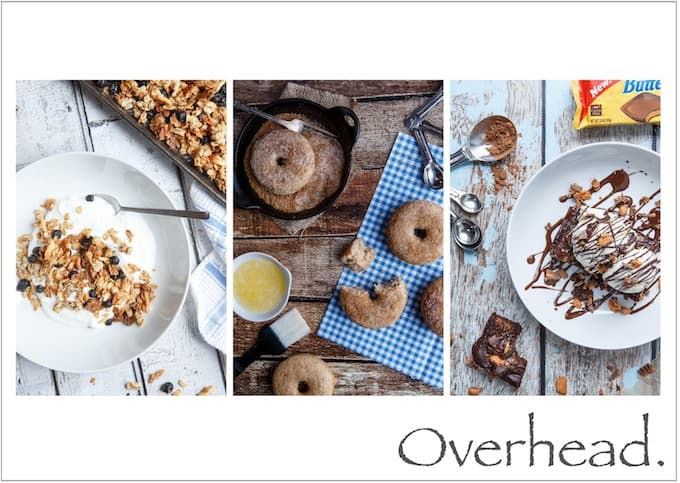
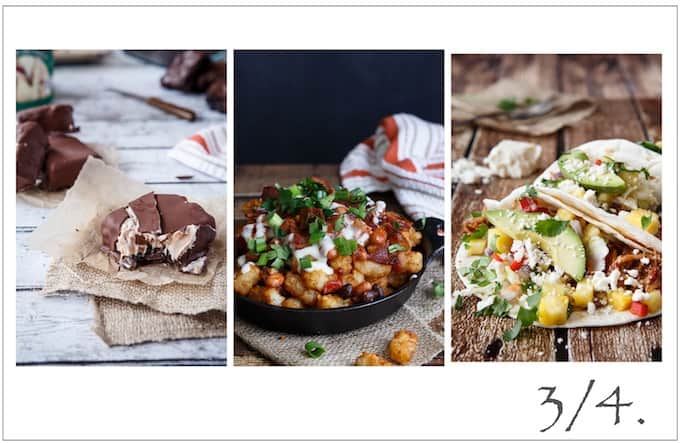
Well what if I want to shoot some overhead shots and some straight-on?
Sometimes it'll just work out that you can do that... but sometimes that means going back into the kitchen and re-plating the food. A bit of a pain, but it can take your photos to a whole new level of awesome.
8) Have a Bag of Tricks
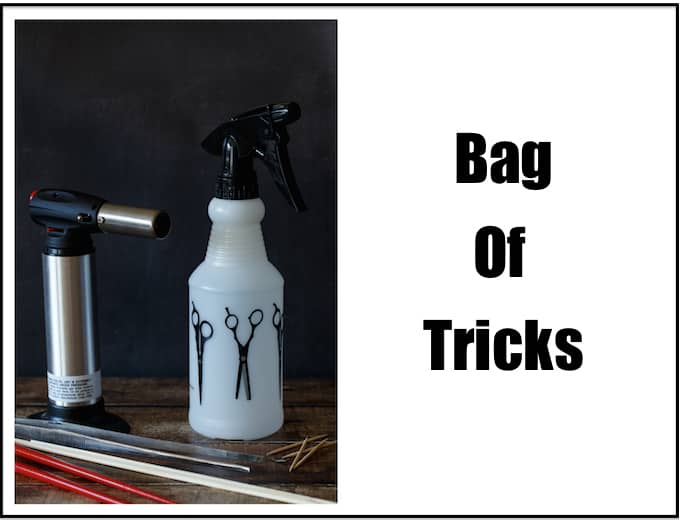
Tweezers and chopsticks are really great for placing and moving around different ingredients when you are trying to style a dish.
A spray bottle filled with water keeps fruits and veggies looking super fresh. A dry strawberry doesn't look as appetizing as a strawberry with a few drops of water on it. #truth
Ahh, the kitchen torch. One of my all time favorite kitchen tools... it's just so bad donkey. It's fantastic for roasting marshmallows, caramelizing stuff, melting cheese on top of a burger, and a bunch of other things I can't think of right now.
Although I haven't tried it, I've heard of people using a kitchen torch to super heat metal skewers, which they then press on meat/chicken to give perfect grill marks.
Toothpicks and wooden skewers are amazing for keeping things in place, especially on sandwiches. You have no idea how annoying it is to get lettuce, tomato, and avocado to stay in place without some assistance.
A funnel can also be super helpful if you are trying to pour items into a skinny glass or bowl and down want to spill on the sides.
A neat trick... wet some cotton balls and microwave them until steamy. Place behind the food you are photographing and if you have a dark back ground, you should be able to see steam rising up from the food. I've tried this only once and it didn't work out (I didn't use a dark background... duh), but I heard it's what cool people sometimes do.
9) Practice and Get Inspired.
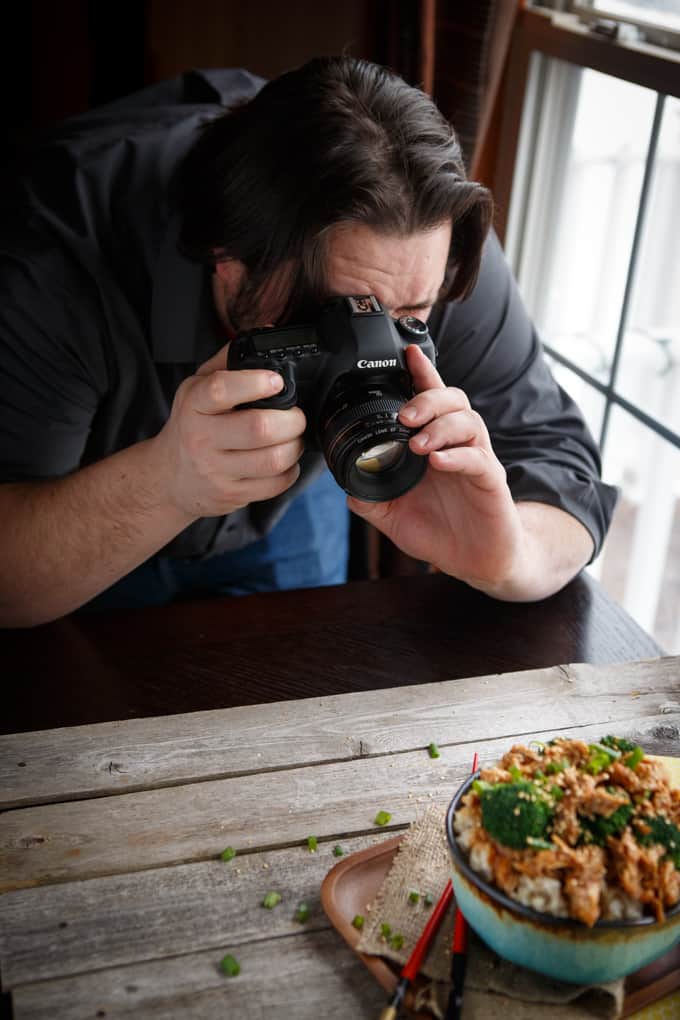
No... that's not me. That dude has way too much hair. I'm more... thinner in the hair department. Hey! At least one part of me is thin. 🙂
That photo is from a food photography seminar I gave for a bunch of people in a photography community group Tyler and I run at our church.
Anyway, practicing. This is the one tip that no one wants to hear. But it's true.
Taking great photographs requires a ton of practice. So get out that camera and shoot... a lot.
Something that really helps me? Look at other work by photographers you admire. Ask yourself...
- what's the light doing in this photograph? where's it coming from?
- reflector? no reflector? are they manipulating the light in anyway?
- what kind of props are they using?
- how did they style their shot? where does my eye get drawn to and why?
- what is making me love this image?
The greatest form of flattery is imitation. Try to replicate the photographs you love gawking at.
And don't be afraid to reach out to those people. Email them questions. You'd be surprised how many times they respond to people that are inspired by their work and are asking meaningful questions!
For an absolutely amazing resource with tons of photos, videos, and lots of "nuts and bolts" content about food photography, check out Lindsey's amazing eBook! Click here to visit Pinch of Yum - Tasty Food Photography eBook.
 10) Have the Right Equipment.
Having the newest, most expensive camera isn't going to make you a better photographer any more than me buying new running shoes is going to help me in running a marathon 5K mile down my driveway.
It's all about practice. Patience. And perseverance. A lot of it.
But I have to be honest, having the right equipment certainly does help. If you're interested in what I use and recommend, you can check out My Favorite Food Photography Gear.


Christine says
Chris, this is simply fantastic, what a thorough and well researched piece, I am seriously in awe right now! Def will be sharing on Facebook bc this is a true educational piece. My straight on shots tend to be hardest for me in terms of composition and styling, but I'm working on it everyday. And I am actually on Swanky Prints right now looking for new backdrop inspiration 🙂
Chris says
Thanks so much Christine! You're the best 🙂 Swanky Prints is the bomb... such a great, cheap, and versatile alternative to lugging around heavy wooden backdrops!
Taylor says
Absolutely love this post Chris! So many great tips - I so agree with all of them!!
Chris says
Thanks Taylor 🙂
Lynn Lovejoy at Order in the Kitchen says
Thank you so much for sharing this!! I really appreciate these tips! Christina from Dessert for Two sent this to me and it's amazingly helpful!
Chris says
So glad you found it useful Lynn! Thanks 🙂
Nicole says
Haha, plankton. You crack me up, Chris! All great tips. I'm sorry to admit that I still need to start using a tripod. I hate them. But, the photos are so much clearer when I force myself to use a tripod.
Chris says
Glad I crack someone up 😉 My wife, not so much. Hahah, I know... those tripods are a love/hate sorta thing. I promise if you start using it religiously you'll love it! ...maybe.
Shashi says
Chris - thank you for this - just like your "An Introduction to Food Photography " post, this one is fulled with so much info I could use! Loved the lighting/propping/background-ing tips! I am a huge fan of Jamie Oliver and I am not sure I could spot the difference between your photos and his!
So - I do have a question - say you are faced with ugly clouds and natural light is not an option for days - what do you do? What sort of lighting do you use?
Chris says
Aww, thanks so much for your kind compliments Shashi! You're the best 🙂 Honestly, I have never had a problem with a dark cloudy day once I started using a tripod with remote. It's very very difficult to shoot handheld in those circumstances, but with the camera on a tripod and you triggering it with a wireless remote, I keep my ISO at 400 and my shutter can be as slow as it wants... it doesn't matter since there won't be any camera shake. If I'm ever shooting at night (which is like .00001% of the time), I use my Lowel Ego Lamps (http://www.amazon.com/Lowel-Digital-Imaging-Tabletop-Fluorescent/dp/B0009K50RO)
Shashi says
Thanks so much Chris - I am heading to Amazon to go tripod shopping!
Chris says
Woot woot!
Tina says
Love the tip about pre-scooping/freezing your ice cream! Melting is definitely something I struggle with, and your tip sounds amazing - definitely going to try that soon!
Chris says
Thanks Tina! Yea, the pre-scooping has helped me a ton!
Sarah says
This is such a thorough and helpful list! I love the list of your most-used props. Dear Santa, Please see this post. Love, Sarah.
Chris says
Thanks so much Sarah... and I'll put in a good word at the North Pole. I have connections.
Ashley says
hahaha food murder. That's exactly how I feel about my early posts. Gah, they make me cringe so much!!
Love these tips - I keep meaning to get a remote trigger ... I need to just buy one already!
Chris says
Food murder indeed.... ahhh the joys of looking back at our early photos! And yes... totally treat yourself to a trigger!
Gerry says
Chris, this is an awesome post! I love the info you give out and you're doing an awesome job I might say!!
Chris says
Thanks so much Gerry... much appreciated!
Karen says
Such a great post Chris! I seriously need to buckle down and embrace the tripod and remote. Or at least buy one and not use it. RIght?? Someday I will be like you. Love your before and afters!!
Chris says
Thanks so much Karen! Yes, totally get a tripod and remote! It's helped me SO SO SO much.
Kelly says
This is such a great post! Loved all your tips and I totally think you are worthy of writing this - your photos are always stunning!!
Chris says
Thanks so much Kelly! You are too kind!
David says
Great tips, my friend! You have made the Wolfpack proud today. For that, you shall earn another cookie. Or a steak. Seriously awesome post! #WolfpackEats
Chris says
My goal is to always proudly serve and promote the well-being of our Wolfpack. I will happily reap my reward in cookies or steak... or both.
Bianca says
Love these tips!! Thank you 🙂
Chris says
Glad you like them!
Alice says
oh my gawd, what are you talking about?! I'm not going to believe that "you don’t feel completely worthy to write this post" nonsense. . your photography is excellent!!!! Thanks for this post! glad you wrote it!
Chris says
Thanks Alice... you're the best. I'm just such a fan of so many people's photography... so much to learn, so little time!
Olivia - Primavera Kitchen says
What a great post, Chris! I love absolutely everything about it. Thanks so much so sharing all this great tips!
Chris says
Glad you liked it!
Tash says
Wonderful post! I have always really admired your photography, so being able to get a sneak peak into your world of 'how-to's and perfect snap secrets is just the best! I will never forget how much my pictures upgraded when I suddenly decided to invest in Lightroom... differences you didn't even know where possible until you see them for yourself! The bit about the light reflector was also really useful since you seldom get to see those kind of before/afters on other tutorials, yet low lighting is something I've really been struggling with recently! Dinner at 2:30pm is not cool. Thanks so much for sharing these, Chris! 🙂
Chris says
Thanks so much Tash... such a super kind compliment! Lightroom is so amazing isn't it?!
Paula says
Great tips, Chris! I'm always looking for helpful photography info!
Paula says
Great tips, Chris. I'm always looking for photography tips and inspiration!
Chris says
Thanks Paula!
Chelsea says
So grateful for posts like these! You are definitely one of my photographer inspirations! I love your dark and moody shots, they are my favorite. Also you are such a funny writer, what an great and engaging post!
Chris says
Aww thanks Chelsea! You're the best 🙂
Serene says
Chris, what a wonderful post! Love all your tips, and your photos are gorgeous. You are definitely qualified to write such a post. Thanks so much!
Chris says
Thanks so much Serene 🙂 Much appreciated!
Colm says
Hi Chris,
Good to see theres another guy out there blogging about food and sharing recipes. Thanks for the great photography tips. Photography is something I struggle with but really enjoy. Its always good to see how another blogger approaches things.
Keep up the good work.
Azedine says
You nailed it Chris. I'm pretty sure a lot of food bloggers will take advantage of this great post. Yep images, images, images can take your blog to the next level;-)
Find the Right Keywords for Your Food Recipes
Julie is HostessAtHeart says
Thank you for this wonderful tutorial! I am such a novice and am trying to get up to speed with a new camera. Your post is easy to read and packed with great information.
Howie Fox says
Wow, this is so much good information. Will have to go through it one more time when I'm shooting my next food photos. Thanks!!
Chris says
Thanks so much Howie!
Brent Herrig says
Hi Chris,
Thank you for sharing these exceptional tips. The points you’ve mentioned above will be great help if someone want to entire into food photography field. Keep sharing!
Picsalicious says
You are so right about finding the great light with natural light. It worked great when we tried.