
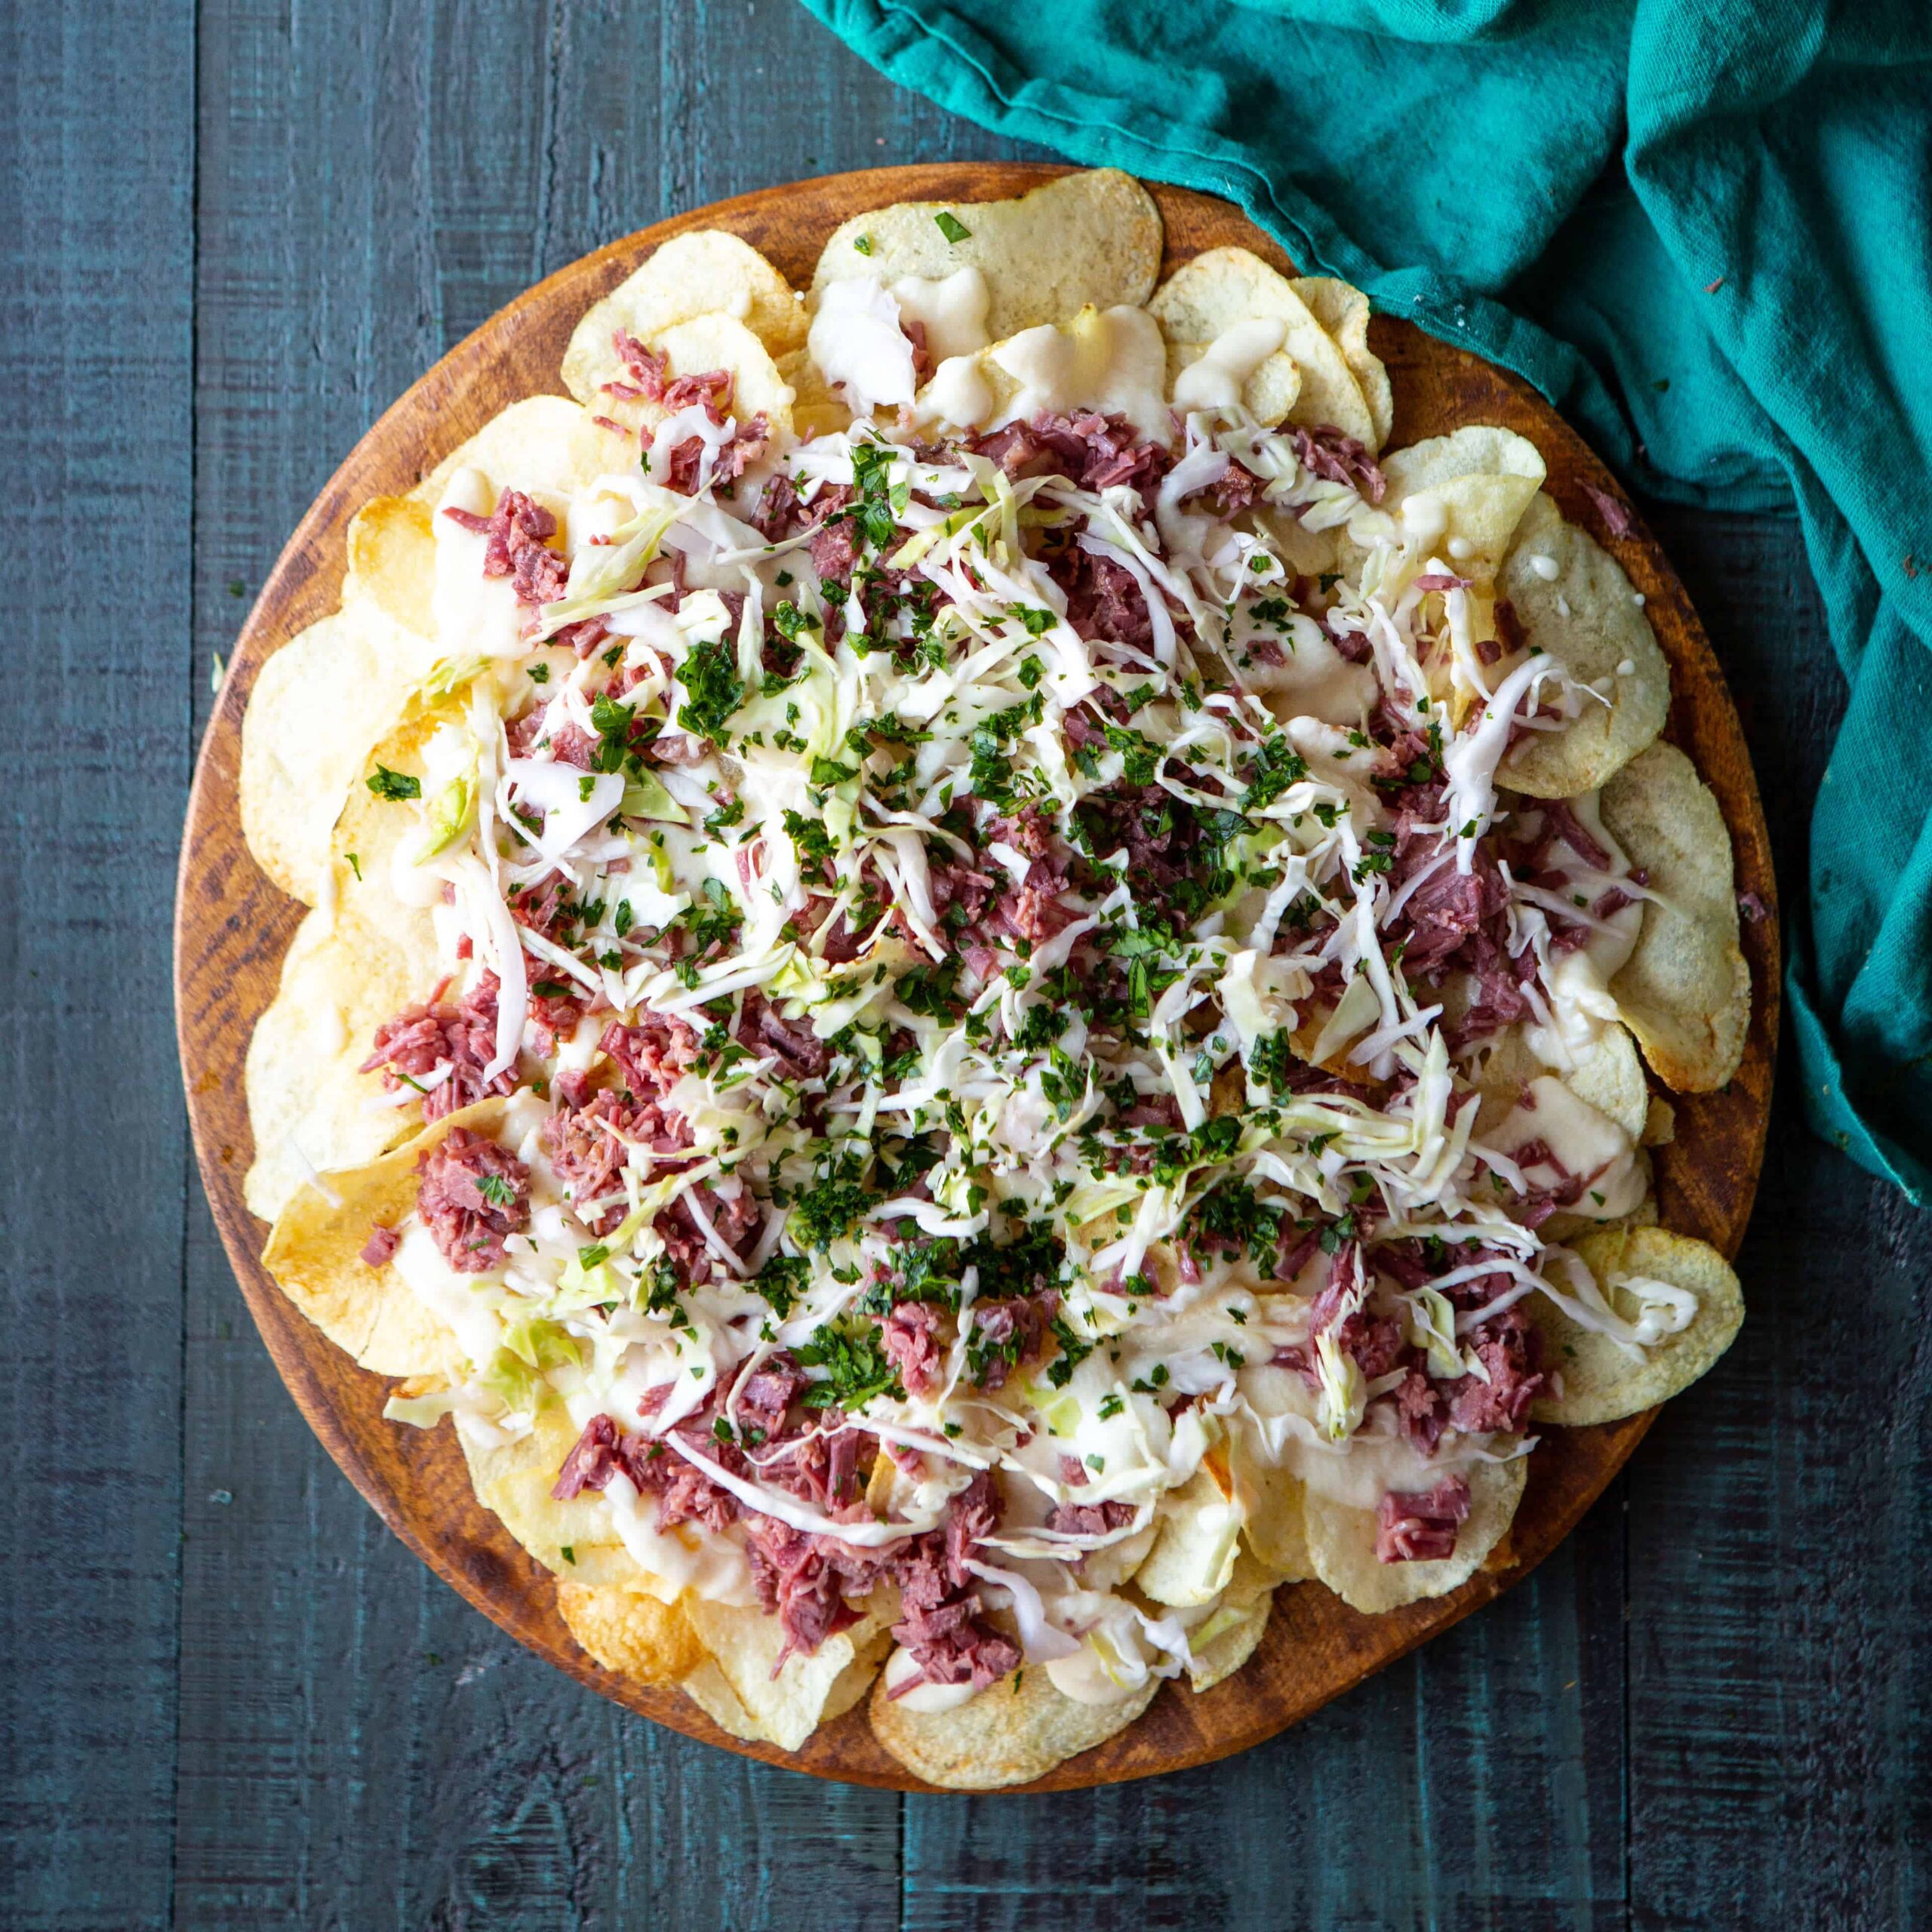
The perfect St. Patrick's Day appetizer is here with these Irish Corned Beef Nachos with Swiss Cheese Queso and Pickled Cabbage!

I can count on one hand the amount of times my family has celebrated St. Patrick's Day since I was a little kid. It just wasn't a big thing in our home, and even for the over-zealous celebratory adult I've become (i.e. I'm quick to celebrate pretty much everything and anything), St. Patrick's Day still is very low on the holiday totem pole.
Of course now that Olivia is at the age where she's learning about each and every holiday (and makes countless art projects that she enthusiastically decorates our house with... definitely my kid), we've become more apt to celebrate anything she's excited about. She's all about St. Patrick's Day, so this year we're going to a parade, running walking a family-friendly St. Patty's Day 5K, and going to her friend's house (they are all Irish) for a little play date - holiday edition.
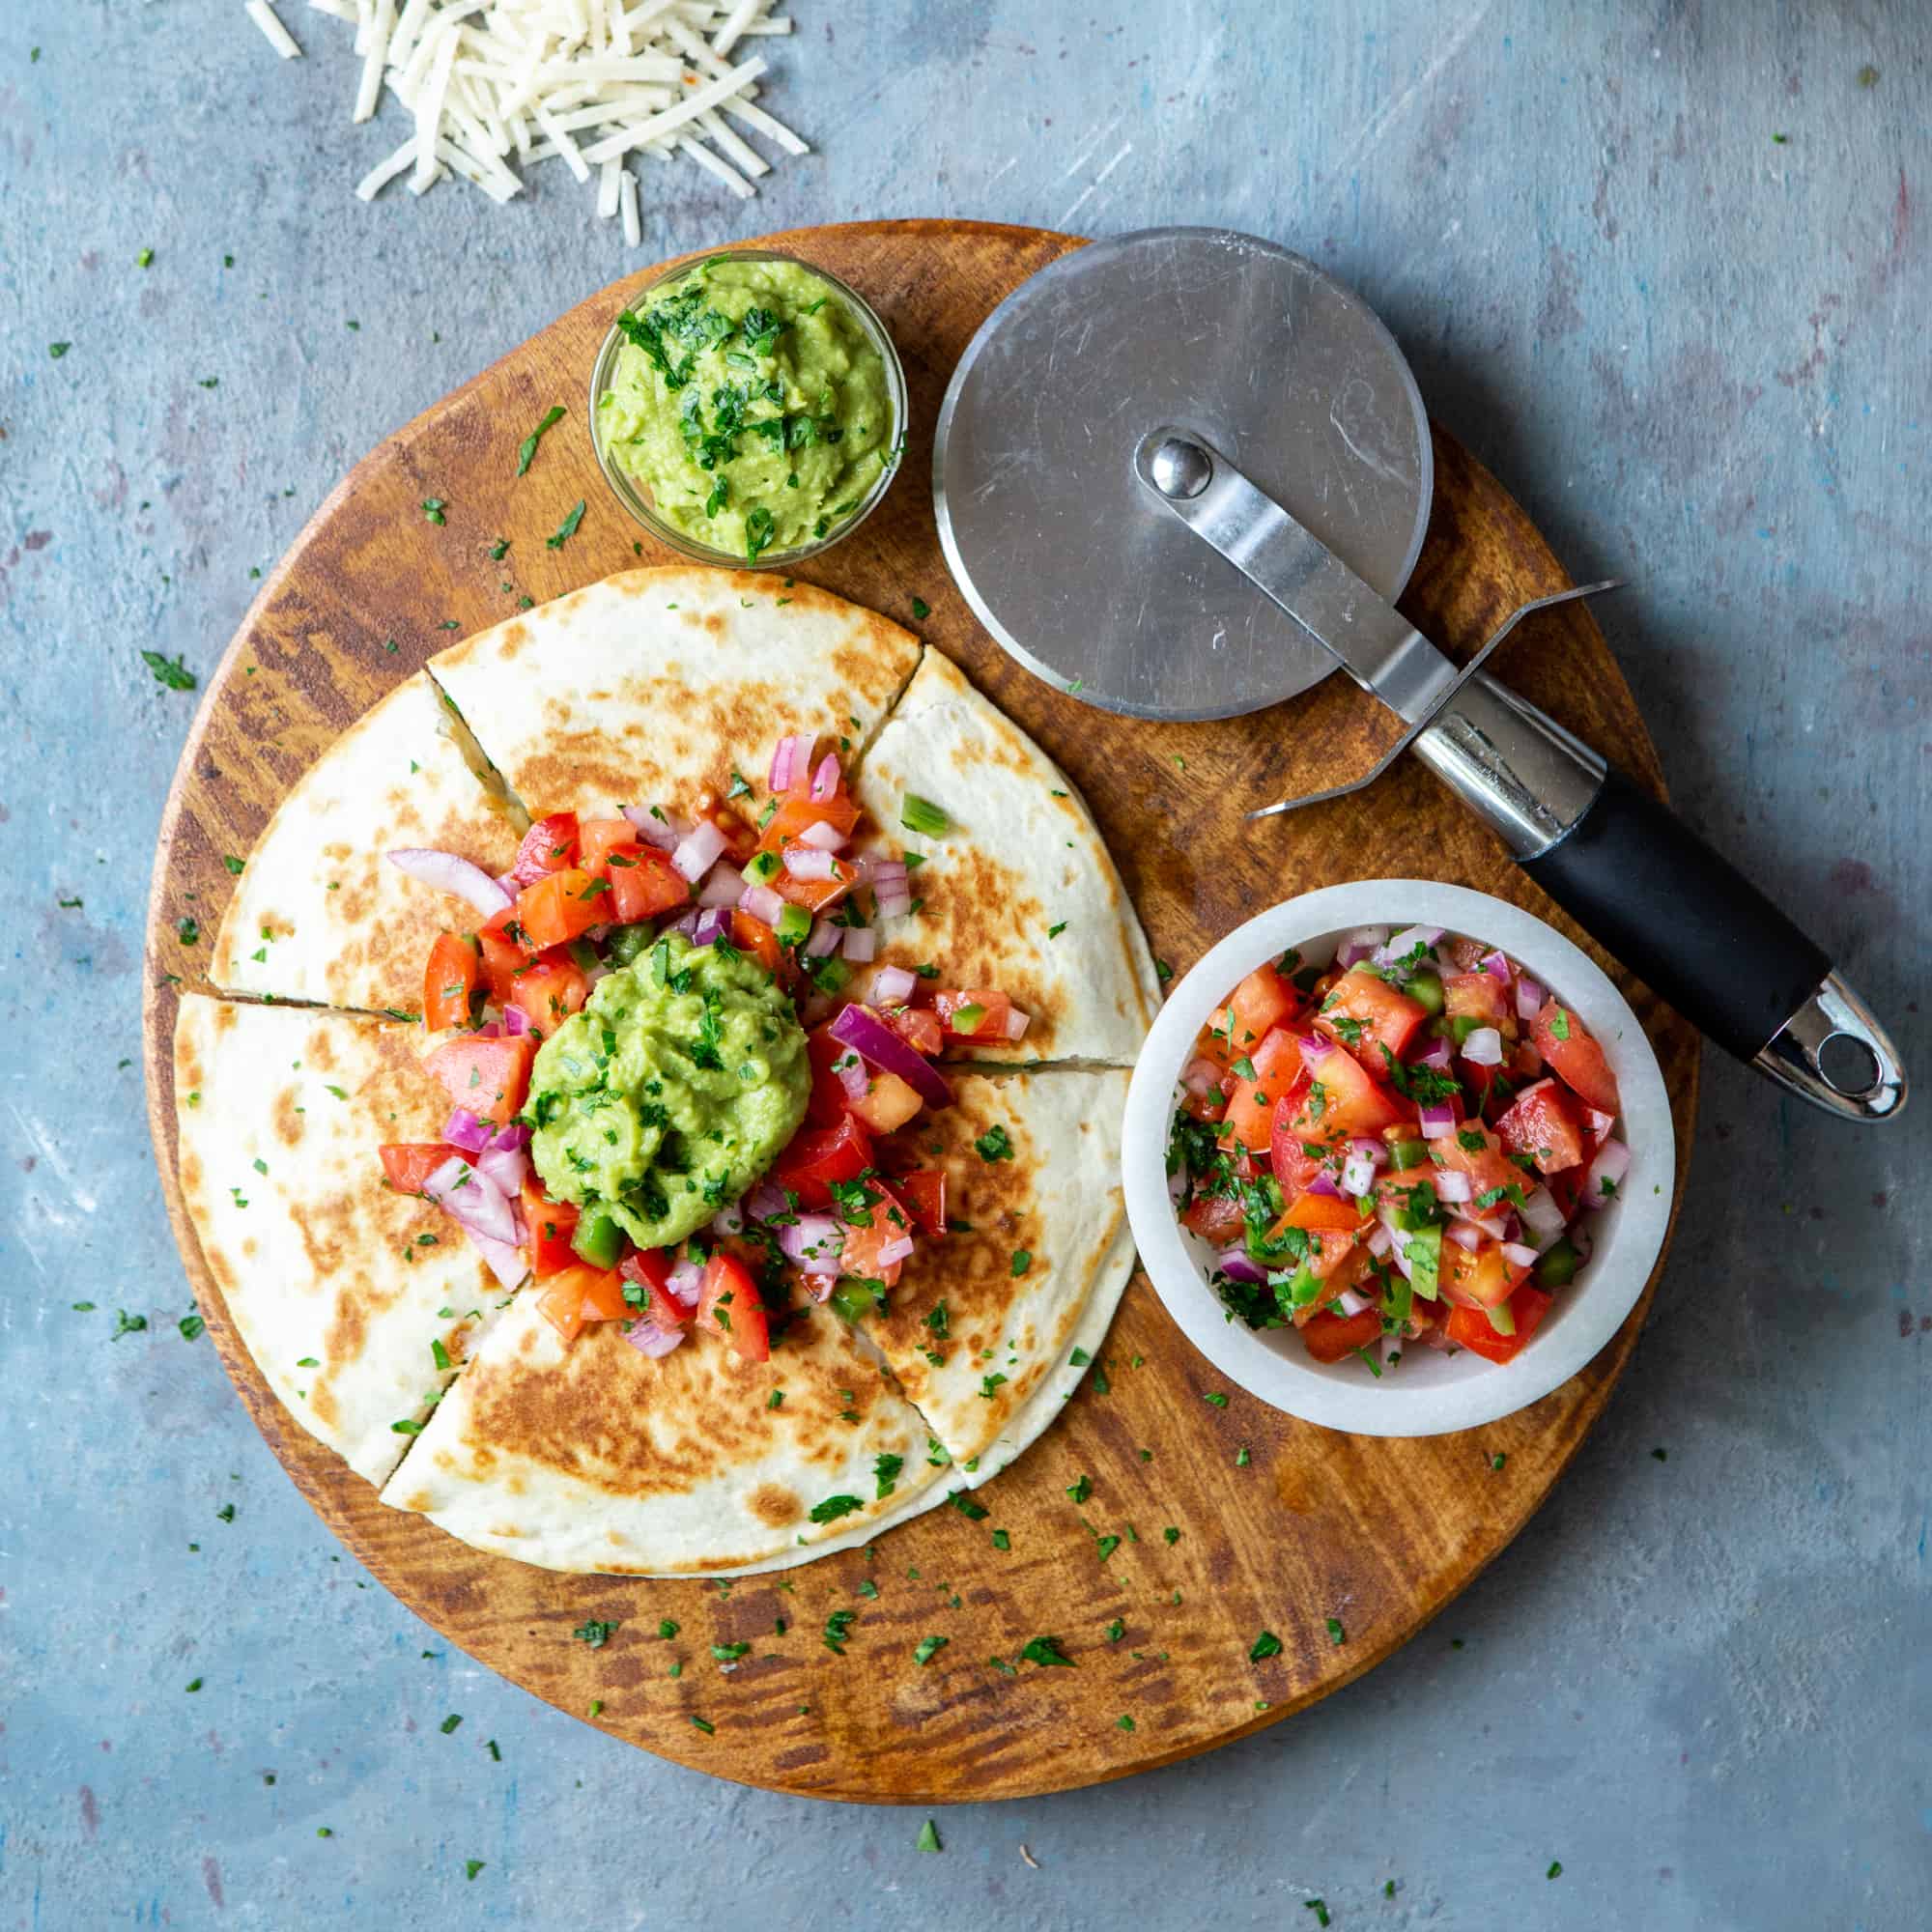
Throughout the years I've tried cooking corned beef a few times, and each time I'm always highly underwhelmed. I didn't get it. And cooked cabbage... still don't get it. But then last night as I was trying to think about what Irish appetizer I could bring over to this St. Patrick's Day celebration, I had an epiphany. Let's combine my love for Mexican food with the traditional flavors that we have come to associate with March 17th... and this St. Patrick's Day appetizer for Irish Corned Beef Nachos with Swiss Cheese Queso and Pickled Cabbage was born.

Let's talk chips.
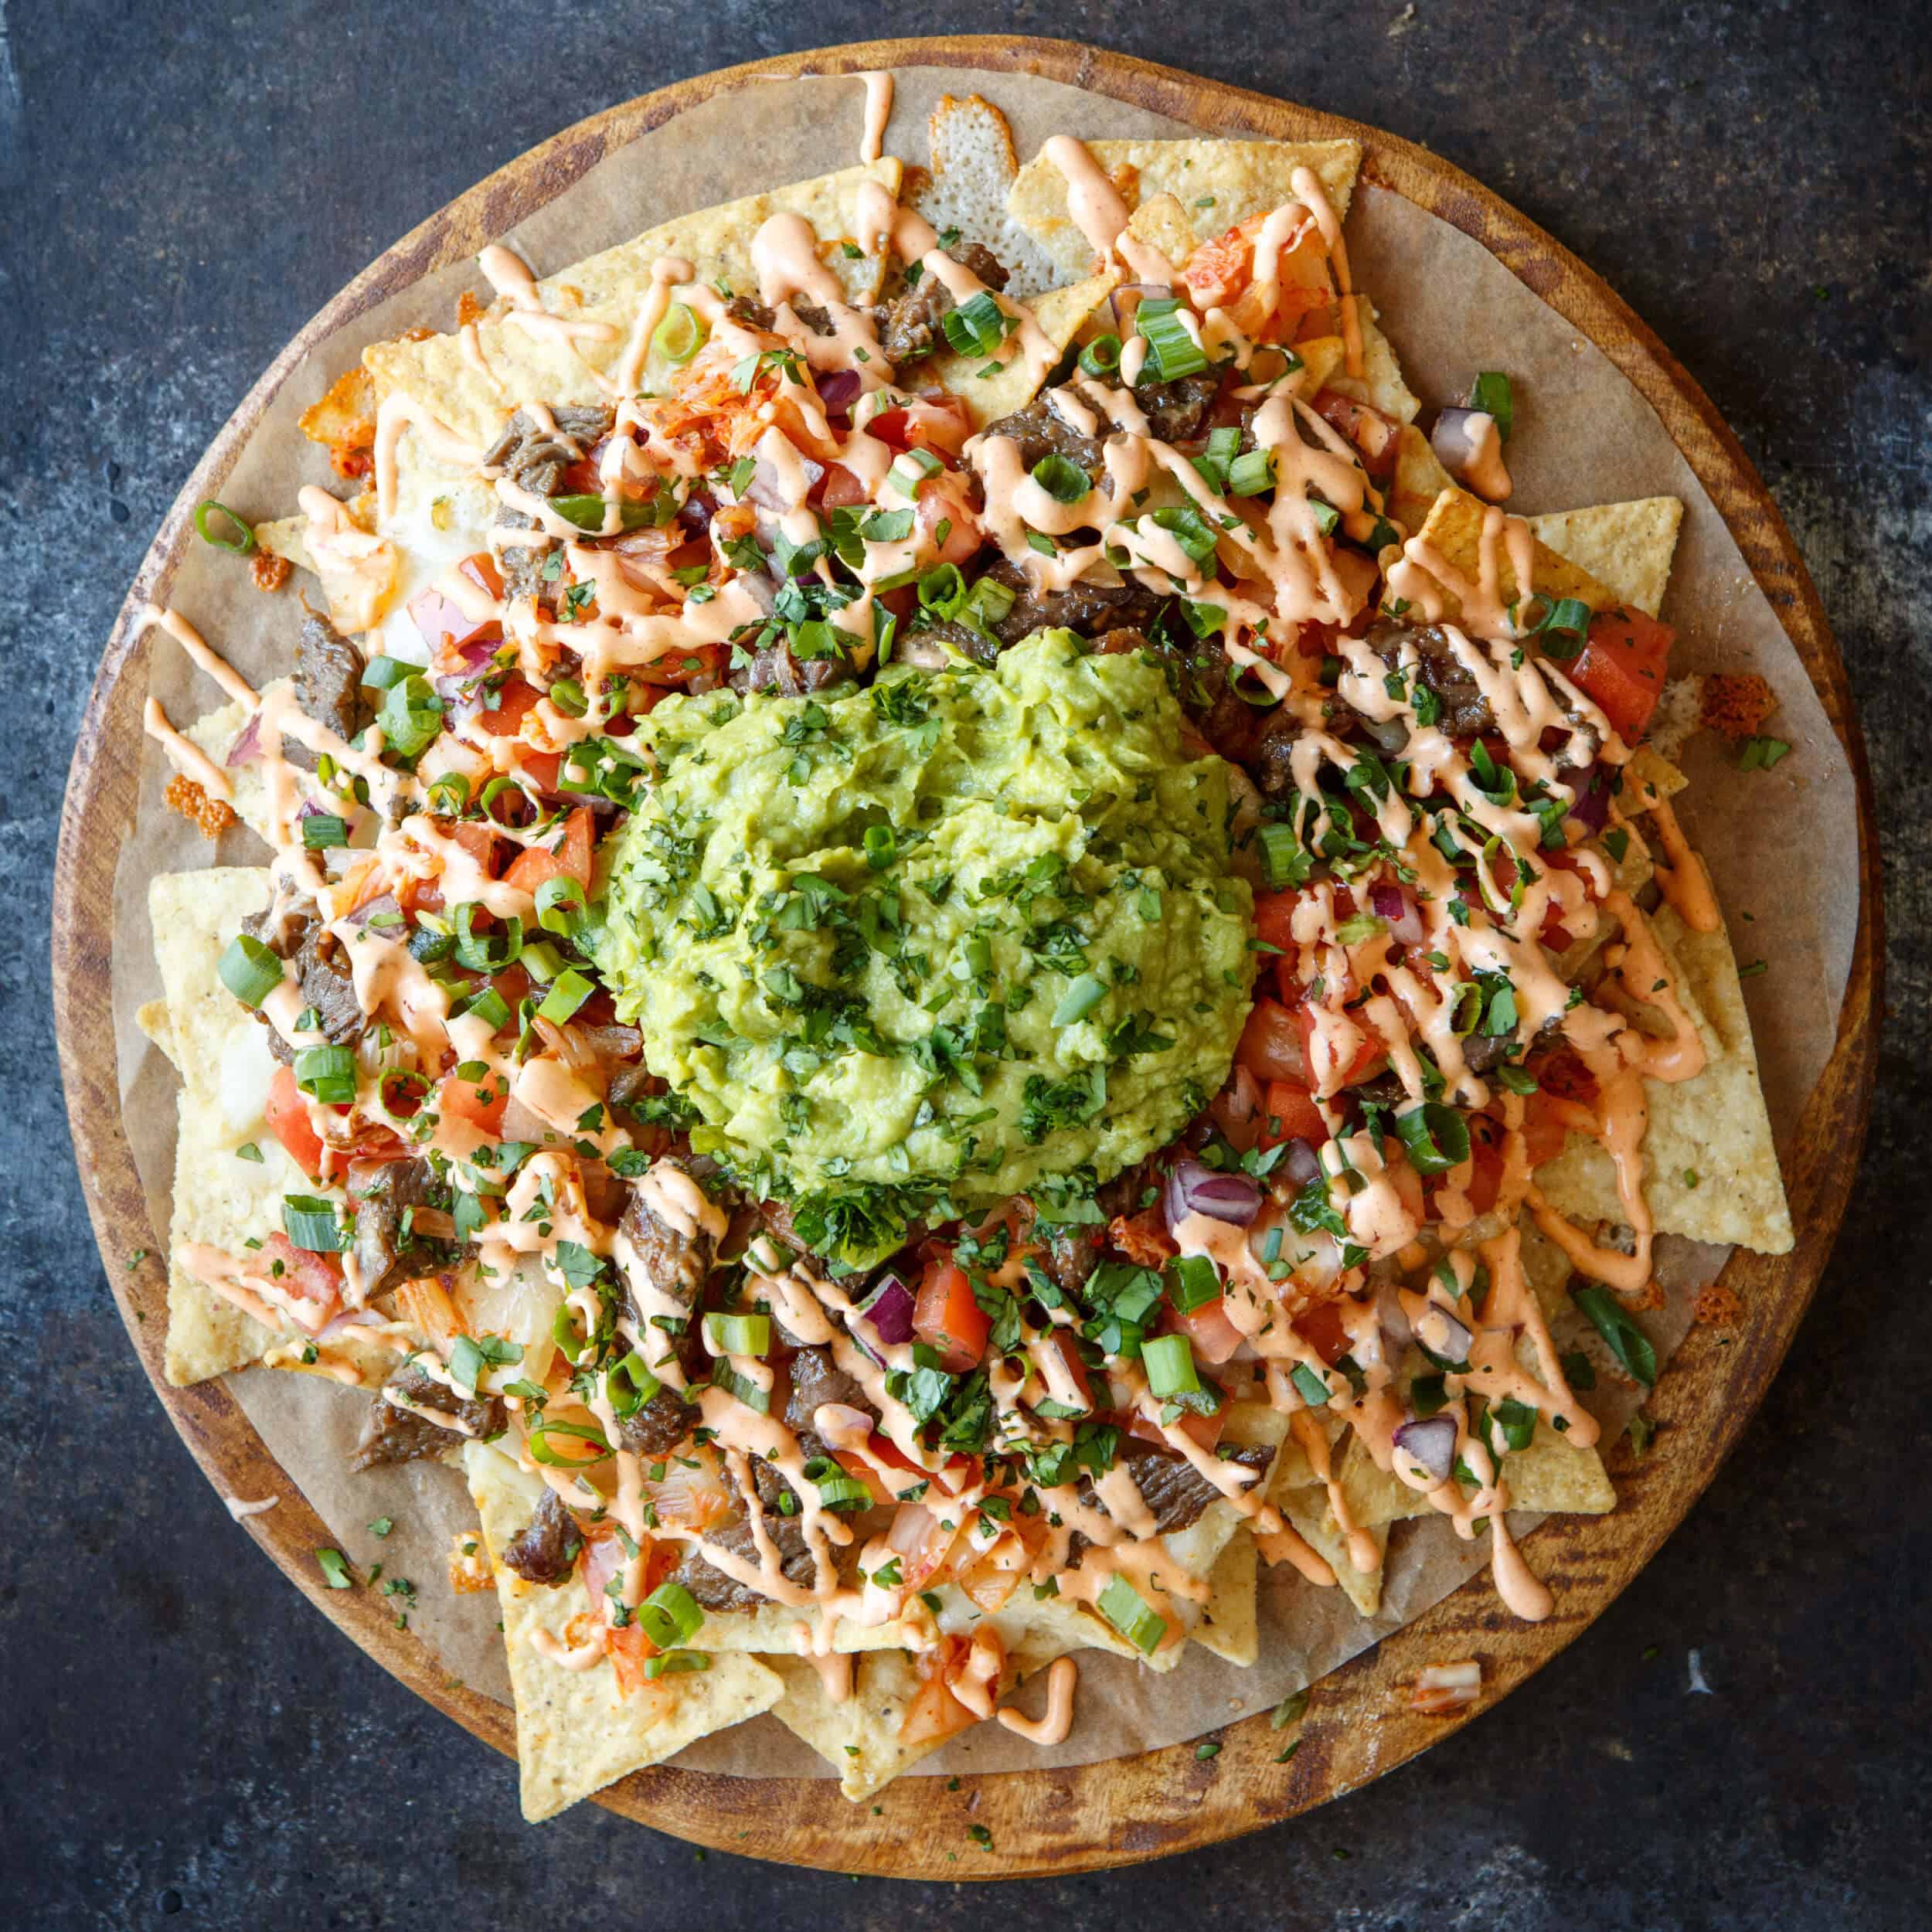
You can 100% use tortilla chips for these Corned Beef Nachos, but I decided to go with potato chips to help mimic the Irish Nacho feel. Some people argue that potato chips are more delicate and go soggy. They definitely do have a soggy factor if you let these nachos sit for awhile, but let's be honest. When's the last time you were at a party and there was a nacho board that wasn't devoured almost immediately?
Say Cheese.
To be honest I'm not a huge Swiss cheese fan, but I knew that if it's good enough for the reuben, it's gotta be the right choice for these Corned Beef Nachos. Holy crap it was. Swiss Cheese Queso for the win. It paired so well with the flavors of the corned beef.
Cabbage. Really?
You know what I've never seen a human being get excited for? Boiled cabbage. Gross. I knew that cabbage had to make an appearance on these St. Patrick's Day nachos, and remembered how epic of a flavor punch pickled cabbage had on these Mini Mediterranean Veggie Sliders Mini Greek Vegetarian Sliders a couple years back! The pickled cabbage helps cut right through the richness of the corned beef and cheese, and it provides a great crunch and freshness to the nachos!

How To Cook Your Corned Beef...
Really, it's up to you. Many people have their preferred tried and true recipe at this point. This year I decided to give my buddy Gerry's recipe a try. He's the super talented guy behind Foodness Gracious. I saw him post a recipe for Instant Pot Corned Beef the other day and knew I had to try it. The corned beef gets braised in Guinness and beef broth and is done in 90 minutes! I've never had corned beef as good as how his recipe came out. So good!
The End Result.
Not going to lie. I wasn't sure if these nachos were going to work. I mean, I knew that people who like corned beef and swiss cheese would like them, but I wanted to like them! I skeptically took a bite and my taste buds went into immediate party mode. The combination of salty potato chips, smooth queso, rich corned beef, and pickled crunchy cabbage makes for the perfect flavor combination!
I have a feeling we'll be celebrating St. Patrick's Day a whole lot more in our house moving forward. And these Irish Corned Beef Nachos with Swiss Cheese Queso and Pickled Cabbage will be front and center!


Corned Beef Nachos with Swiss Cheese Queso and Pickled Cabbage


 It's finally here. SPRING. Can I get a hallelujah? I'm so looking forward to all the promises spring brings. The bare tree branches and desolate flower gardens start to show signs of life. The lazy sun starts to stretch its legs and stays awake a bit longer each day. The frigid temperature finally starts to creep up in the right direction. And all these things leads to one very important thing in our house since having Olivia... being outside.
 When I first started to really entertain and have guests come over back in college, I always tried to take on too much. I'd be trying to juggle greeting all my friends, cooking crazy involved multistep recipes in the kitchen, and trying to play bartender by mixing drinks for everyone each and every time someone needed a beverage in hand.
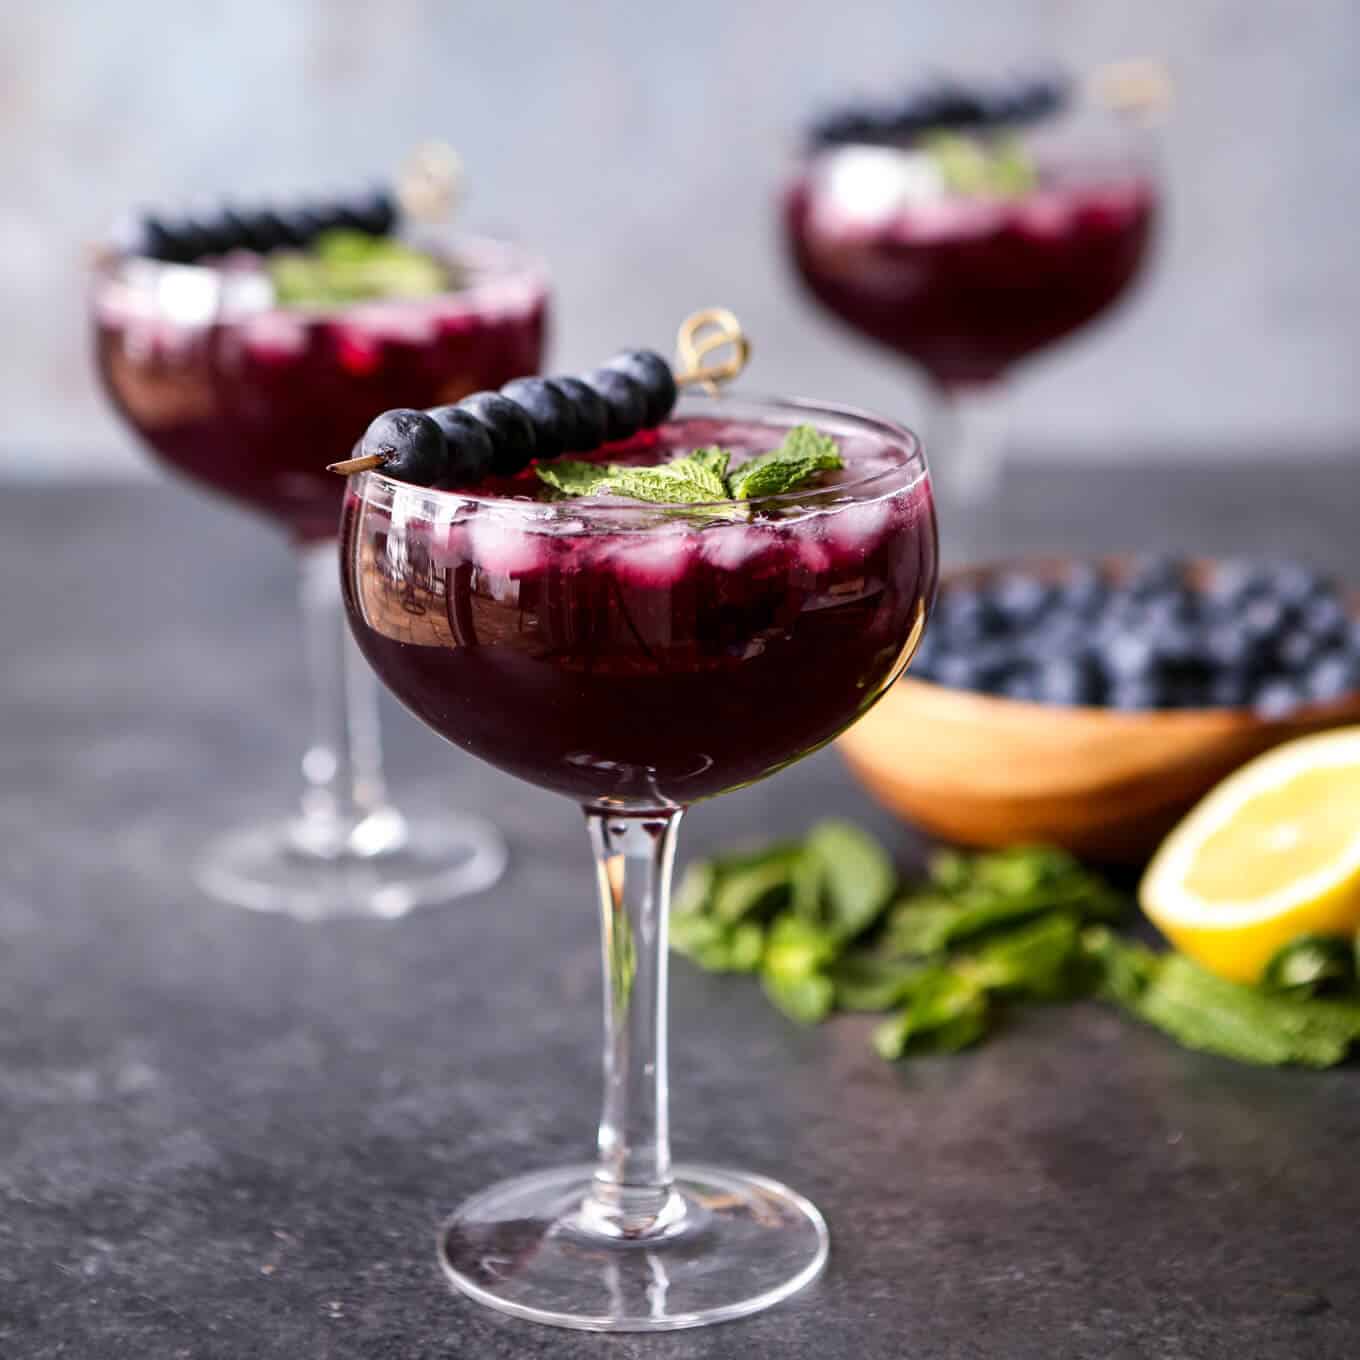
 I'm all about sparkling cocktails. They are so refreshing and perfect on a warm day, especially when sipping on them poolside. The key to getting the SPARKLING in these Sparkling Blueberry Lemonade Mojitos is 7UP!


 A few tips to think about:
 It's your choice if you want to make your mojitos in a big batch all ahead of time or if you want to leave the ingredients out for guests to assemble themselves. I personally like letting my friends make them to taste because everyone has their own preference. Some like it sweeter, some a bit stronger, some more bubbly... this way everyone's happy!


 Valentine's Day is next week. I don't know how it manages to sneak up on me every year... but here we are again. Honestly, Valentine's Day isn't a huge holiday for Asheley and I. We made the decision years ago that we wouldn't do the whole going out to dinner thing and Asheley is unwavering in her apathy for the standard Valentine's Day gifts.
 Asheley LOVES soup. It's what she craves for dinner 90% of the time... from the day I finally cave and turn on the heat in the fall all the way up until the pool gets uncovered in the spring. Yeah, that's a lot of soup. Usually I make a big batch of my
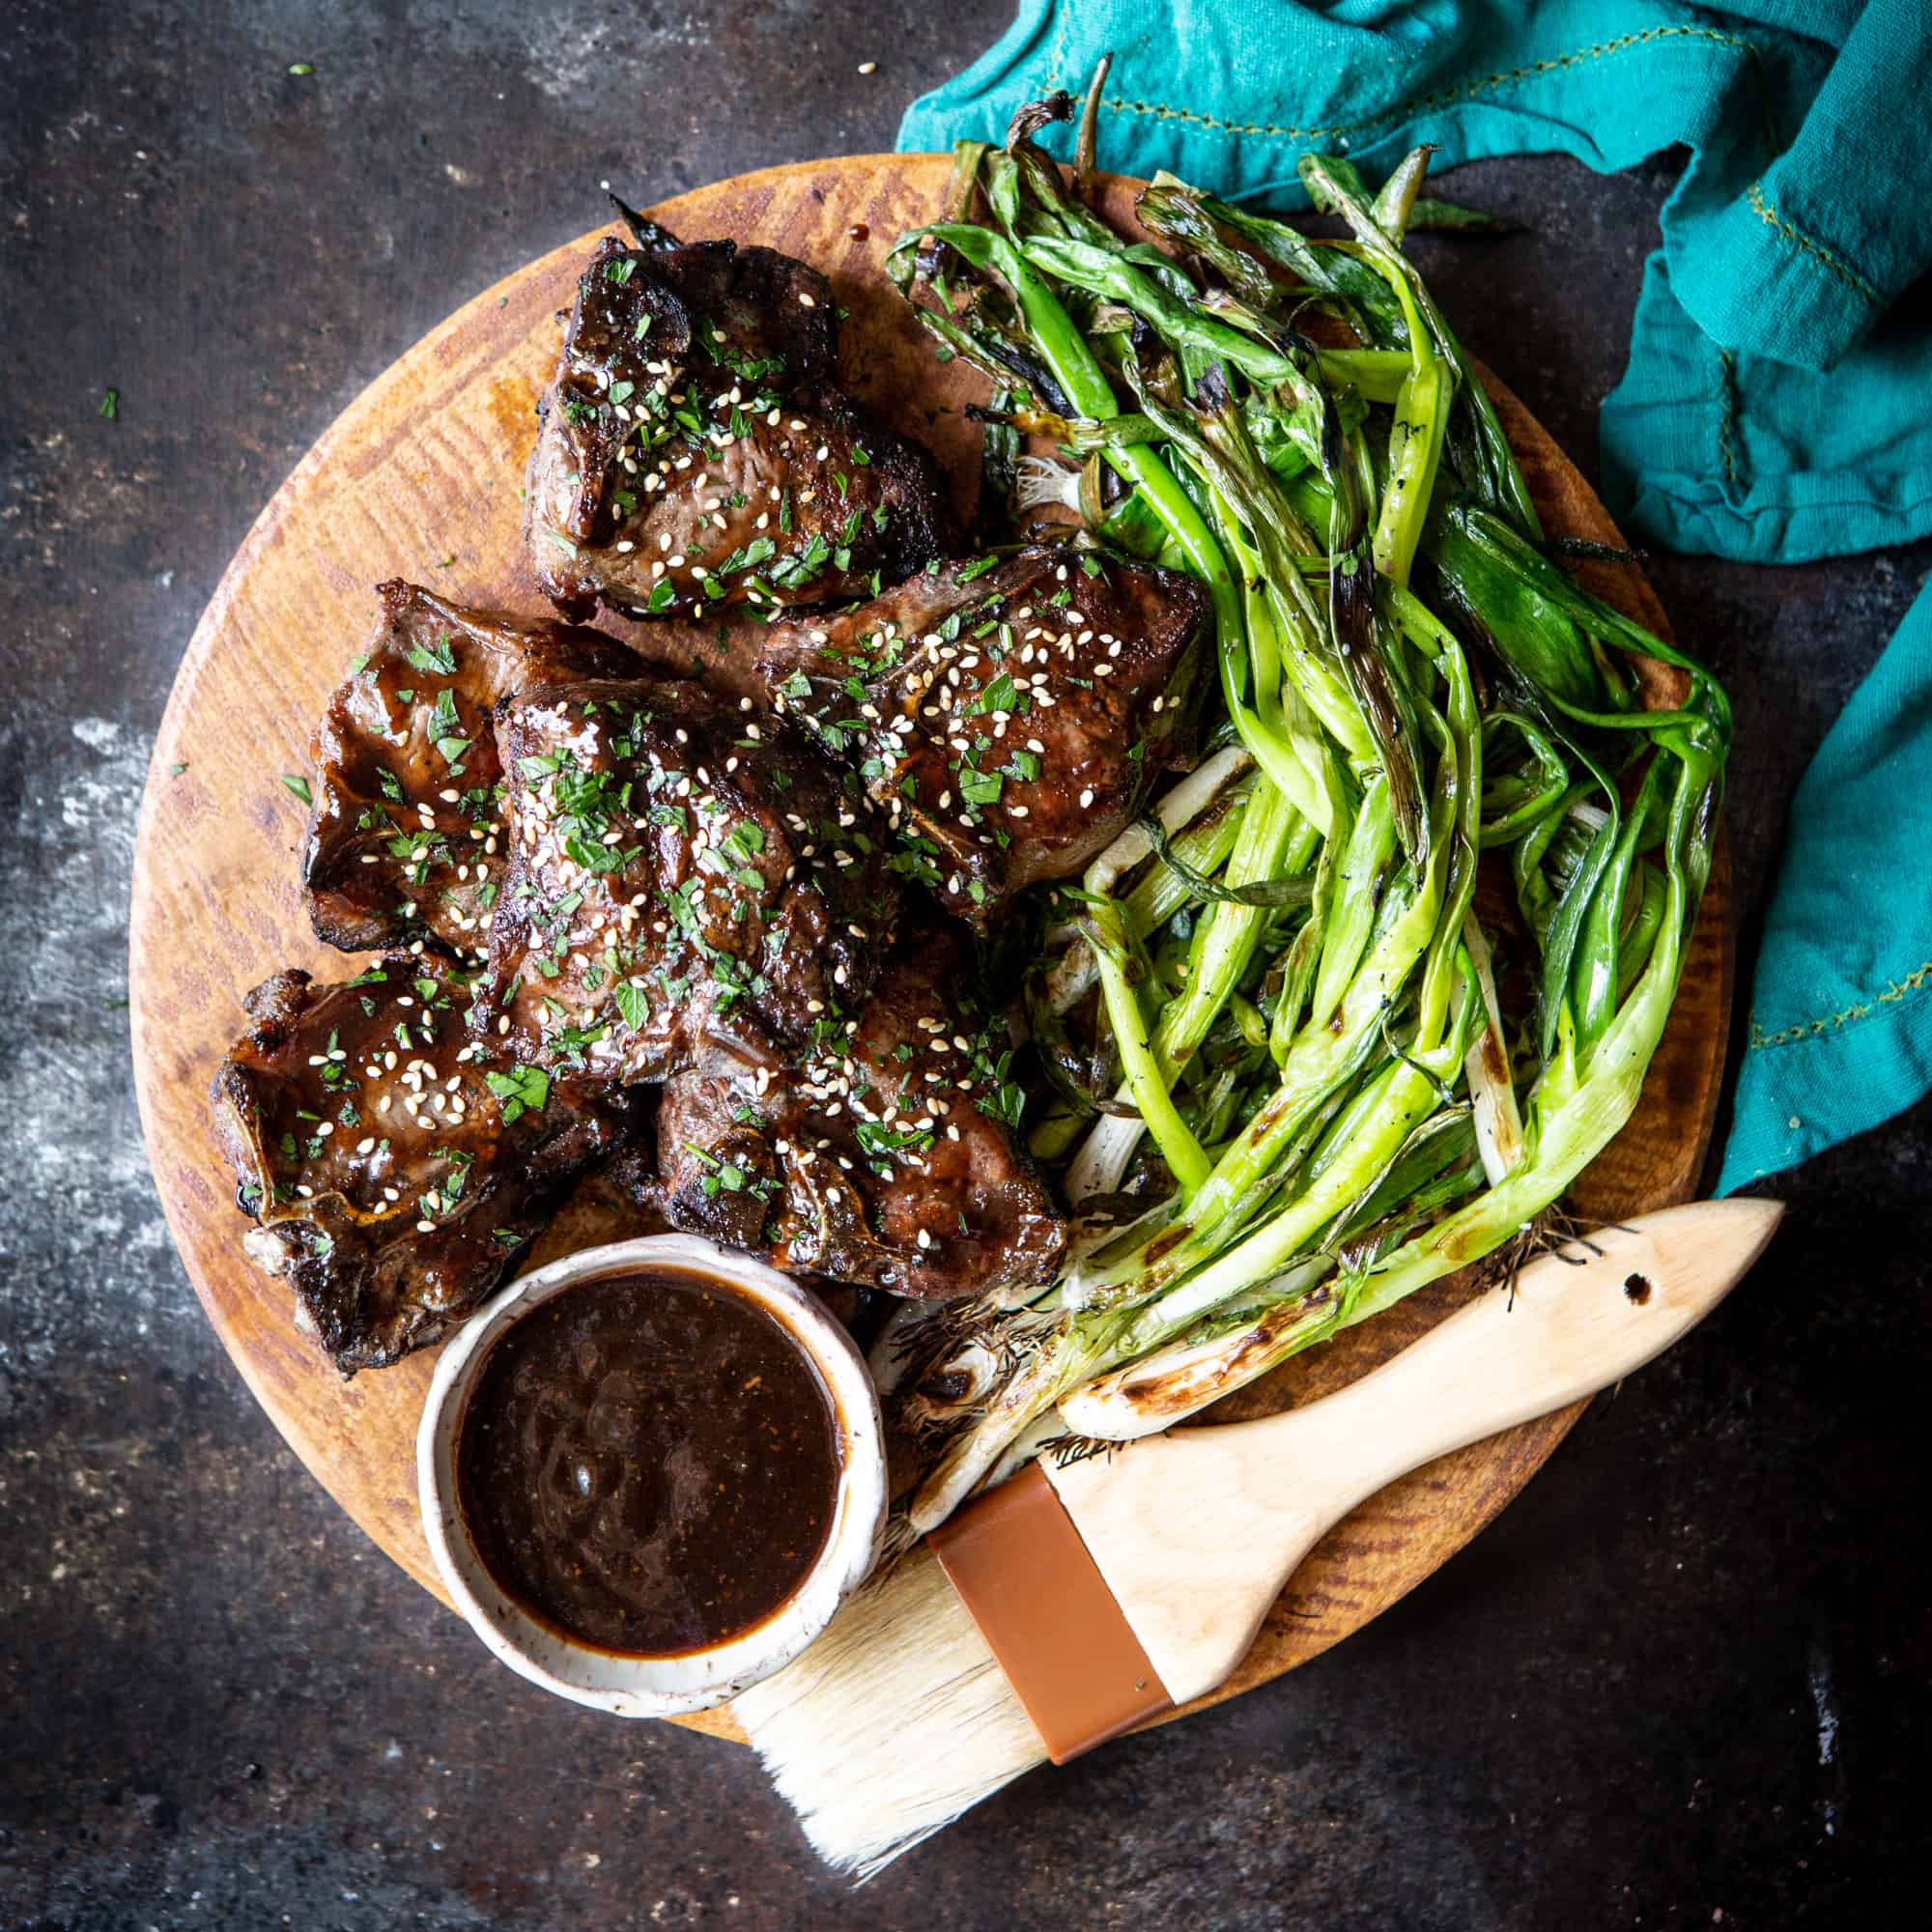
 My Spicy Lamb Coconut Curry Ramen is a version of their Khao Soi that is a little bit more accessible to the home cook (and one that is easier to make happen on a weeknight when time isn't on your side). It all starts with a flavor bomb that will become the base for this coconut curry soup... shallots, garlic, ginger, cilantro, a few spices, and sambal oelek. Give it a whirl in the food processor, simmer it with coconut milk and some broth, and you have one dynamite soup.
 Back to this spicy lamb. We need to have a chat.


 Has anyone else been seeing these crescent rings popping up in their Facebook feed like crazy lately? Or is it just because I'm obsessed about food and the internet somehow knows how much Asheley loves those perfectly buttery crescent rolls? Side note... I was talking with Asheley the other day how I need a new wallet, and the next time I was scrolling through my feed a wallet ad came up. Coincidence?
 When it comes to game day entertaining, I have a few rules...
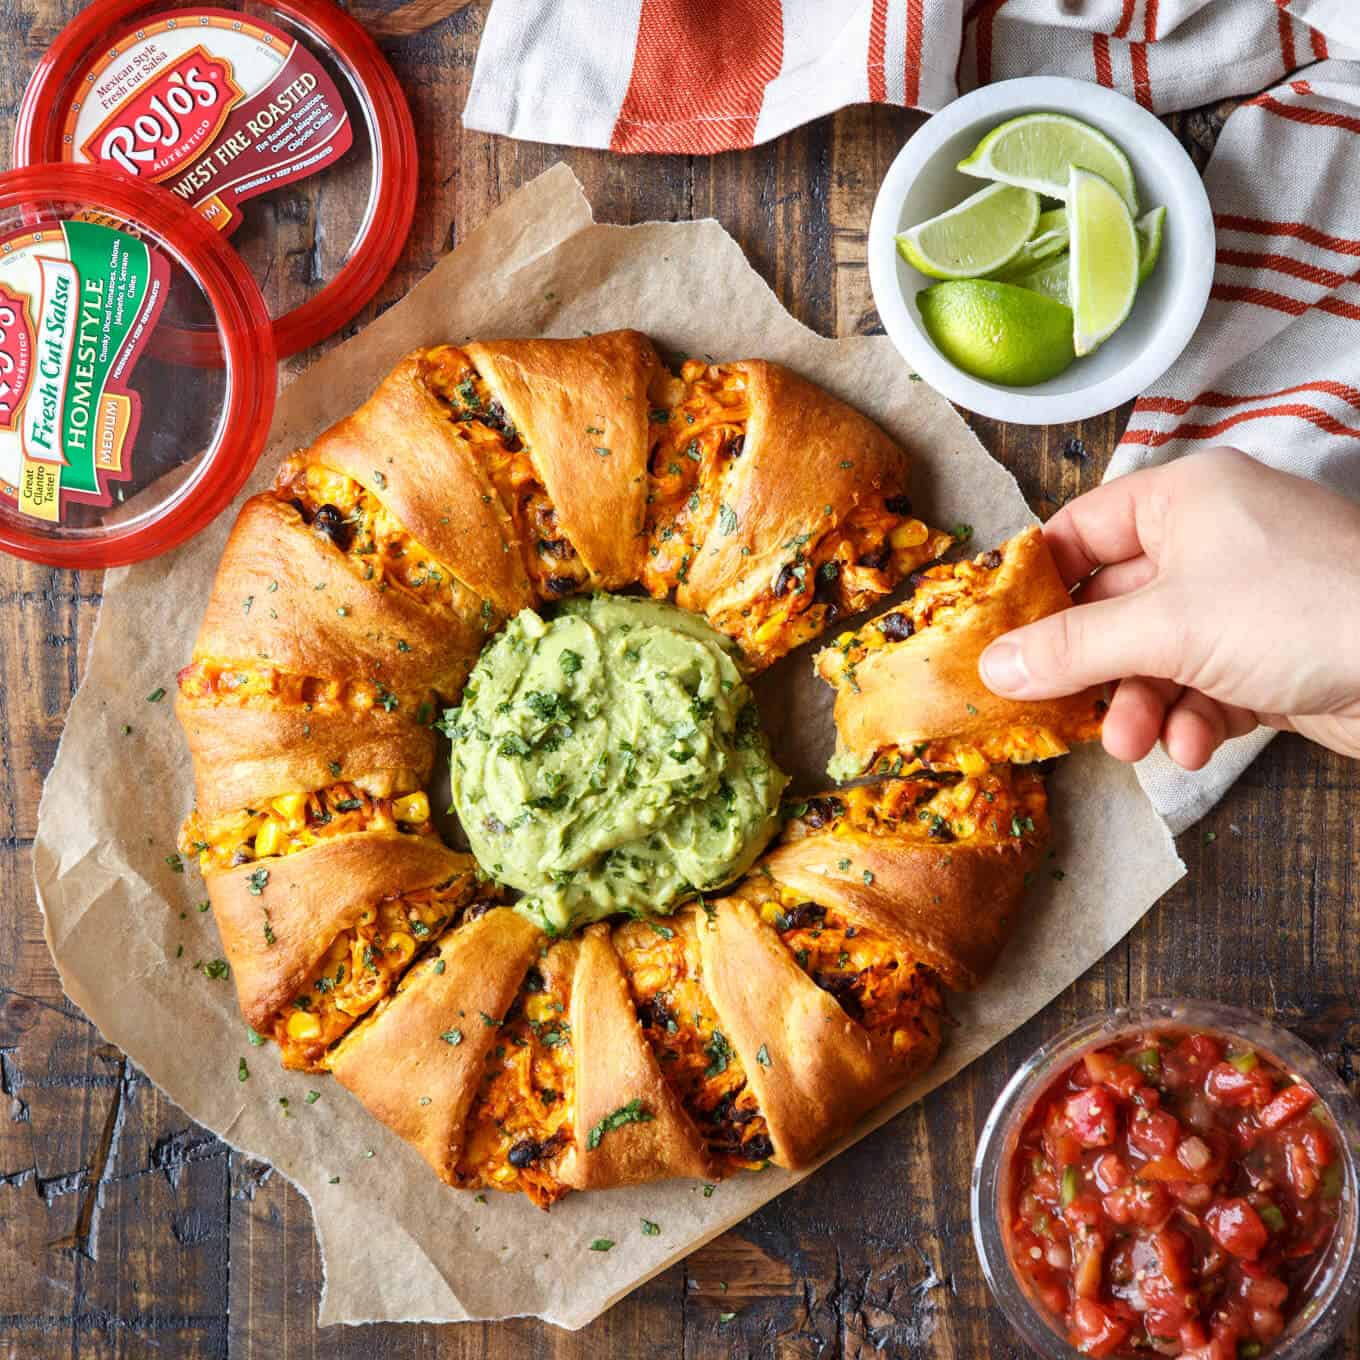
 Does this Chicken Enchilada Crescent Ring check all of those boxes? Heck to the YES.


 Valentine's Day. Yeah guys, it's coming up pretty darn soon. Did you make plans yet to celebrate? For Asheley and I, it's always a pretty laid back day. We don't do the whole going out to dinner thing and Asheley is adamant that I don't spend a large portion of my paycheck on overpriced flowers and jewelry.
 Can we talk about Target for a second? Who else is obsessed? I know I'm not alone on this one.
 I'm not a huge baker. This was actually my very first attempt at making a version of cake balls. Now, I'm obsessed.
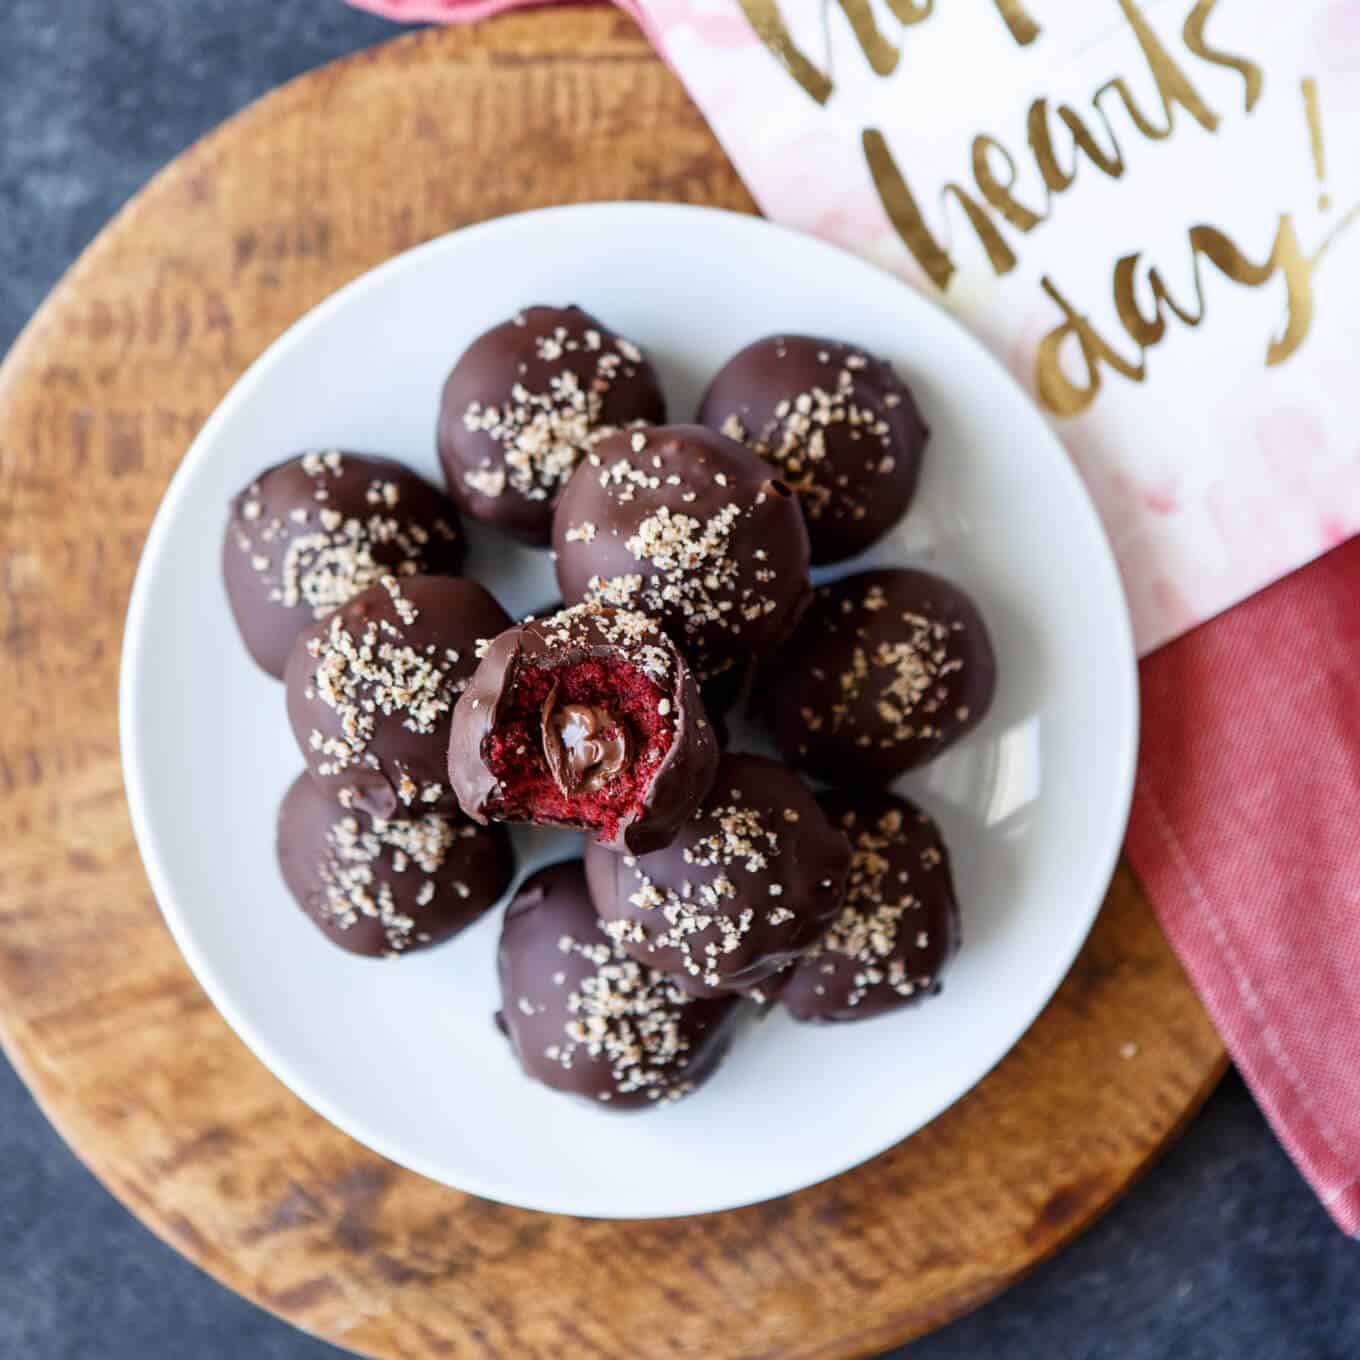
 Olivia loved helping me pick out Asheley's Valentine's Day card this year. She always gets excited when looking at all the cards at Target. She loved the gold writing and hearts on the card we finally settled on. Mommy will like this one! And my heart melted.

 Asheley is going to be beyond excited when she sees these Nutella Filled Red Velvet Cake Truffles and her Valentine's Day card! Now the only question is... what should I make for dinner?

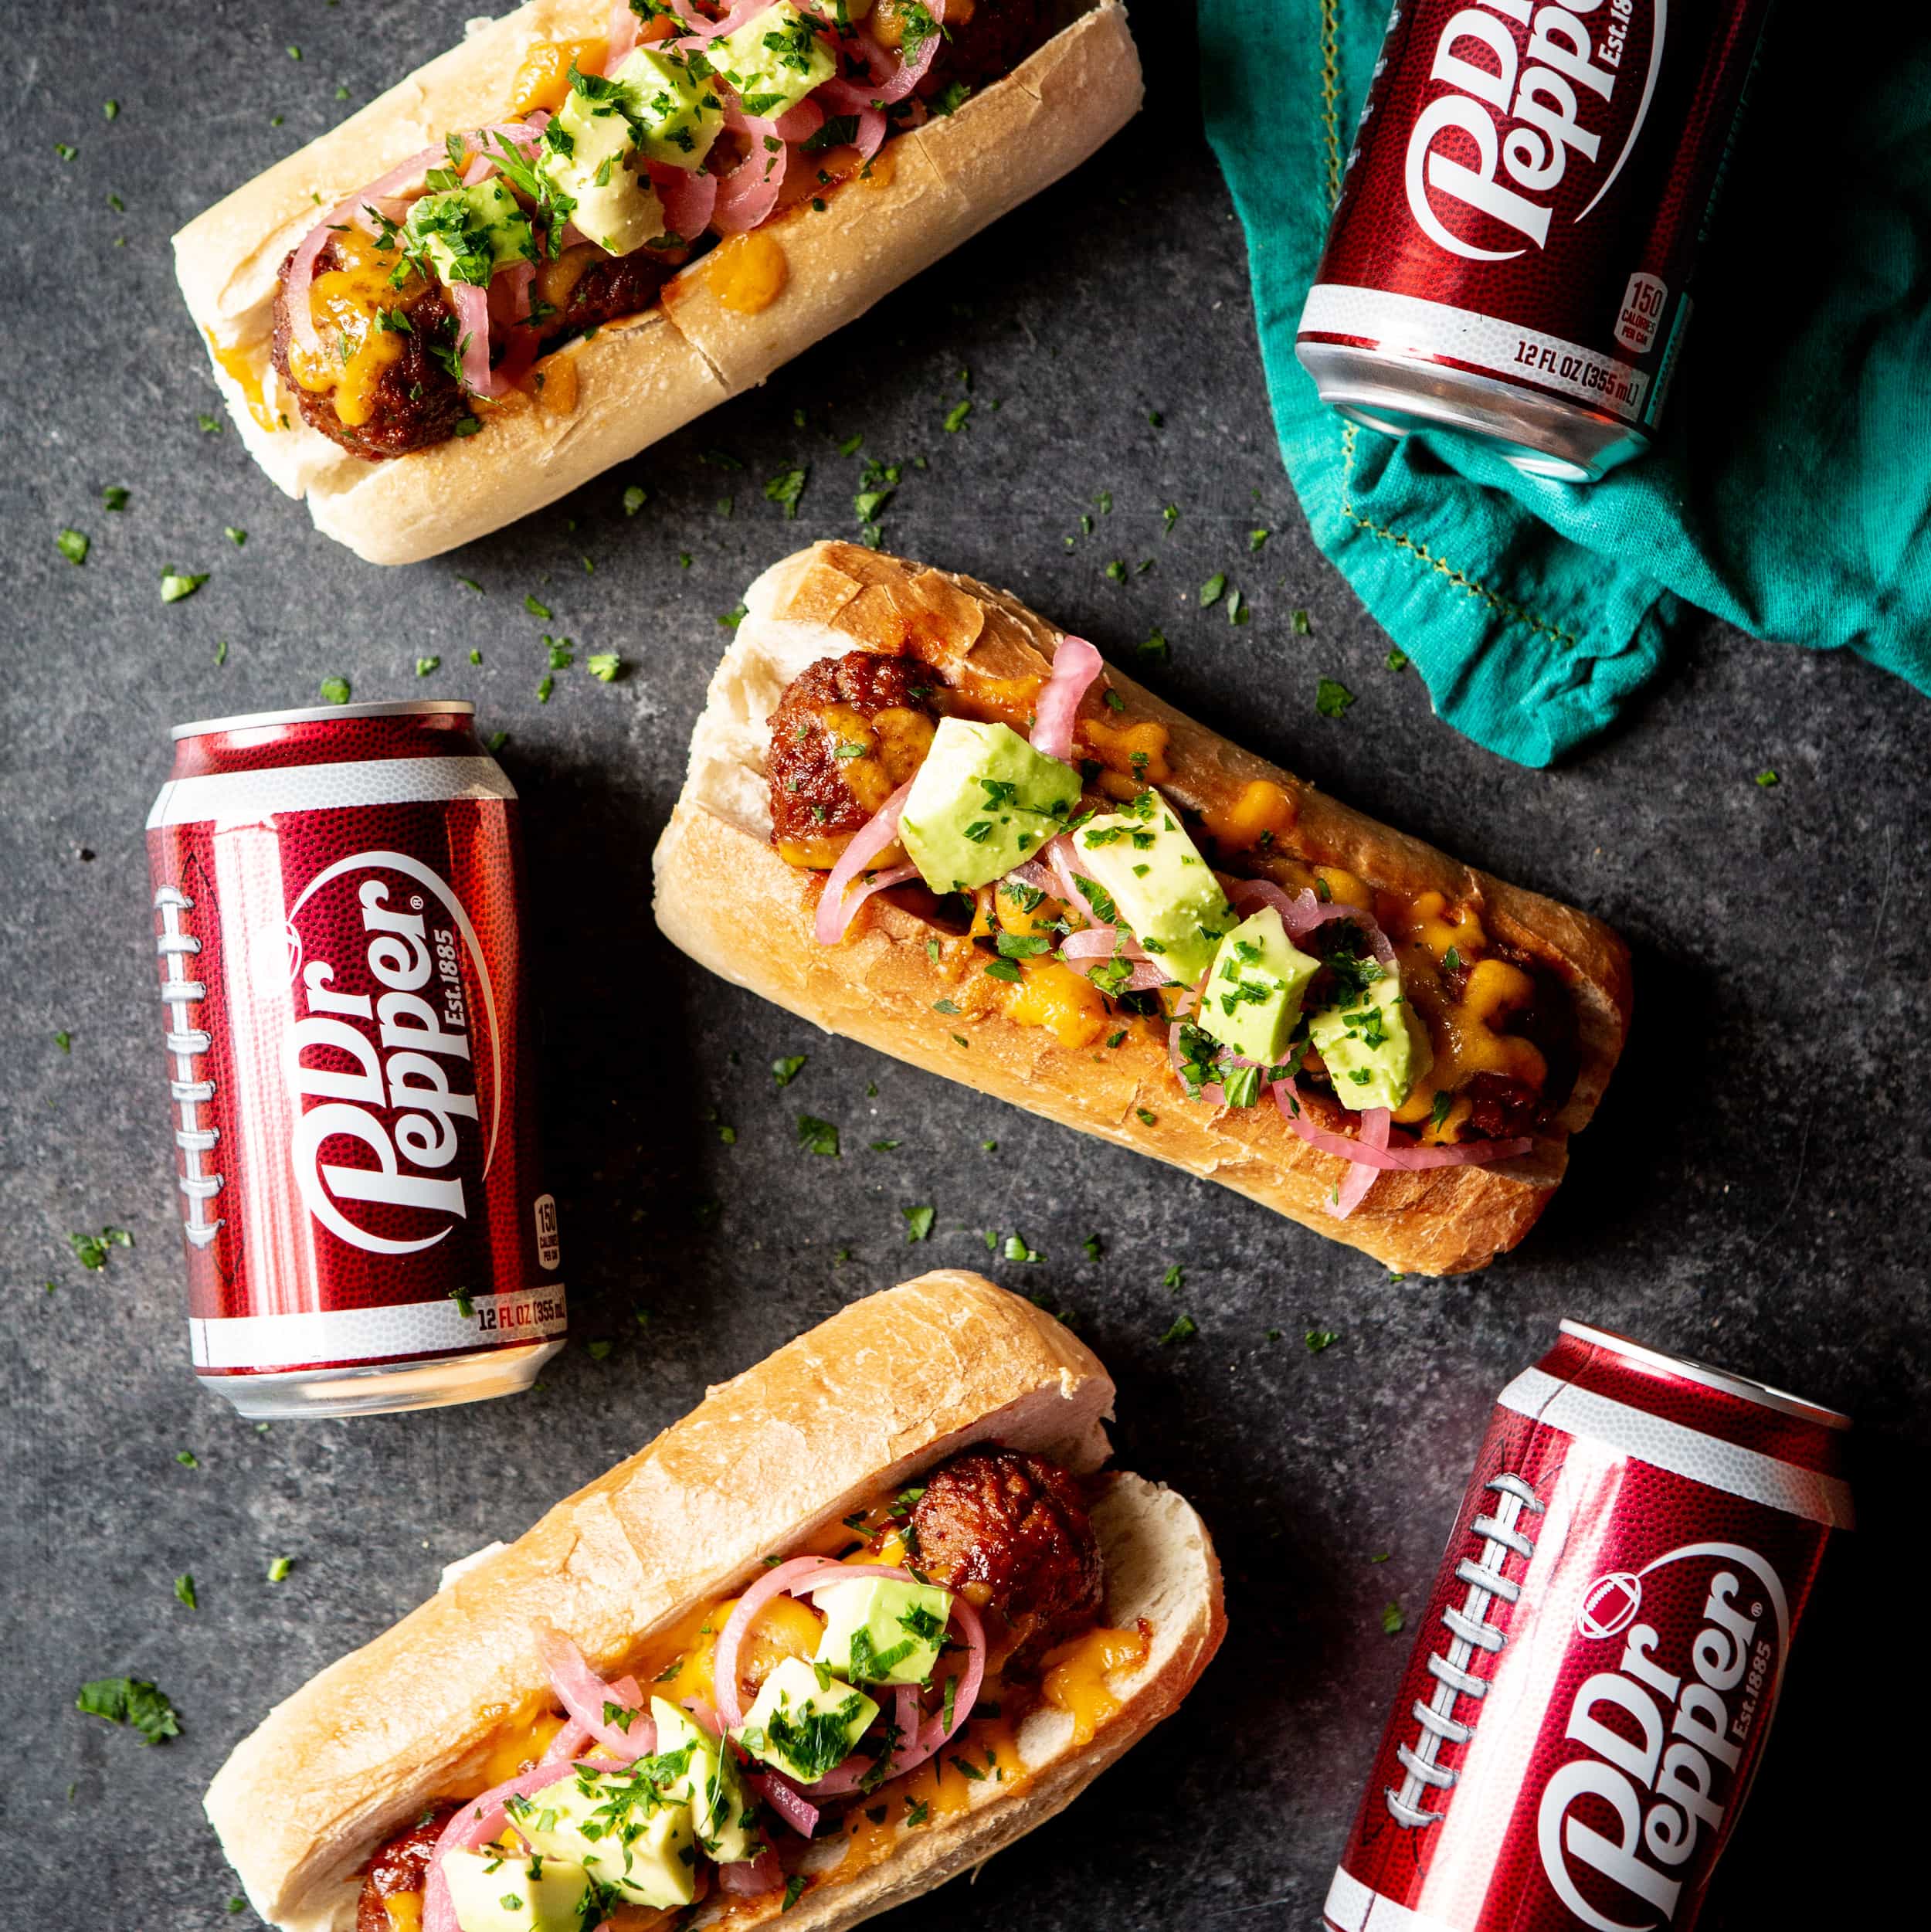
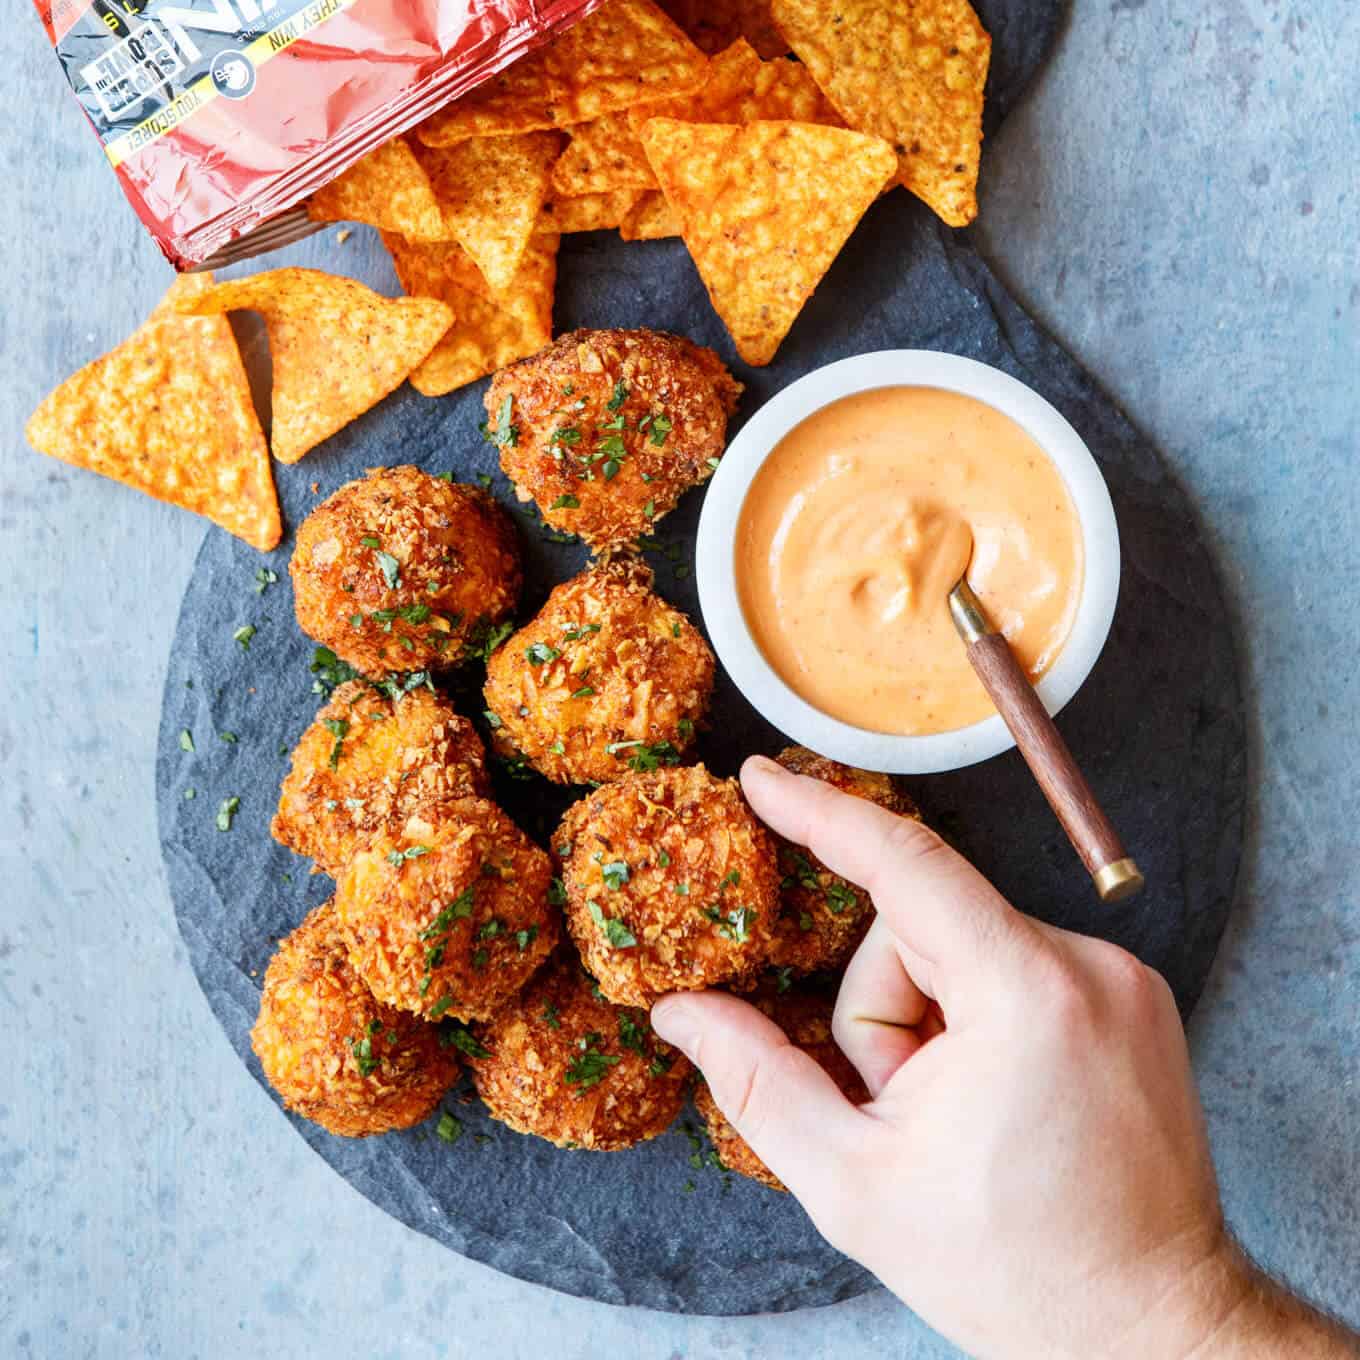
 I honestly never really got into football. I mean I'm happy to watch it when it's on, but I couldn't tell you what teams are doing well this year and which ones aren't. But that one magical day a year... the be all end all that fans wait all year for and the event that even non football fans like me can get into.
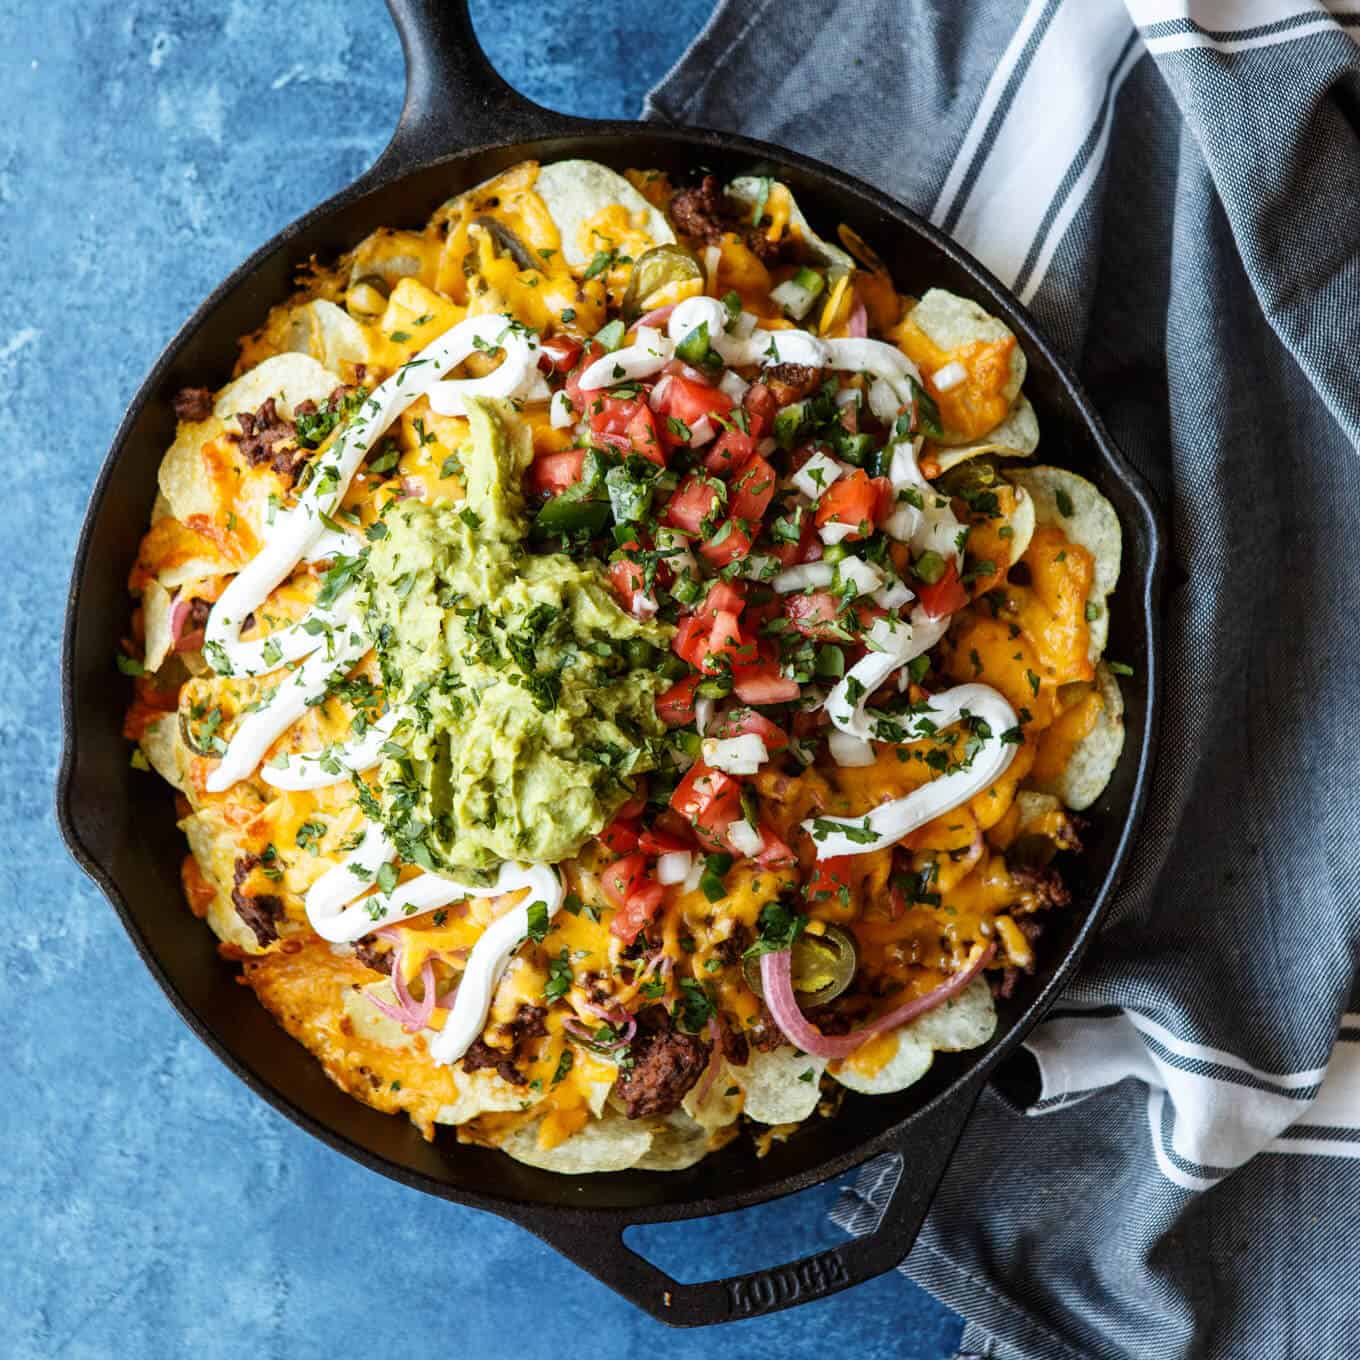
 When it comes time for a game day menu, I'm all about foods that take minimal effort and deliver huge on flavor. You all know I'm a sucker for Mexican and Southwest flavors, so when I had the opportunity to combine Asheley's love with potato chips with my love of nachos... let's juts say it was one excited house.
 You don't have to make these Skillet Loaded Taco Potato Chip Nachos in a large cast iron skillet, although you have to admit it looks pretty darn cool. Feel free to make them in any large baking dish or even a regular old baking tray. Let's break down how simple and easy it is to build these epic Skillet Loaded Taco Potato Chip Nachos:
 Seriously, you'll be wondering why you've been making nachos with tortilla chips your whole life. These Skillet Loaded Taco Potato Chip Nachos have opened up a whole new world of nacho opportunities to me and have totally raised the bar for game day entertaining.


 It's the most wonderful time of the year. Really, I so love the month of December. I'm the guy that wakes up the day after Thanksgiving and the first thing on my mind is to climb into the attic and get down all our Christmas decorations (while blasting my favorite seasonal tunes throughout the house, of course). It drives Asheley nuts (she sadly doesn't share in my ridiculous holiday enthusiasm), which coincidentally makes it all the more fun.

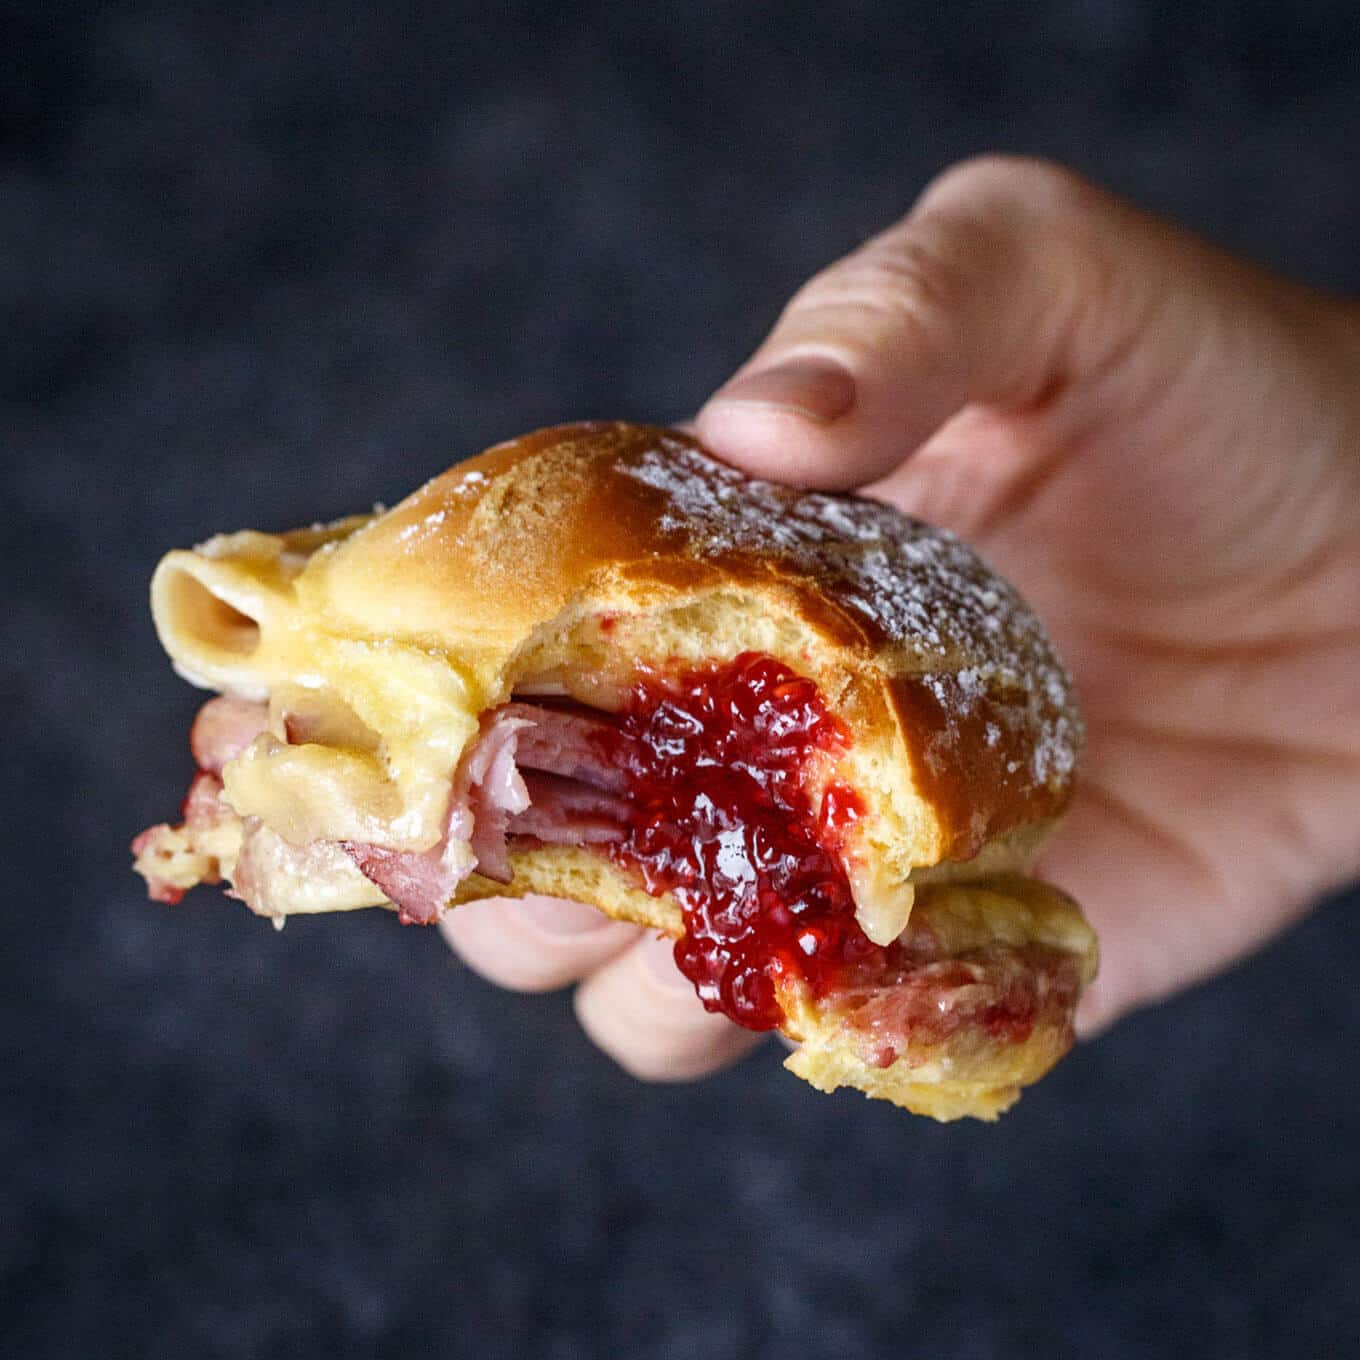
 Once they come out of the oven, the sauce is going to be really liquidy and loose. Just let it sit for a minute and it'll set up a bit. Then you can let it rain with powdered sugar and serve these Baked Monte Cristo Sliders with plenty of extra red raspberry Hero Fruit Spread on the side.


 It's officially the start to the holiday season. And as much as I try my best to avoid thinking about Christmas until after we fully celebrate Thanksgiving, I know as soon as I step foot into any store within the next week... BOOM. Christmas everywhere.
 One of my favorite lunch time get togethers we try to make happen each year is some sort of friendly cookie swap. We do it after church on a Sunday, so it involves a house full of families with small children. It's... chaotic.
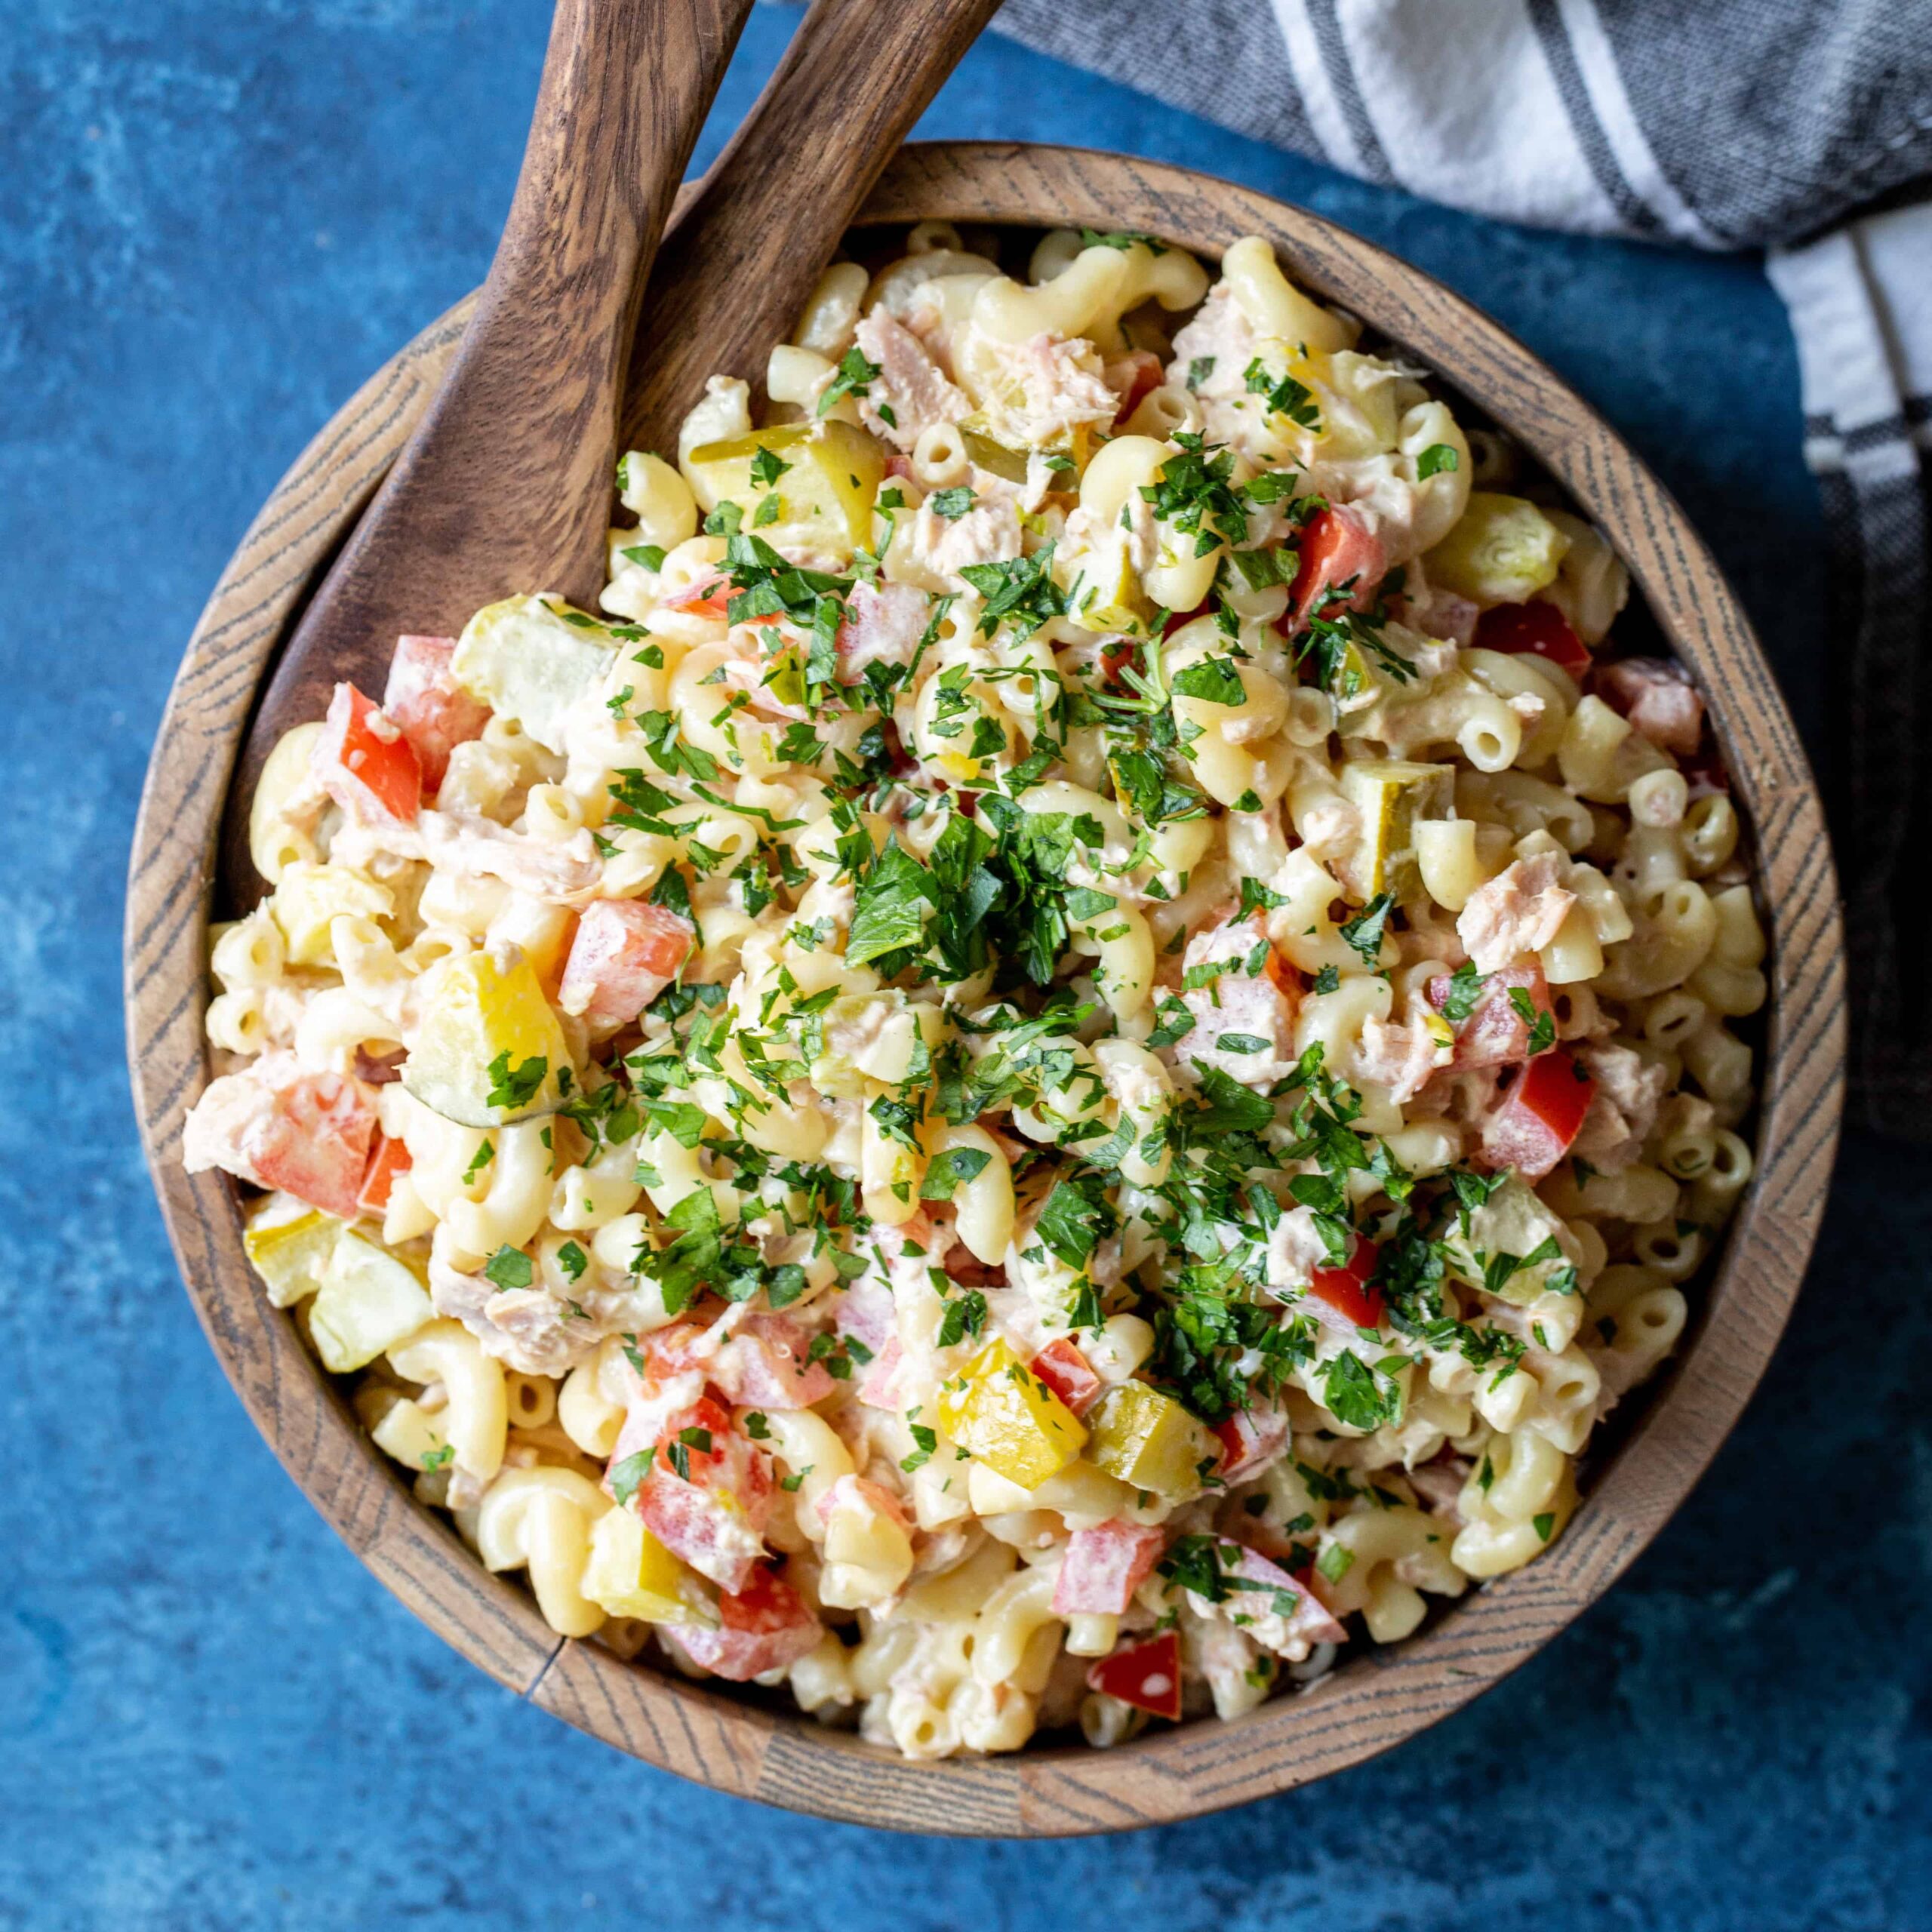
 Whenever I bought canned tuna in the past, I was usually a tuna in water kinda guy. It's simply because that's what my mom always bought when I was a kid. When I found that eye-catching can of
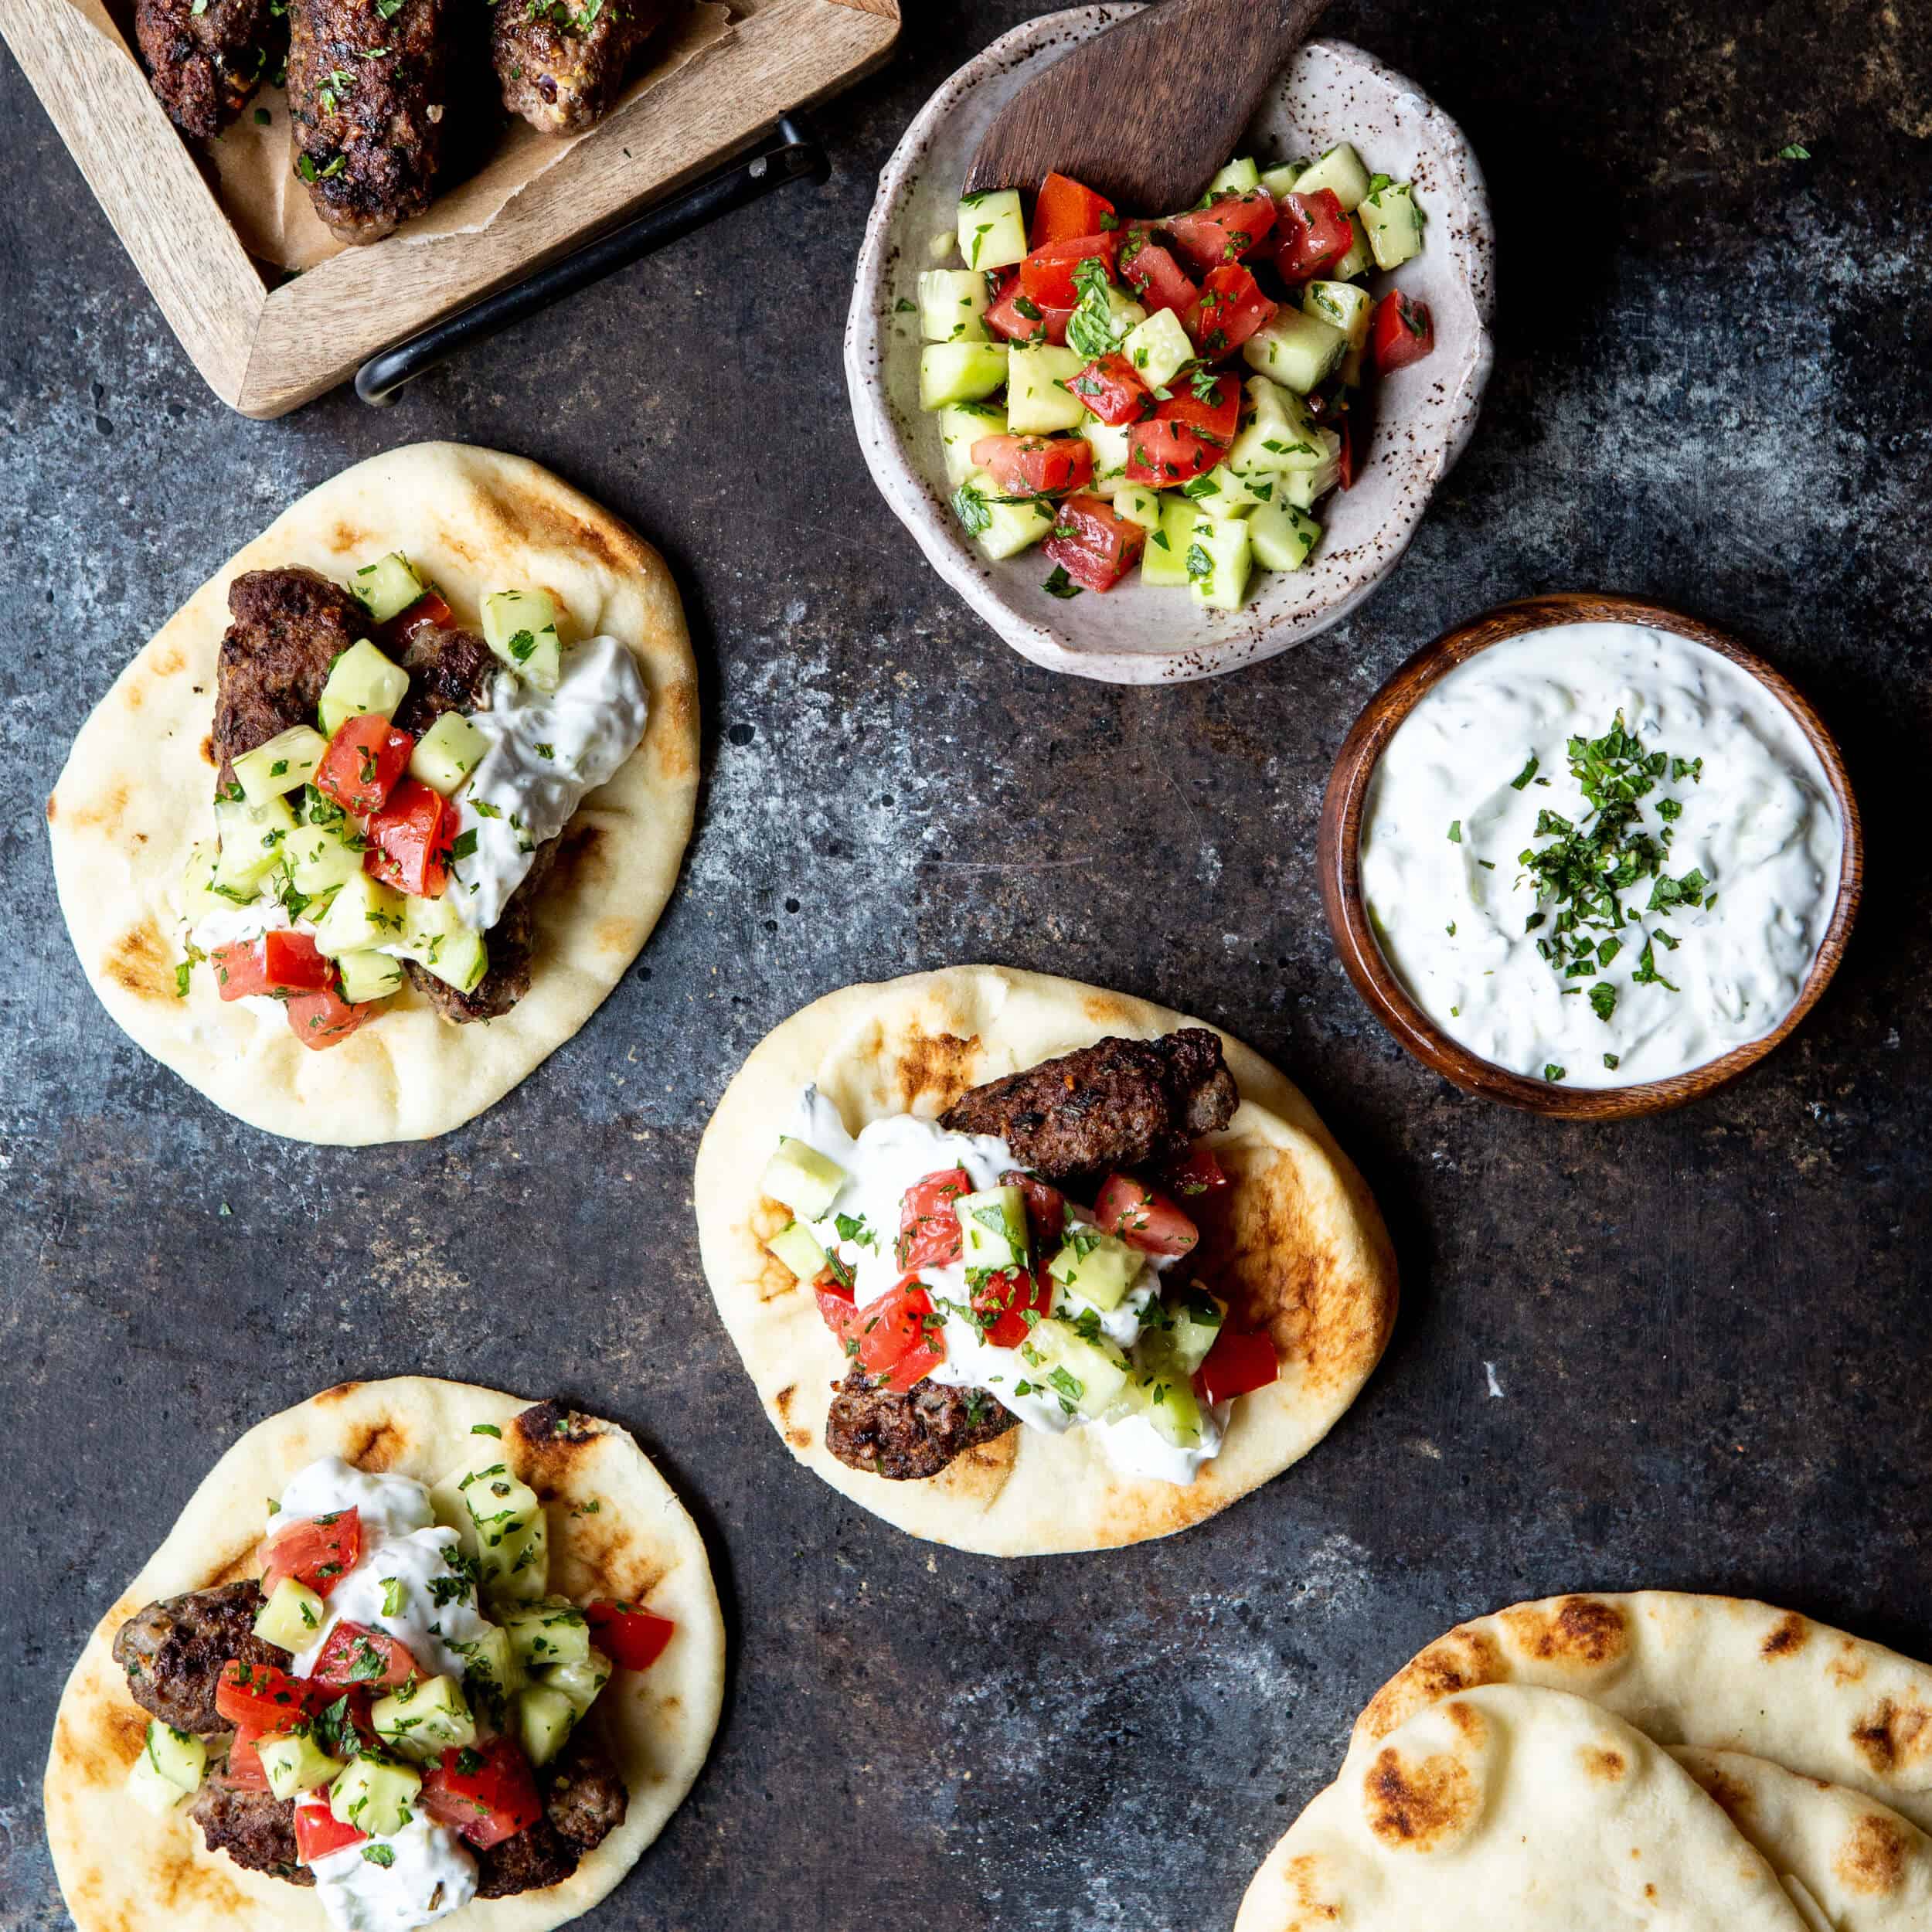
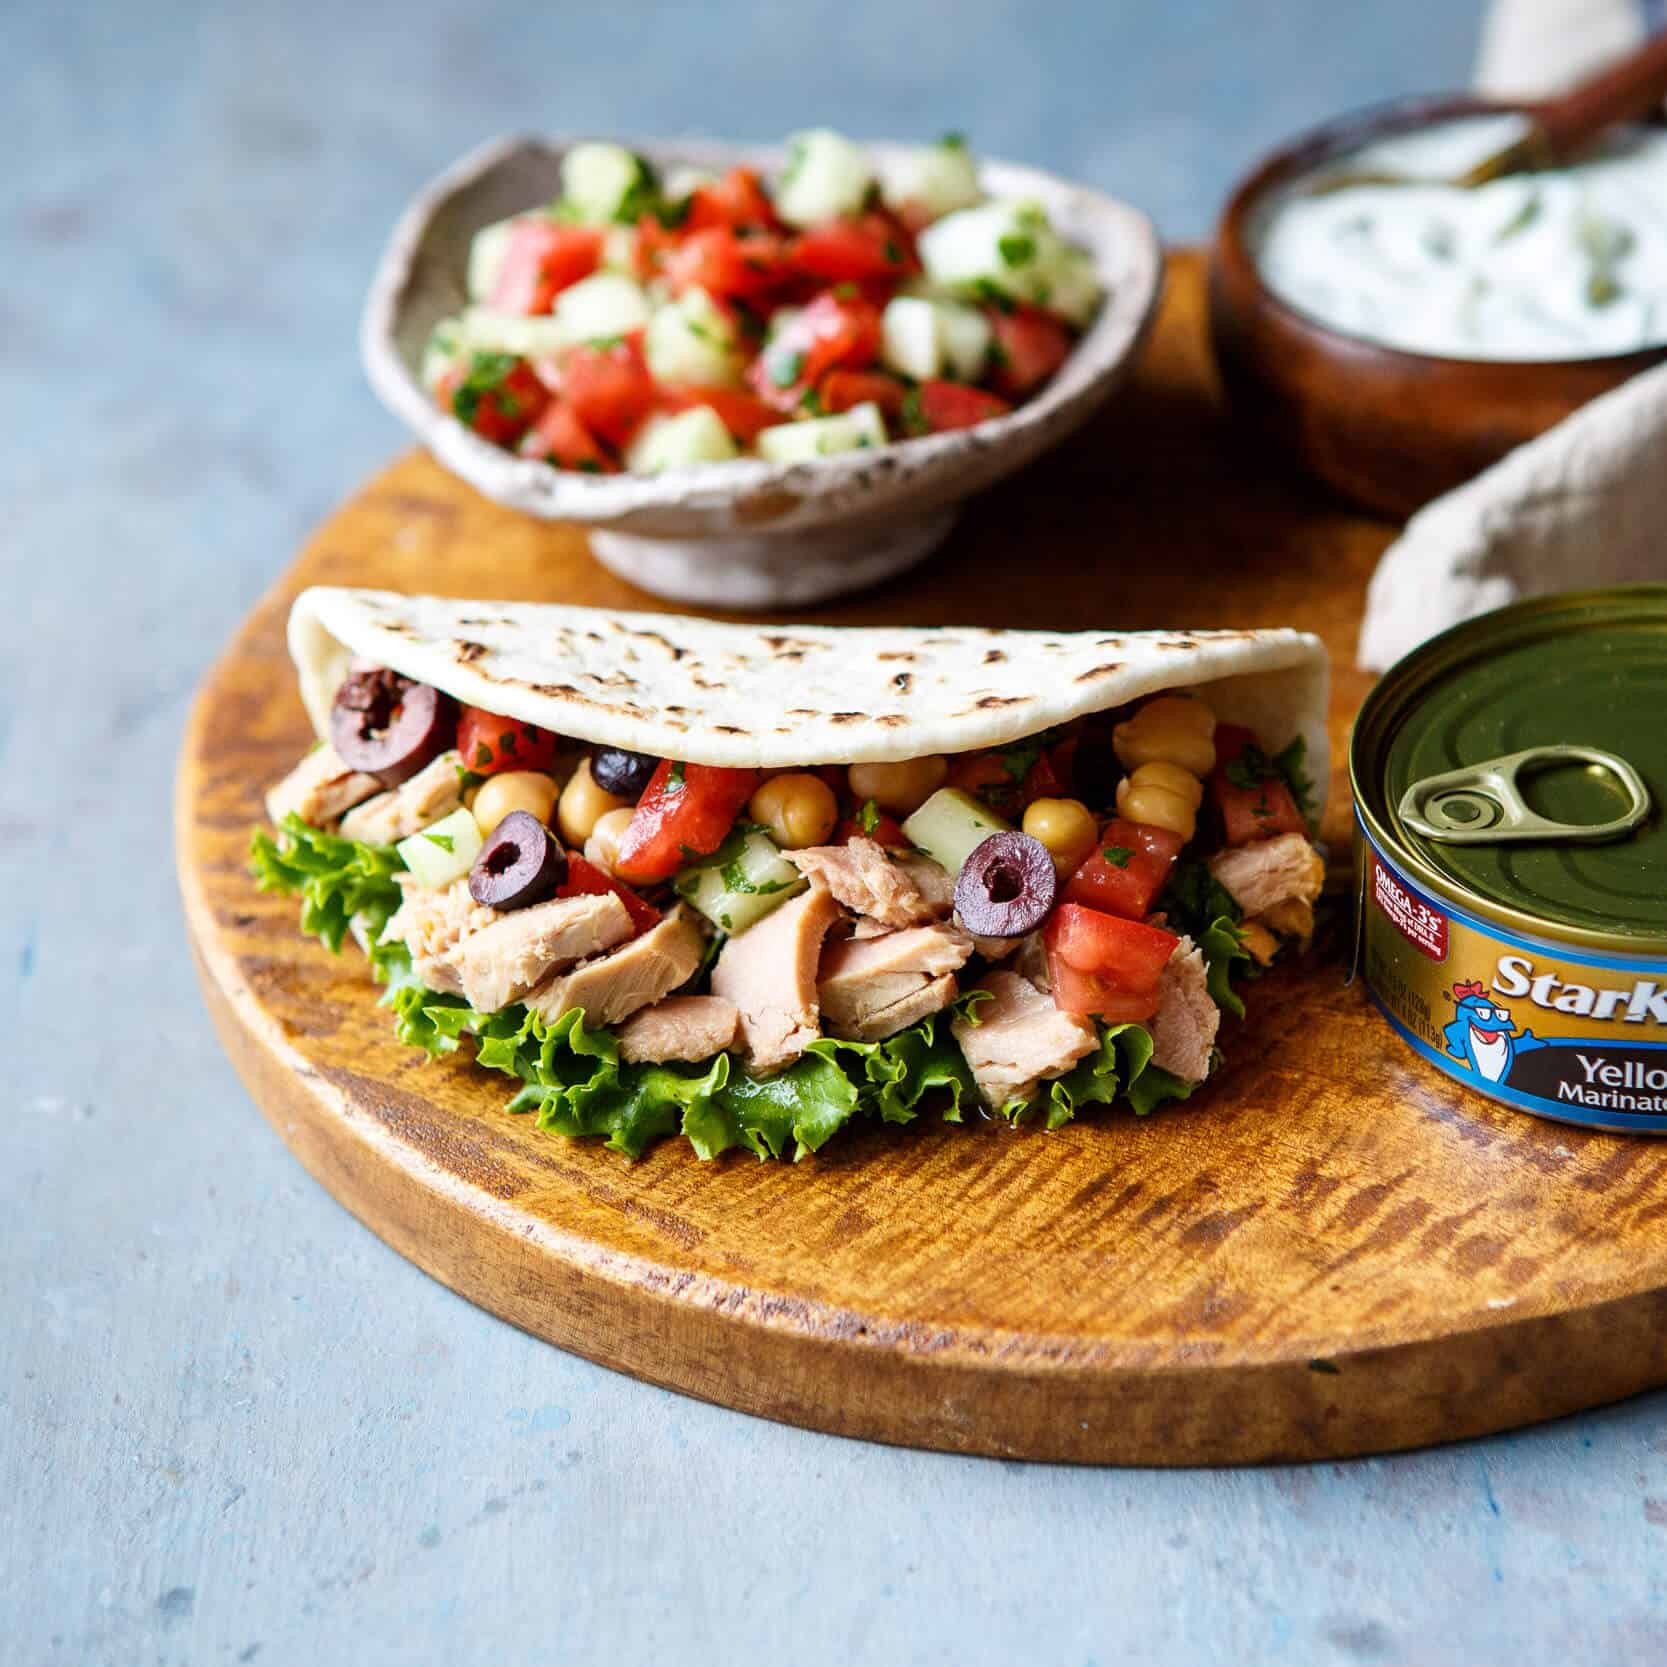
  StarKist Selects EVOO comes in a few different flavors. My local grocery store had the Roasted Garlic variety and I was super pumped with how it gave these Mini Mediterranean Tuna Pita Wraps even more flavor! It went so well with the fresh and bright flavors of the Israeli Salad and creamy and acidic tzatziki.

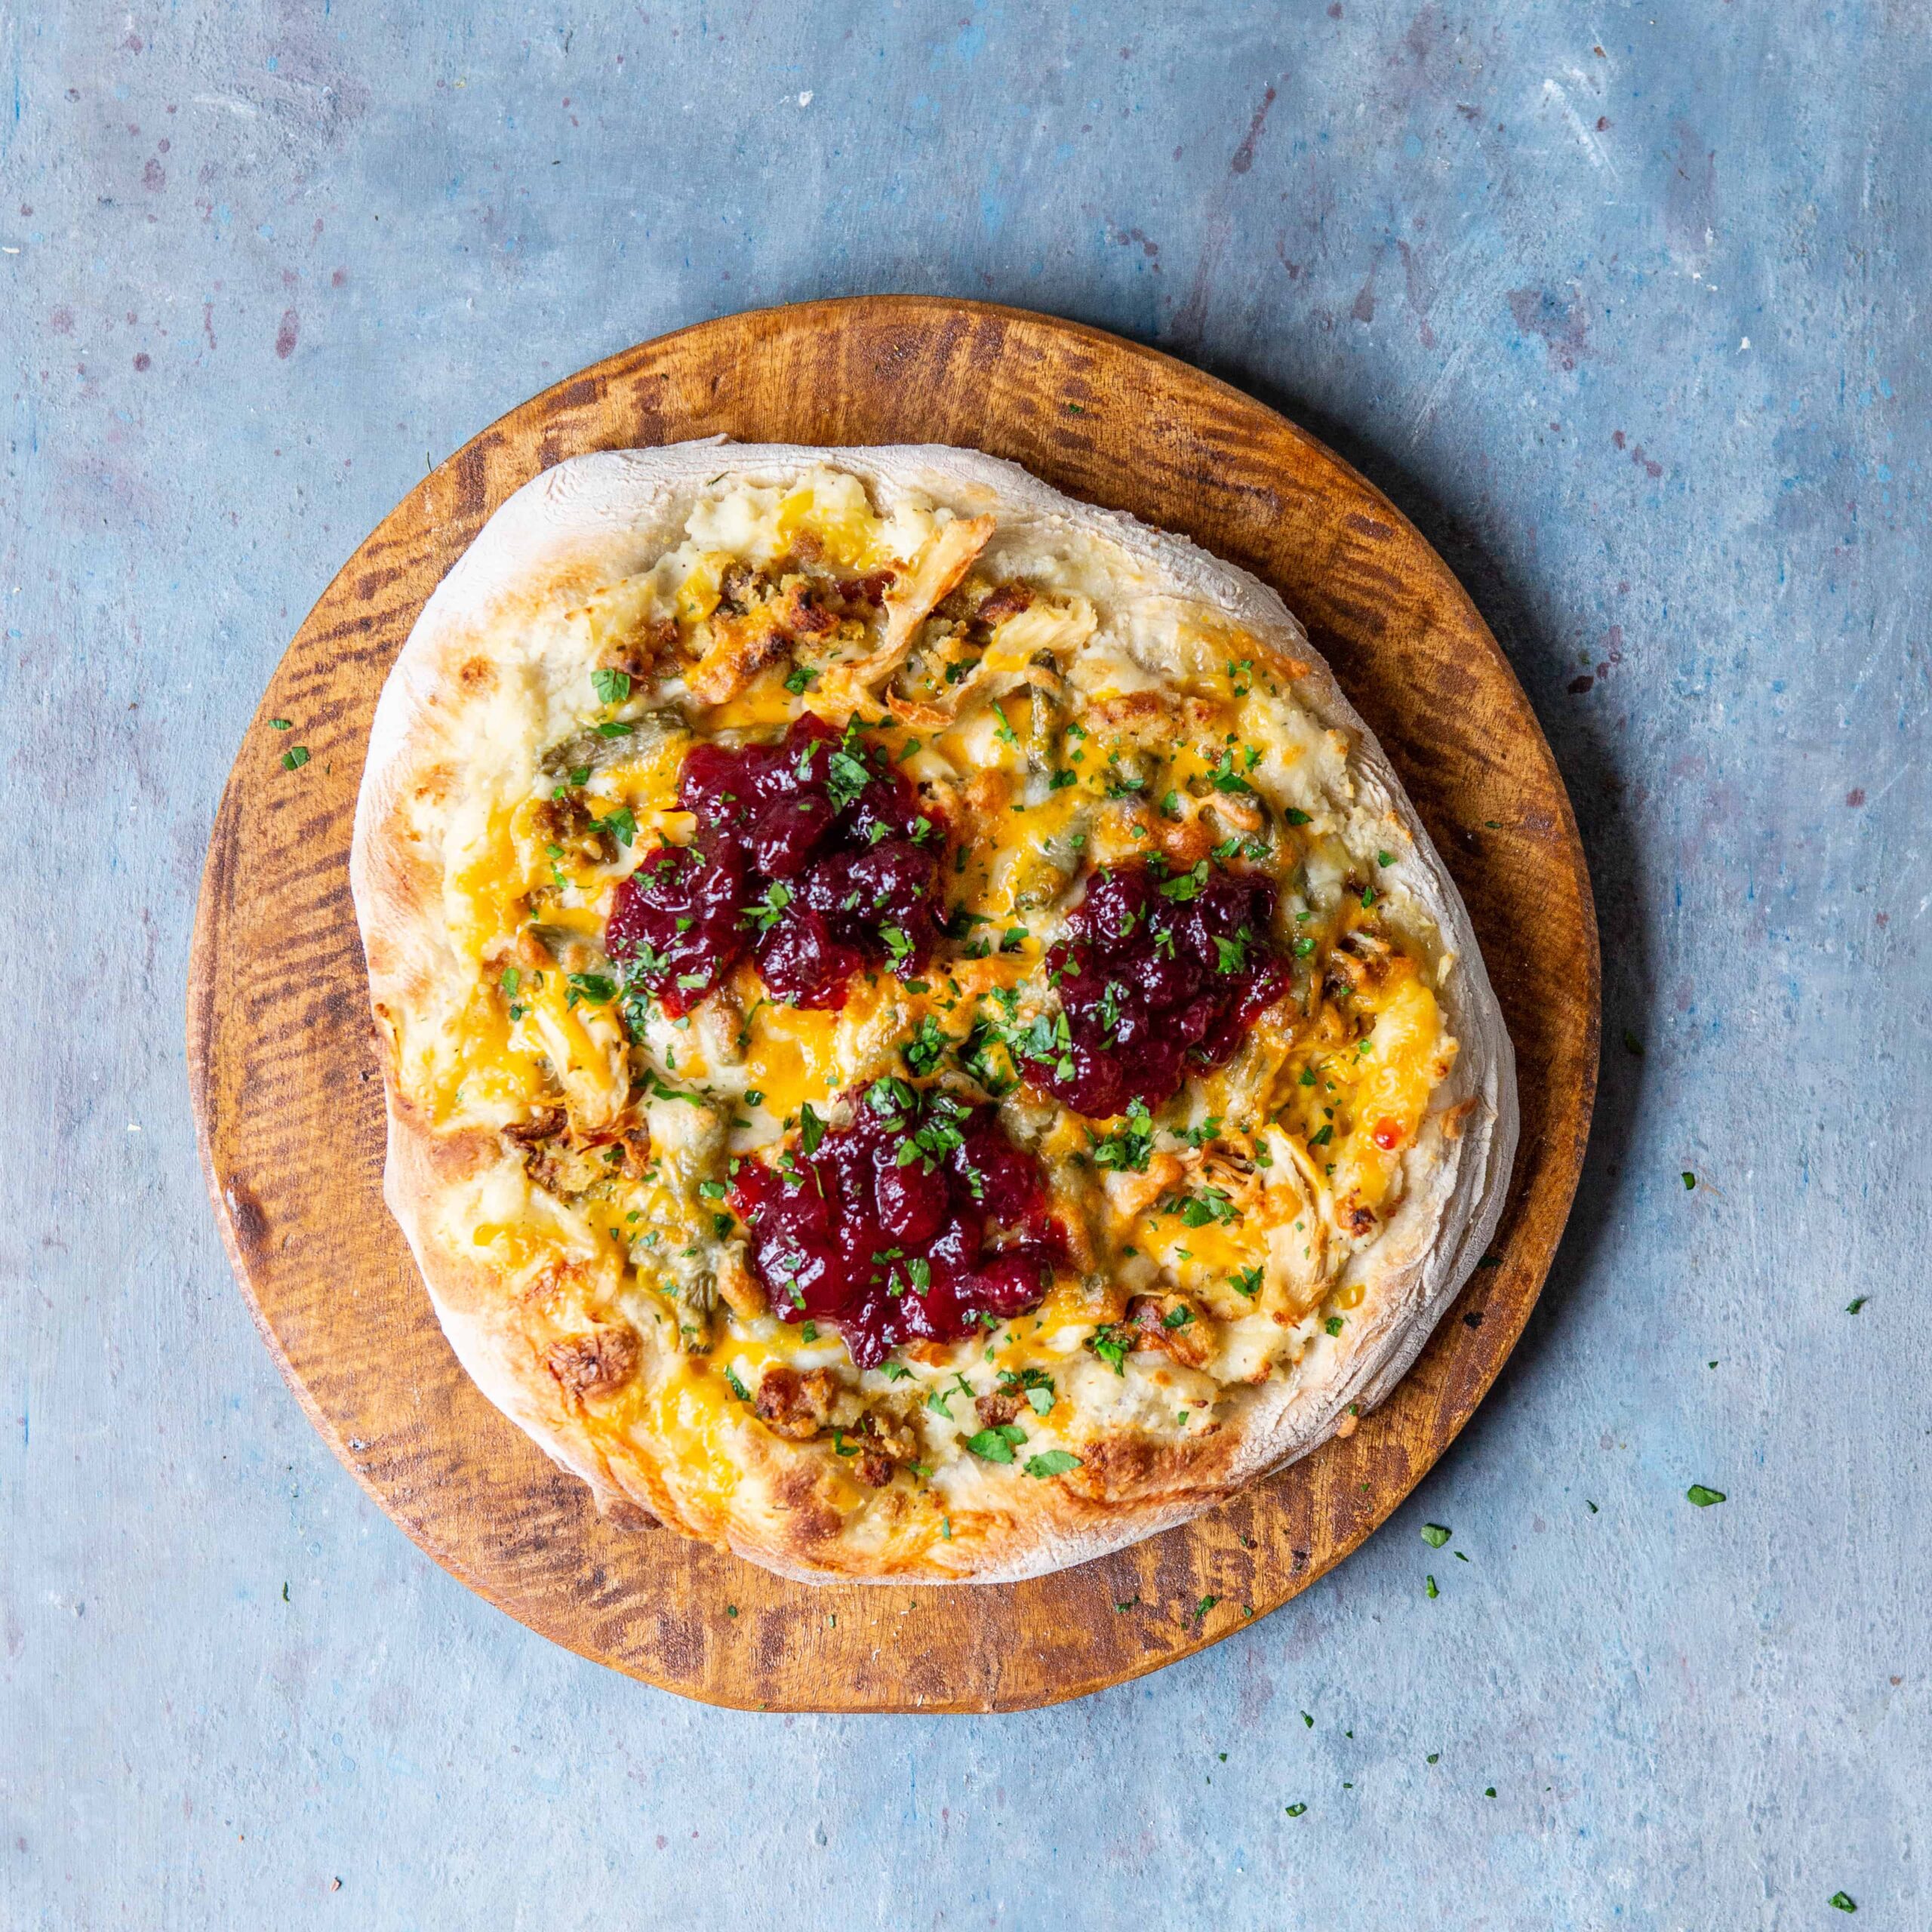
 How is it November already?! I feel like it was just summer... and now it's suddenly dark at 4:30pm and the AC breaker in the electrical box has been officially turned off for the foreseeable future. And although there's still those lingering pieces of Halloween candy still lurking here and there, the focus of our minds has all shifted to the biggest entertaining season of the year. Thanksgiving and Christmas. They're coming... and quick.
 When it comes to successful holiday entertaining, a few rules pop into my head. The biggest, though, is that you have to plan. The better game plan I have, the more relaxed and laid back I can be at the actual party. There's nothing more stressful (especially with my Type A personality) than trying to wing it last minute.
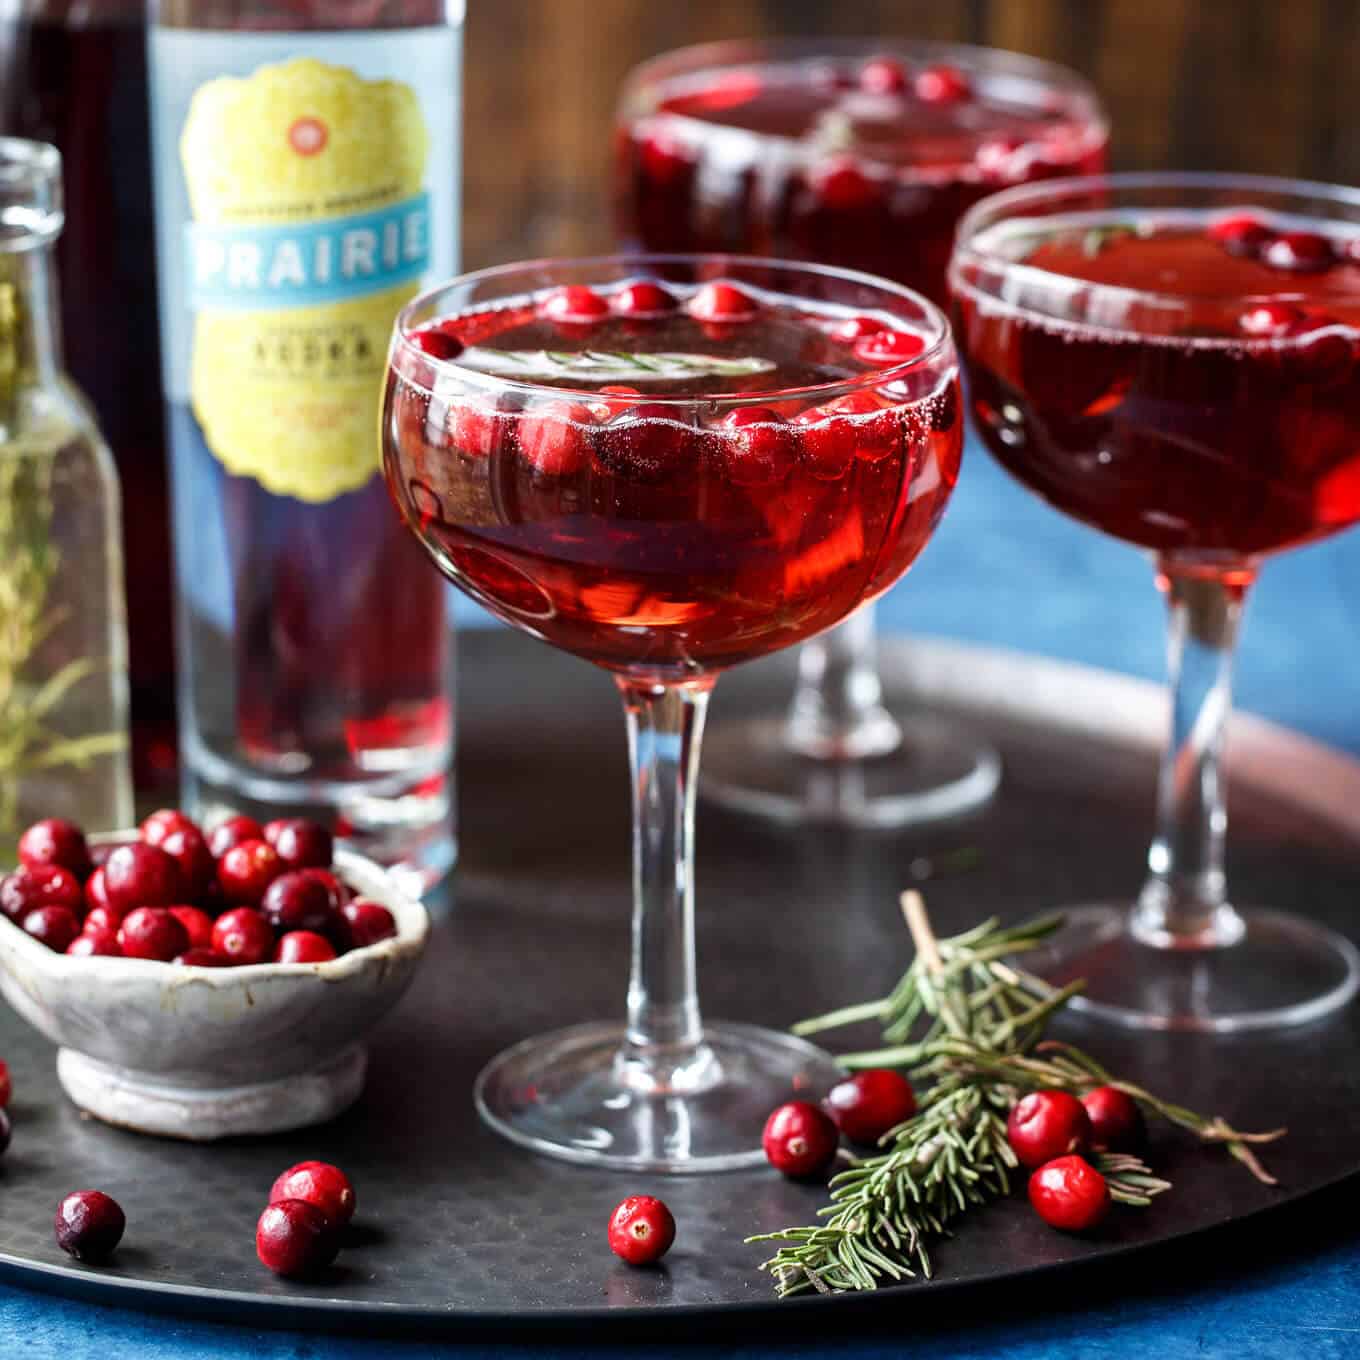
 Whipping up a big batch of these Sparkling Cranberry Rosemary Cocktails couldn't be easier. The recipe below will make 4 cocktails, but it's just as easy to multiply the recipe by as many as you want to serve for a large crowd. Best of all, everything can be prepped way before the first guest arrives!
 Back to this award winning


 Before I actually had a child, I told myself that my kid would of course be an adventurous eater. They'd have no problem trying new, exotic foods and would simply eat whatever Asheley and I decided to eat. Easy enough. Right?
 Anyone else have a family that loves pizza? I'm all about ordering a takeout pie, but sometimes it's way more satisfying to just whip up a homemade variety at home with customized toppings. Best of all, I can have Olivia help me make the pizza. She loves being my little sous chef (Daddy, I STIR!!!!).
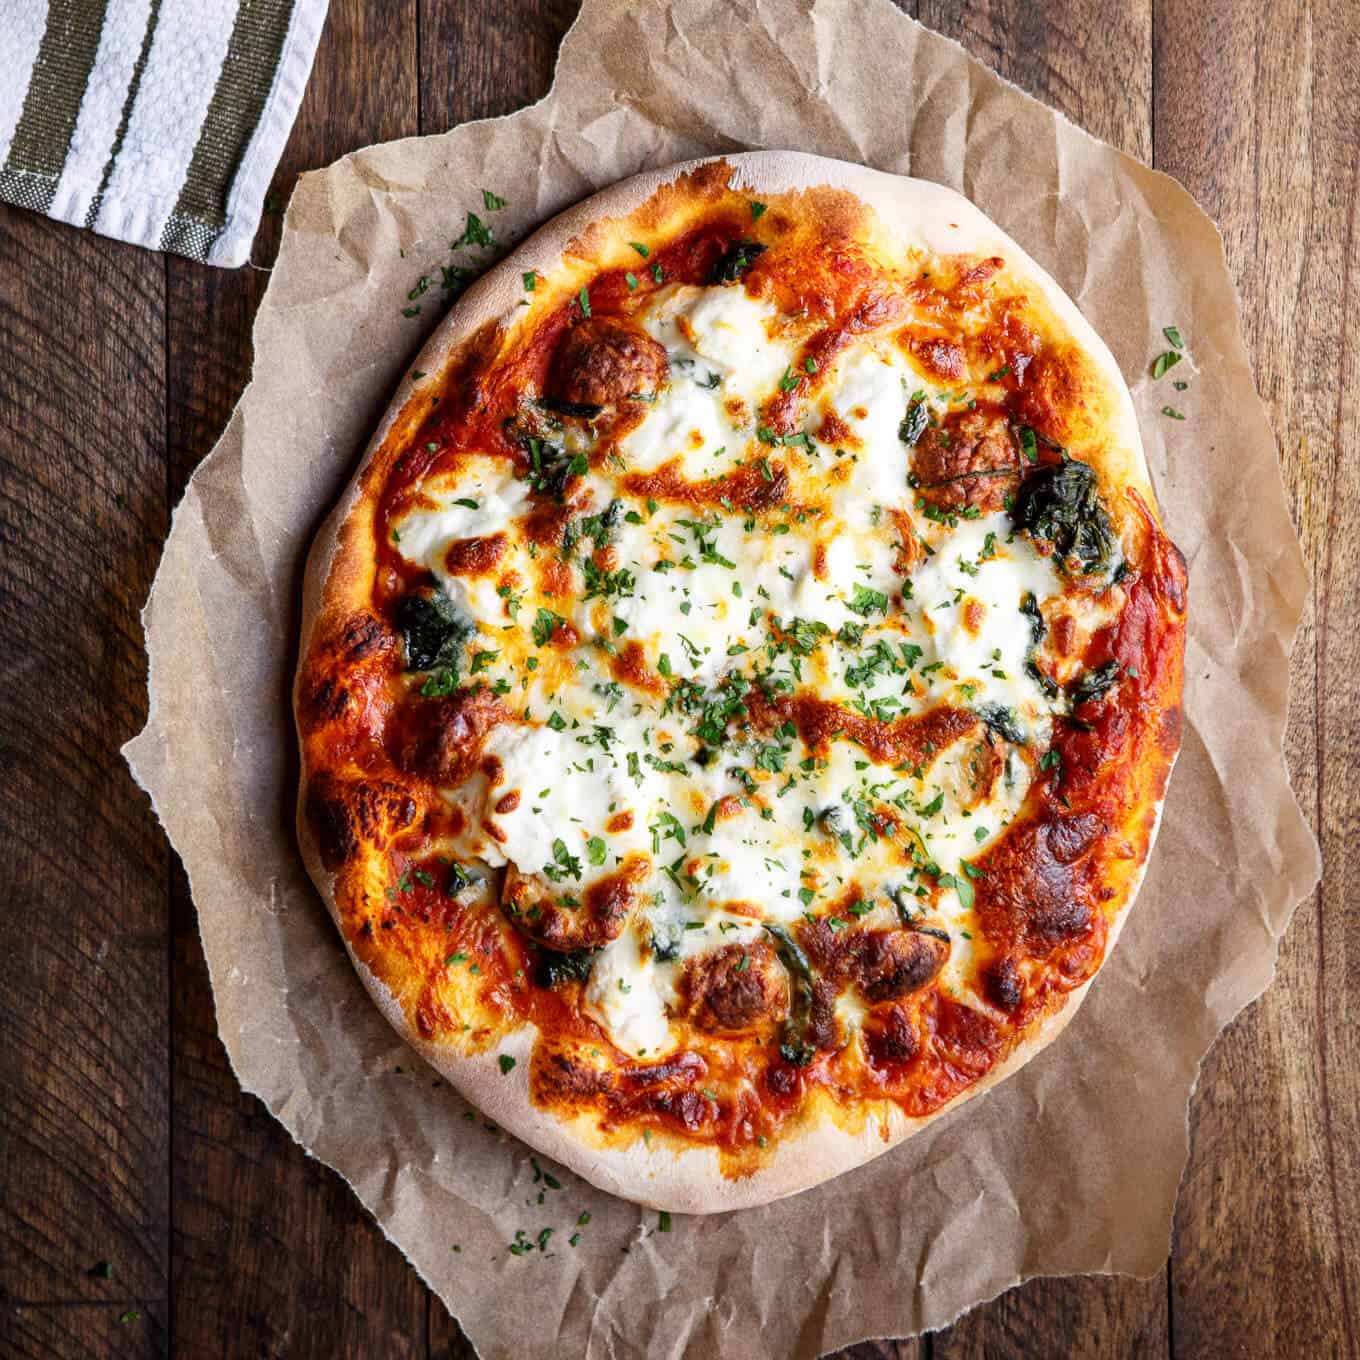
 I did have a huge help in getting this Meatball, Spinach, and Ricotta Pizza on the table so quick... Cooked Perfect Fresh Meatballs!
 Besides the meatballs, I was also pretty darn happy that I snuck in some spinach into Olivia's dinner! At first she was like... what's this?! referring to the meatballs and spinach, but once she realized it was all part of the pizza she was totally down to try it.


 Well, it's now officially Fall. I know technically it started a few weeks back, but up until the start of this week it's been so unseasonally HOT here in New York. Although I'm sad to see summer go, I'm always pretty excited about the Fall weather. It's hard to beat a 60-70° day... I just wish I could have that temperature AND it stay light outside past 7pm. Lofty goals, I know.
 I actually have a recipe somewhere in the annals of Shared Appetite for a
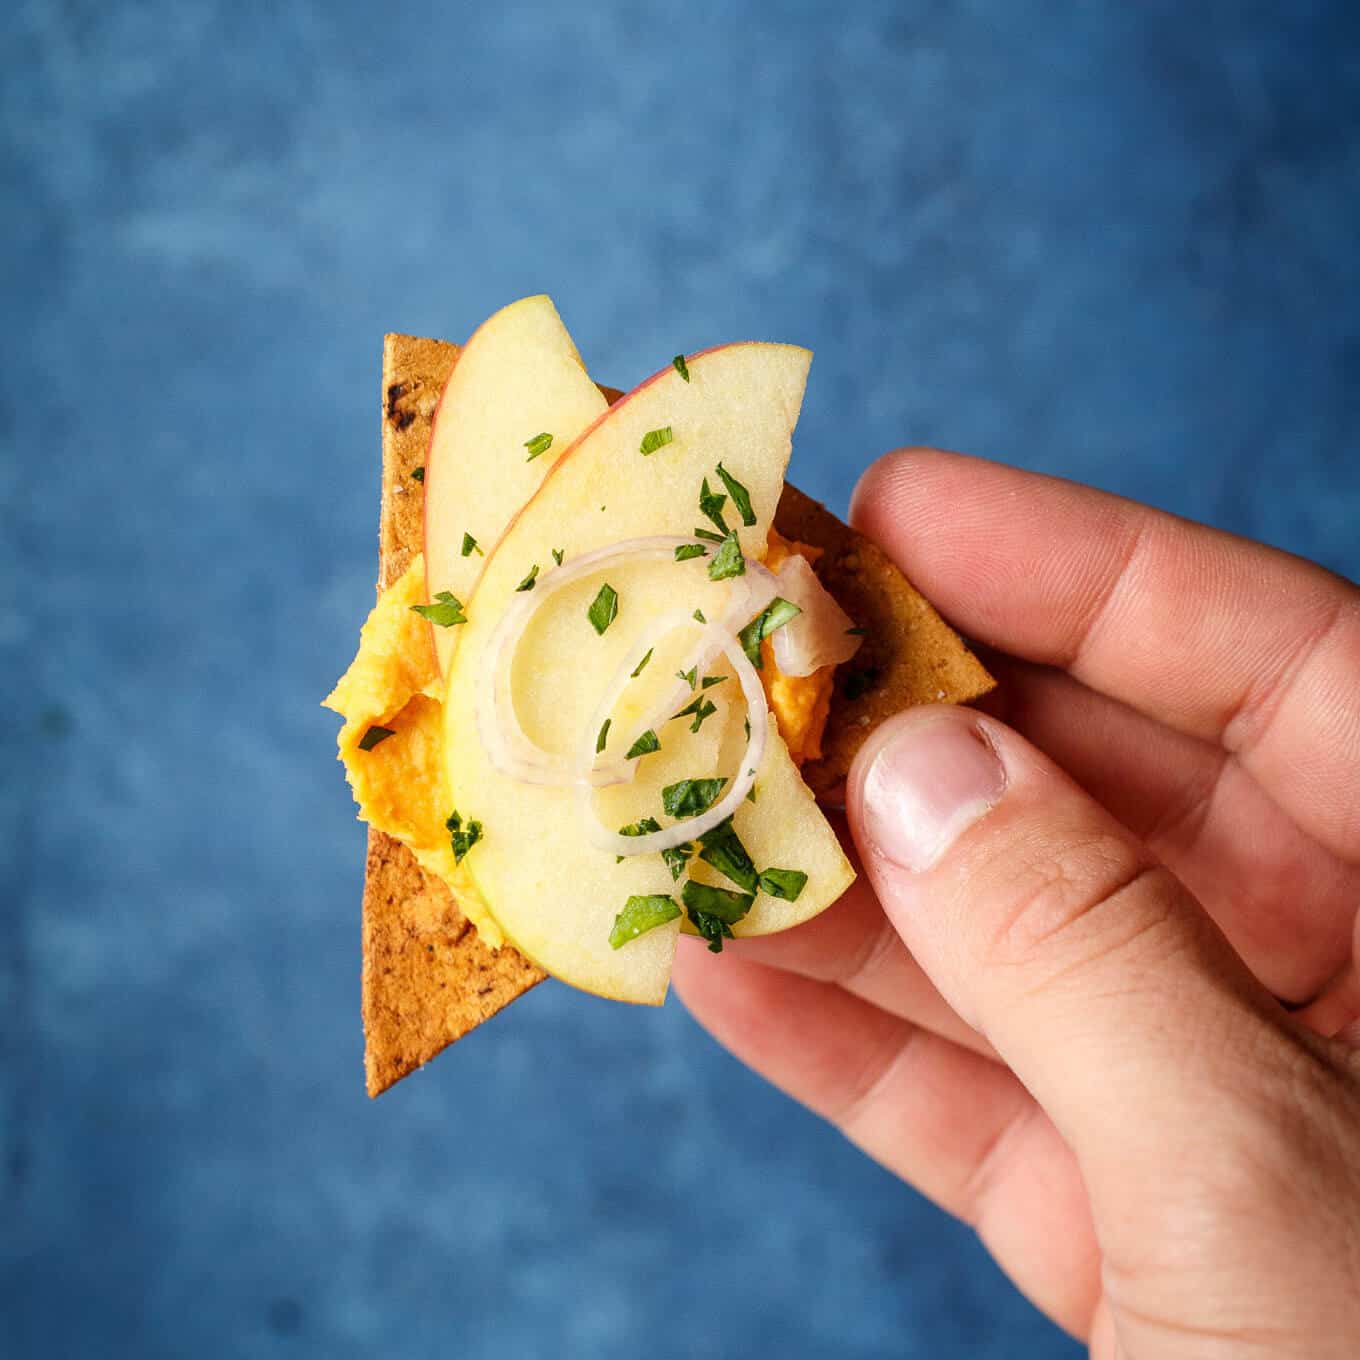
  If you taste your sweet potato hummus and it tastes a little flat, you can always feel free to alter it with a little lemon juice and/or salt. Depending on what brand store bought hummus you buy, you may need a little help from those two kitchen all stars.

 I love the balance of flavors in these Vegan Sweet Potato and Apple Bites. The savory hummus with just a hint of sweetness, the sweet and tart honeycrisp apples (PLEASE make sure to use honeycrisp or something similar... don't go using red delicious or anything like that... bleh), and the bite of shallot. HEAVEN on a chip.

 One of the hardest goodbyes I have to say each year is to my dear friend... summer. It always takes forever to get here and then leaves way too quick, but my oh my do I love every minute we get to spend together.
 I know what you're thinking. Olive oil
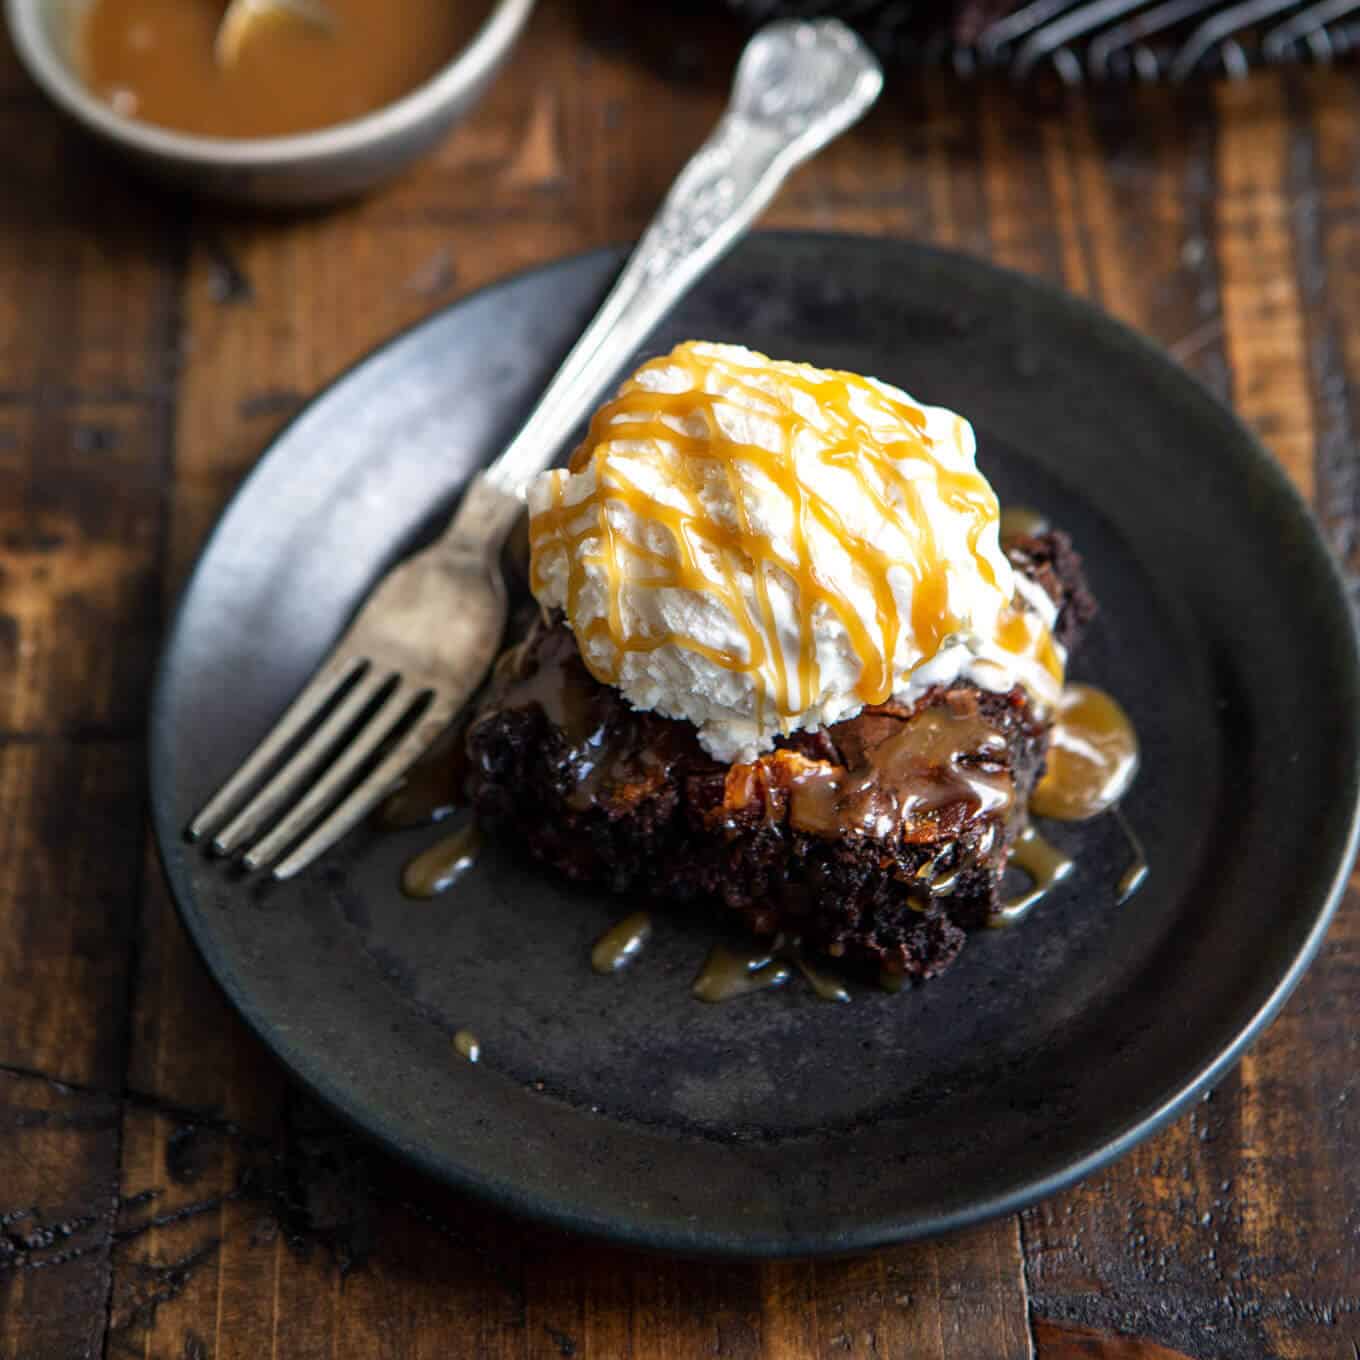
 I have to admit. I always thought no churn ice creams were kind of lame. I mean, they are kind of like cheating. Mix a few ingredients together... freeze... and boom, ice cream. Really? Could it truly be that easy?
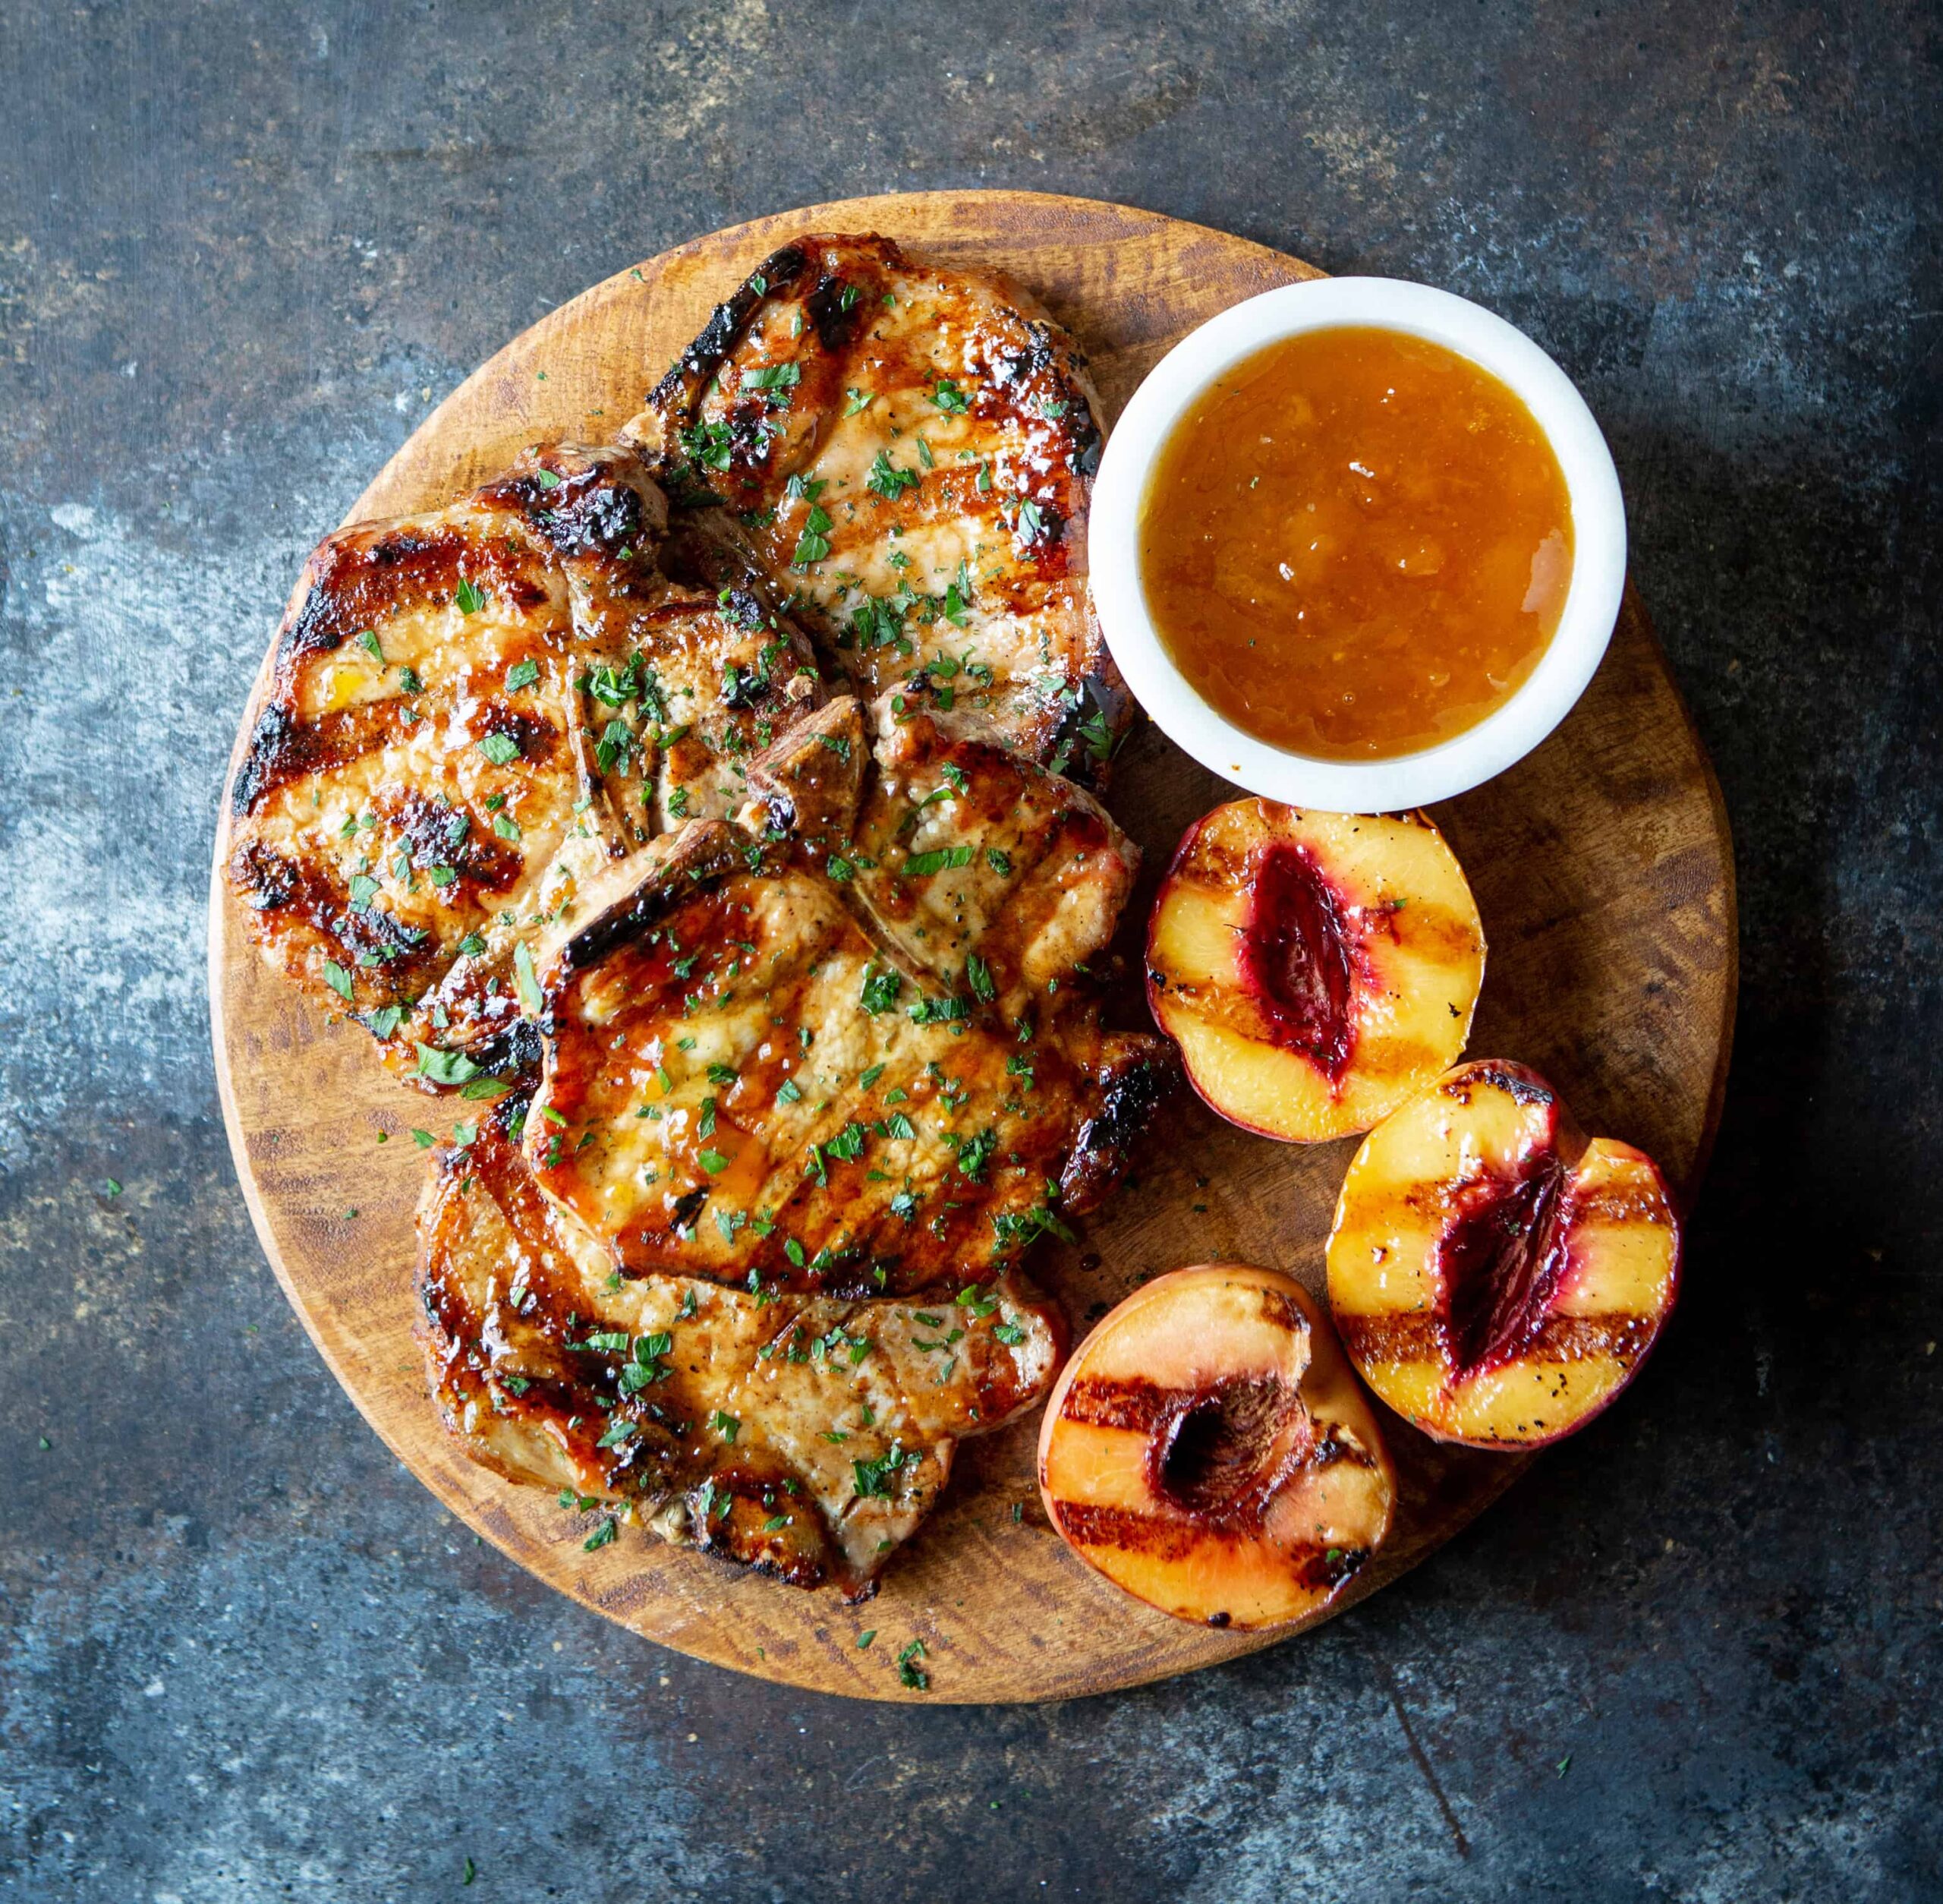
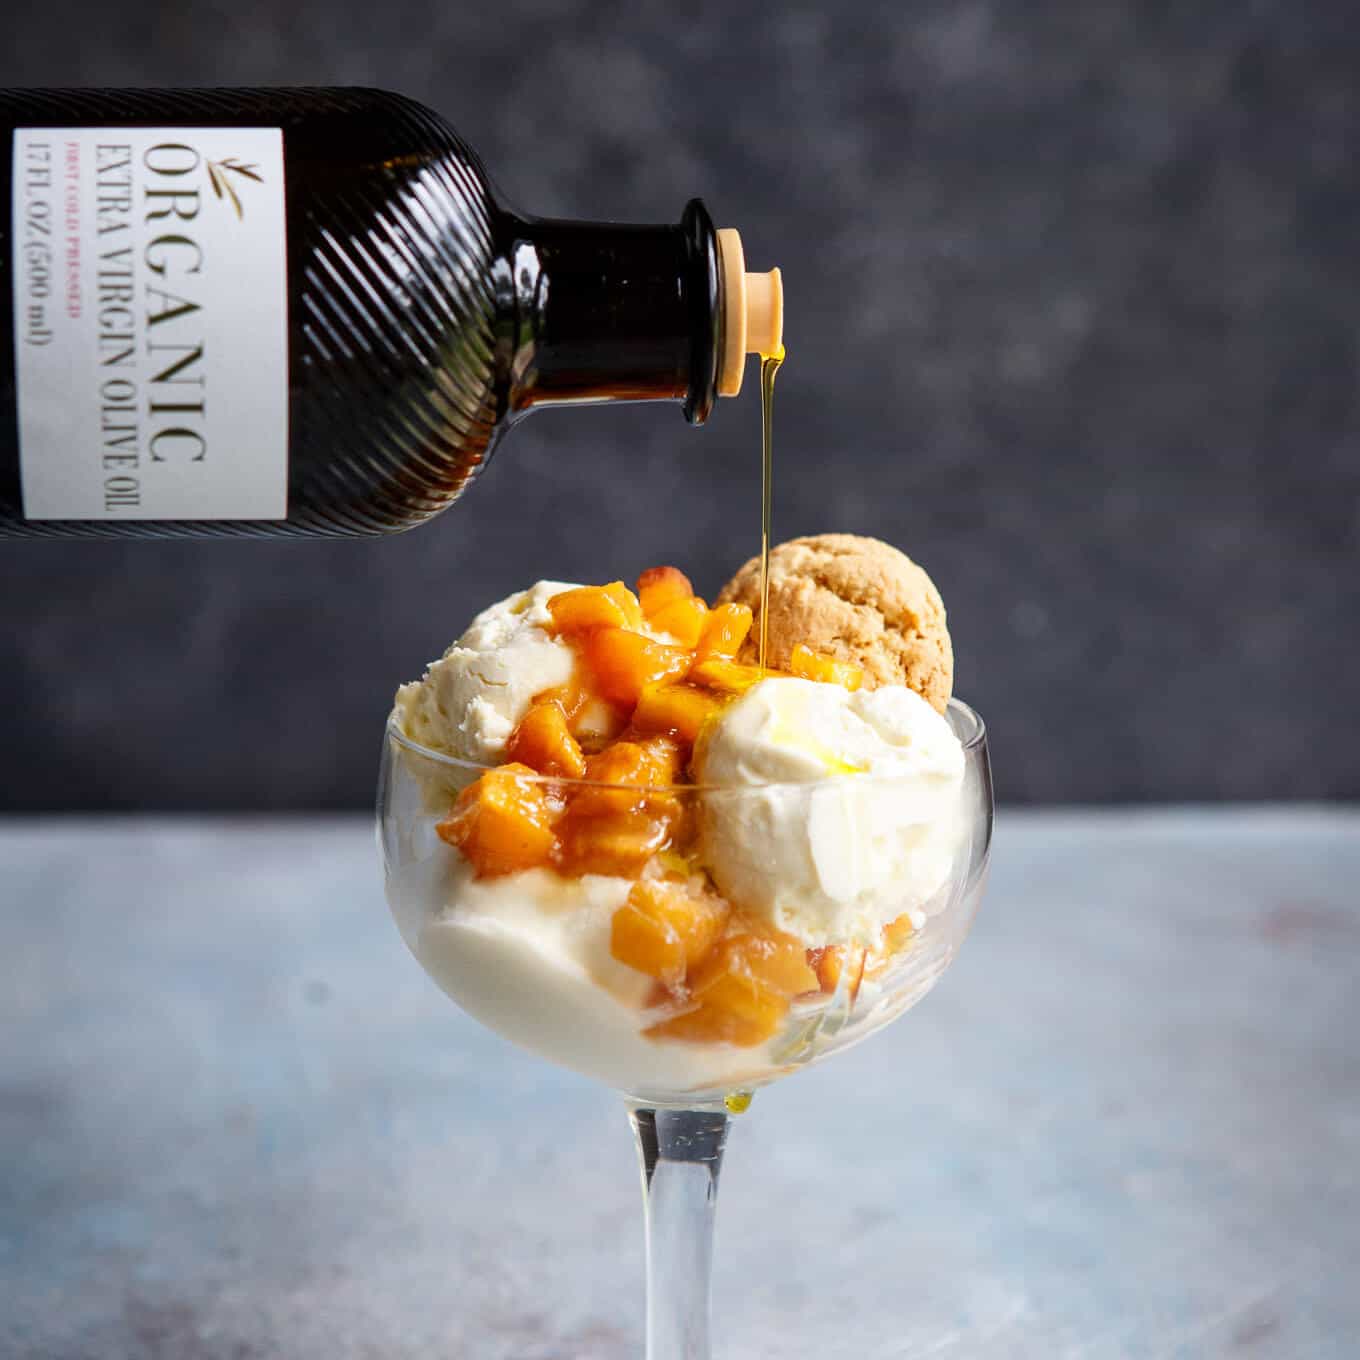
 Now listen, you really need some fruit component on top of this ice cream. It really helps tie together the olive oil ice cream. I'm using peaches here because it's peak season for them in NY, but feel free to use another seasonal fruit as you see fit. Roasted apples, berries, cherries, and other stone fruit would be amazing as well!
 These mini olive oil cookies are not entirely required for these sundaes, but they certainly make them MUCH BETTER. I love having a textural component in my ice cream, whether that be as simple as some sprinkles or crushed oreos... or as stunning as these mini olive oil cookies.
 How good are these cookies? Let's just say my 2 year old daughter couldn't keep her hands off them long enough for daddy to photograph them...
 Onto the star of this No Churn Olive Oil Ice Cream with Roasted Peaches and Olive Oil Cookies.
 Looking to find Carapelli® Organic Extra Virgin Olive Oil? Good news... it's in stock at your local Shop Rite! I found it in the oil/vinegar aisle right away! Plus, use this


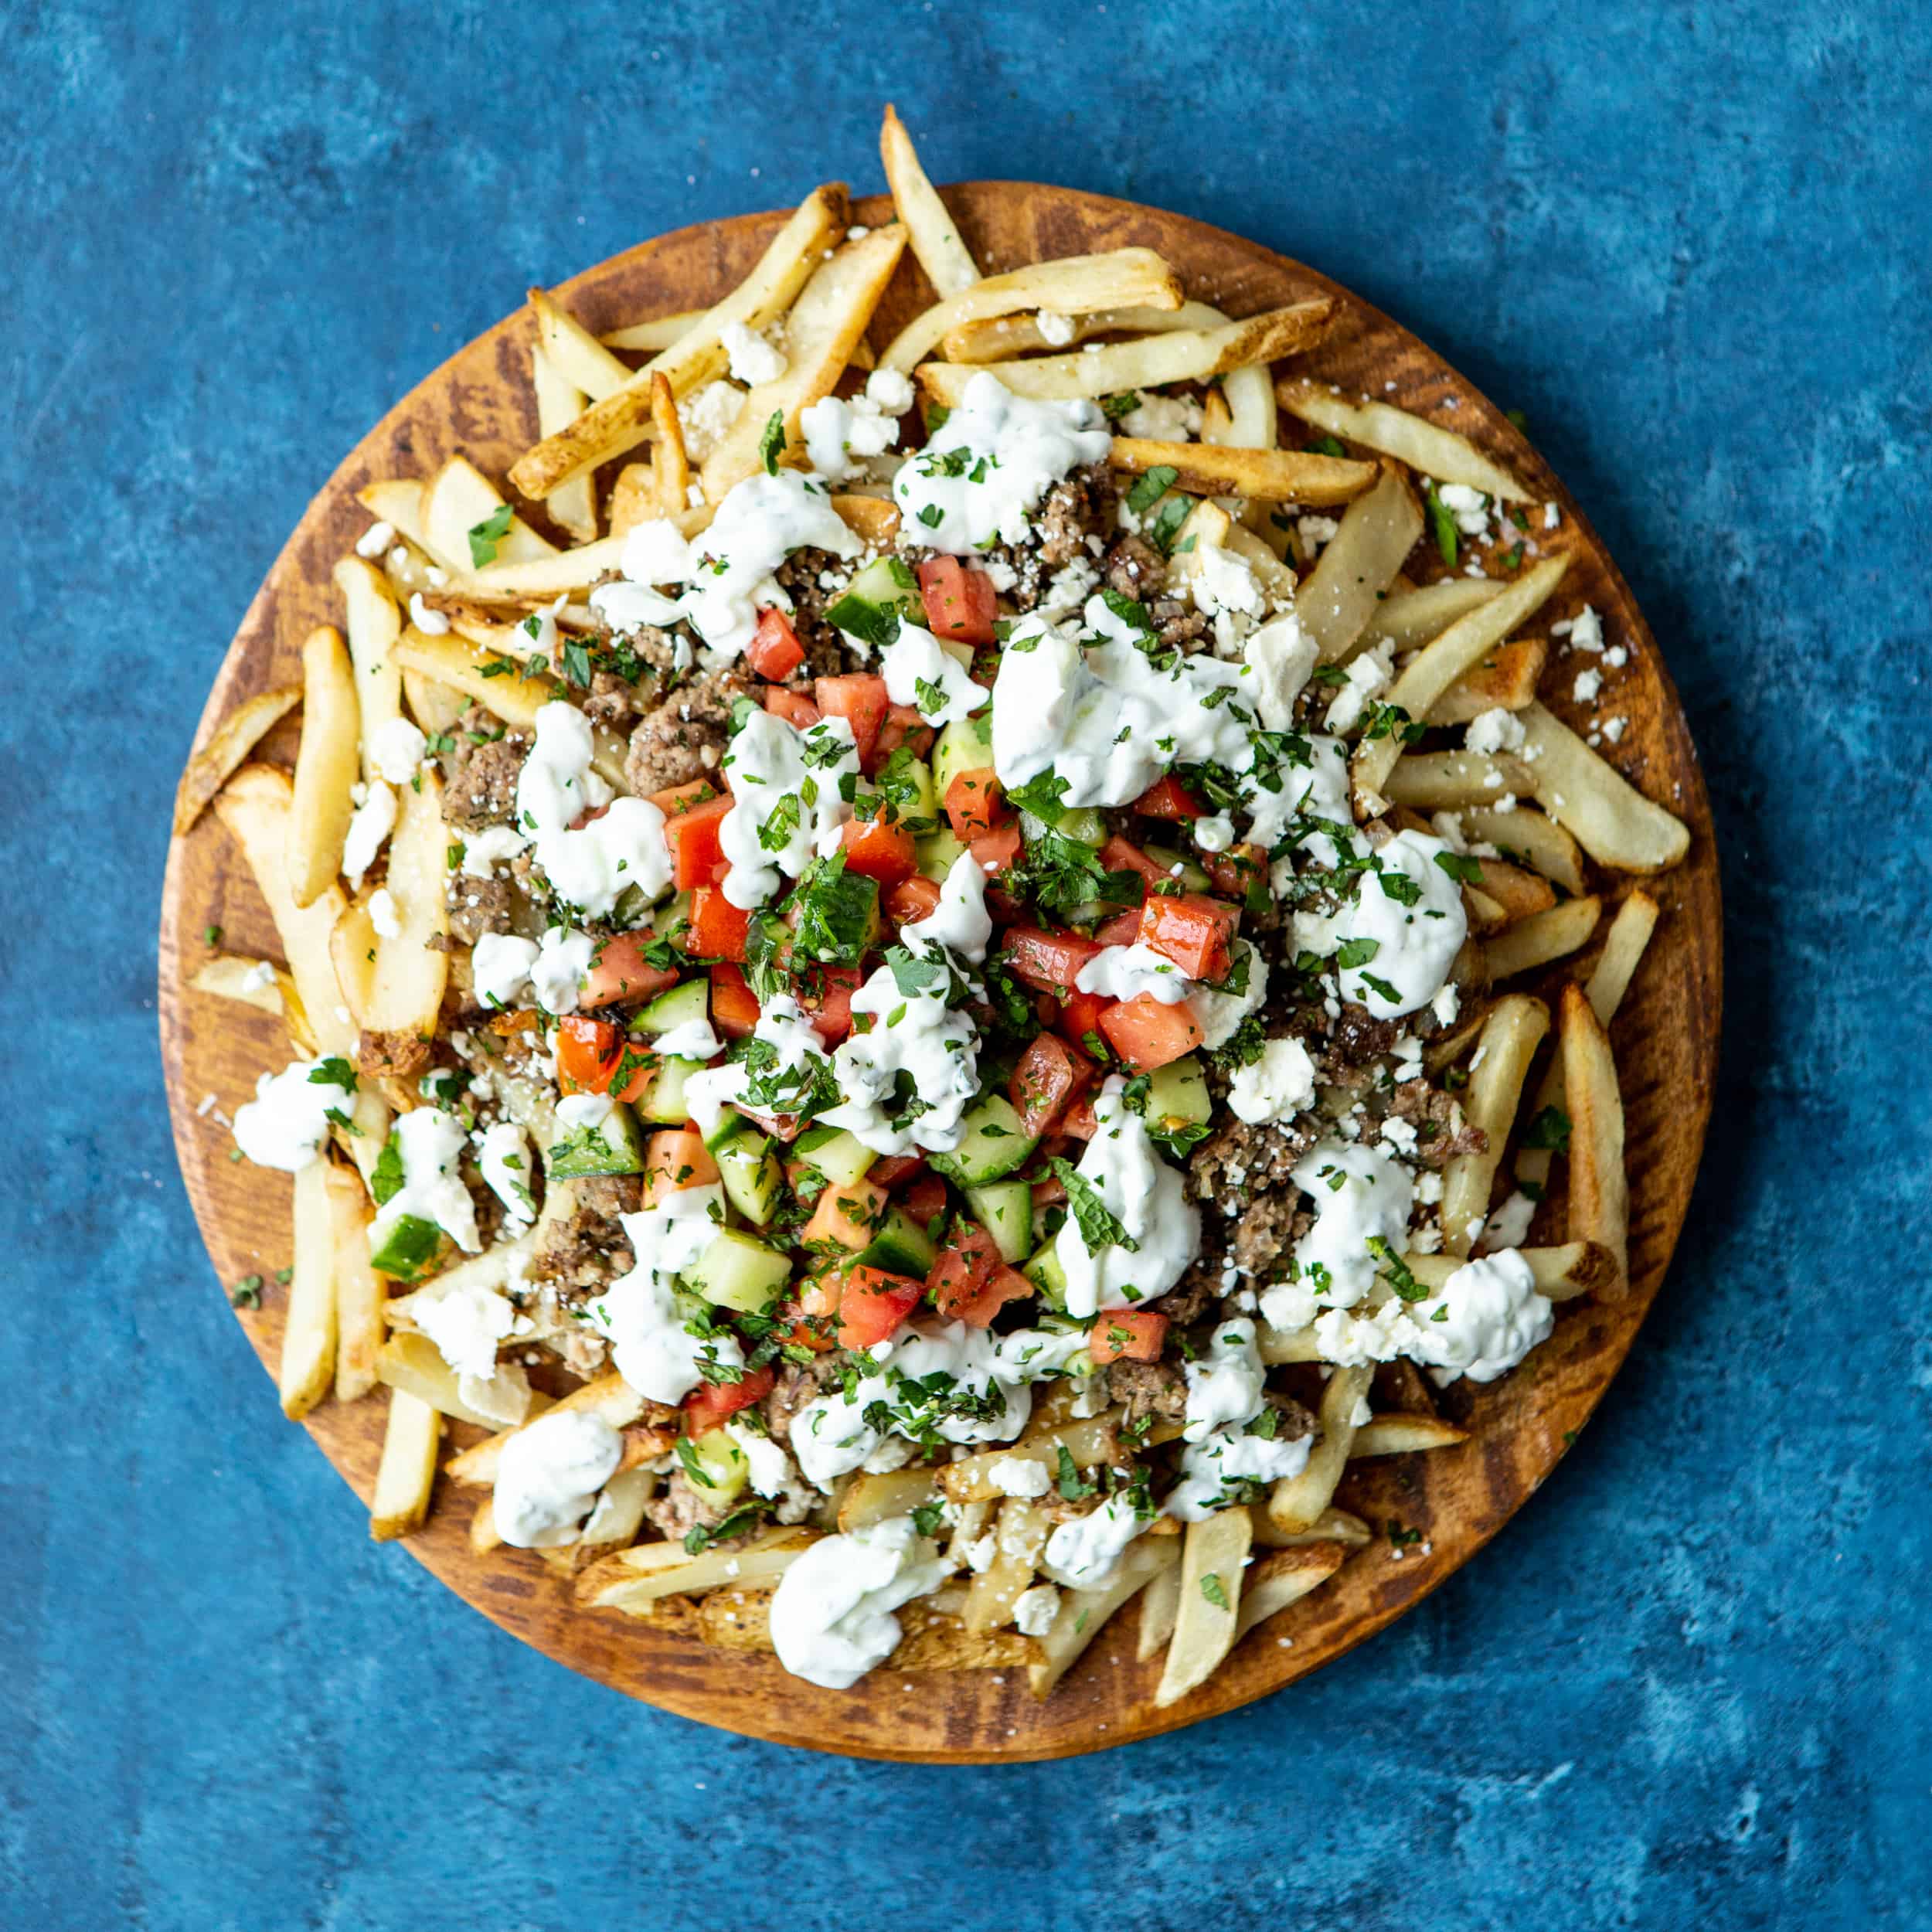
 The new school year is in full swing. I can't believe summer is over. Well, okay I know... it's still technically summer. But not for us teachers. Long gone are days without alarms, elastic shorts, and care free schedules. Now I have to get Olivia out the door by 7:30am so I can get her to the babysitter with enough time for me to get to work before the bell rings. Then it's home, make her dinner, get some quick play time in, and the bed time routine. It's... exhausting.
 Making breakfast is just so out of the question for us in the morning. Asheley is packing up Olivia's food for the day at the sitter while I quickly answer emails and catch up on work (besides being a music teacher and running Shared Appetite, I also co-own a wedding photography studio... and it's peak wedding season of course). So yeah, things are hectic.
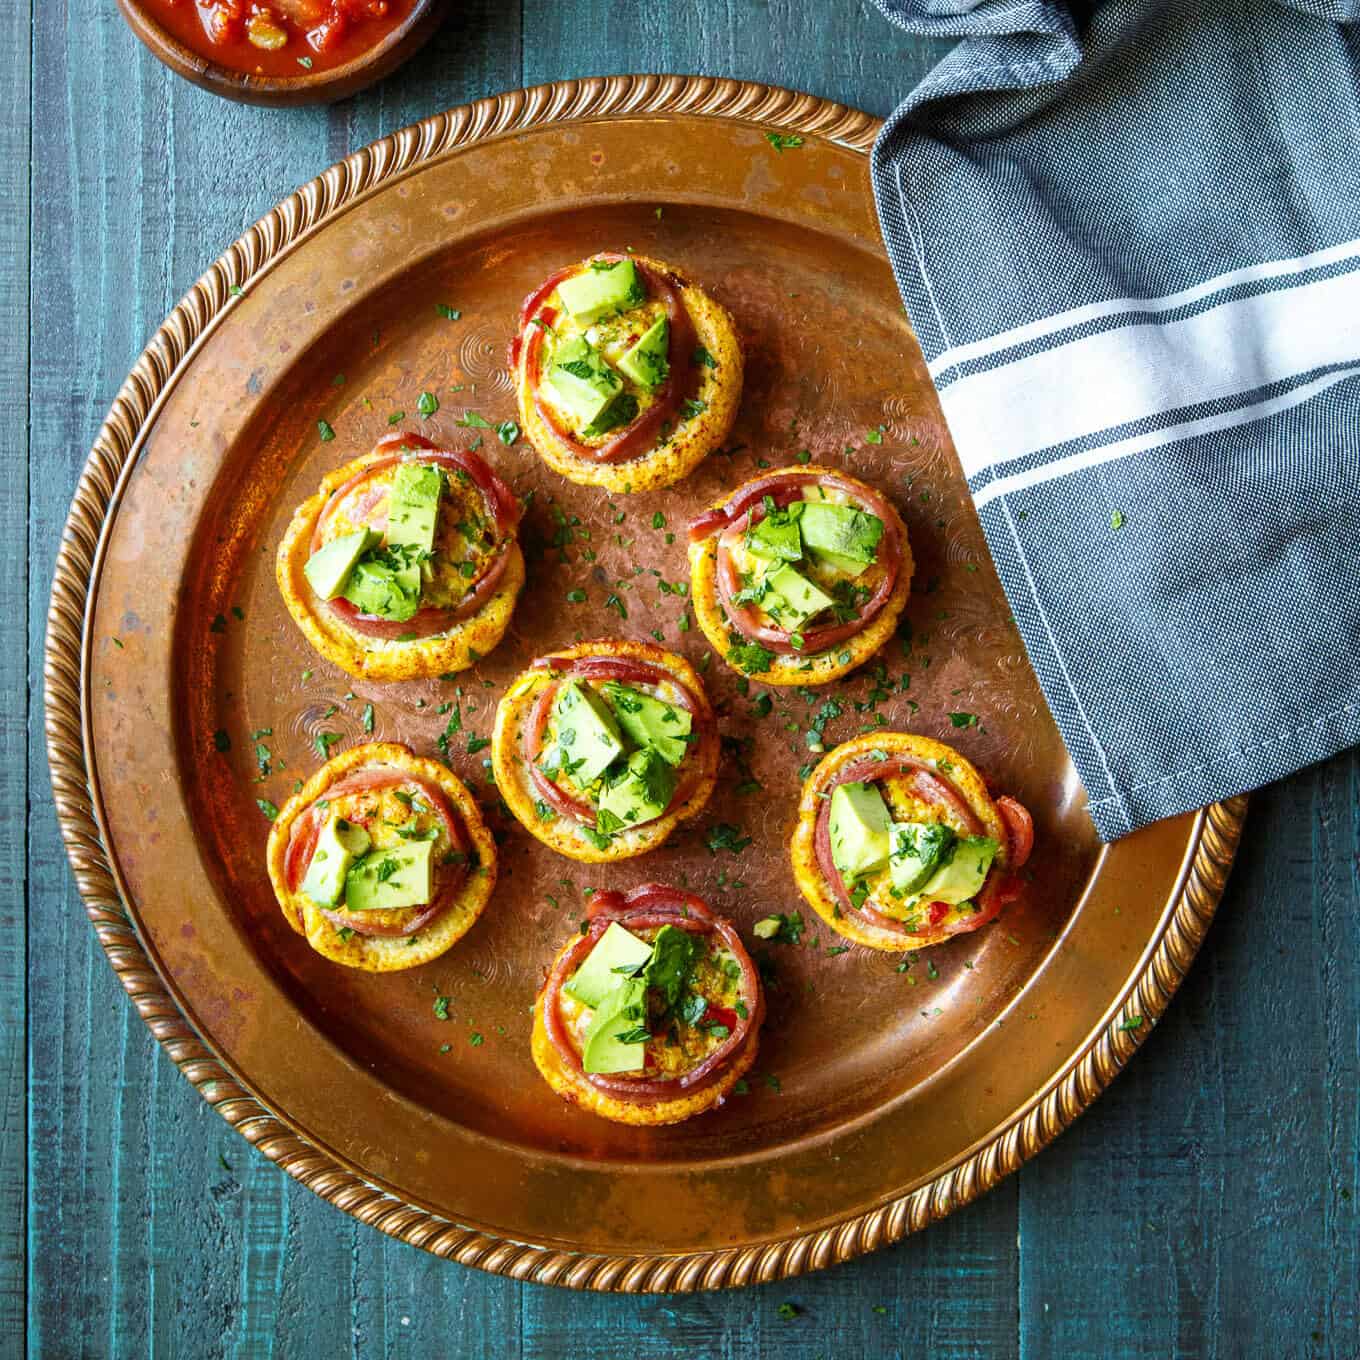
 Let's break down just how easy these dairy-free Healthy Turkey Bacon Wrapped Southwest Egg Muffins are to make:
 My go to turkey bacon is
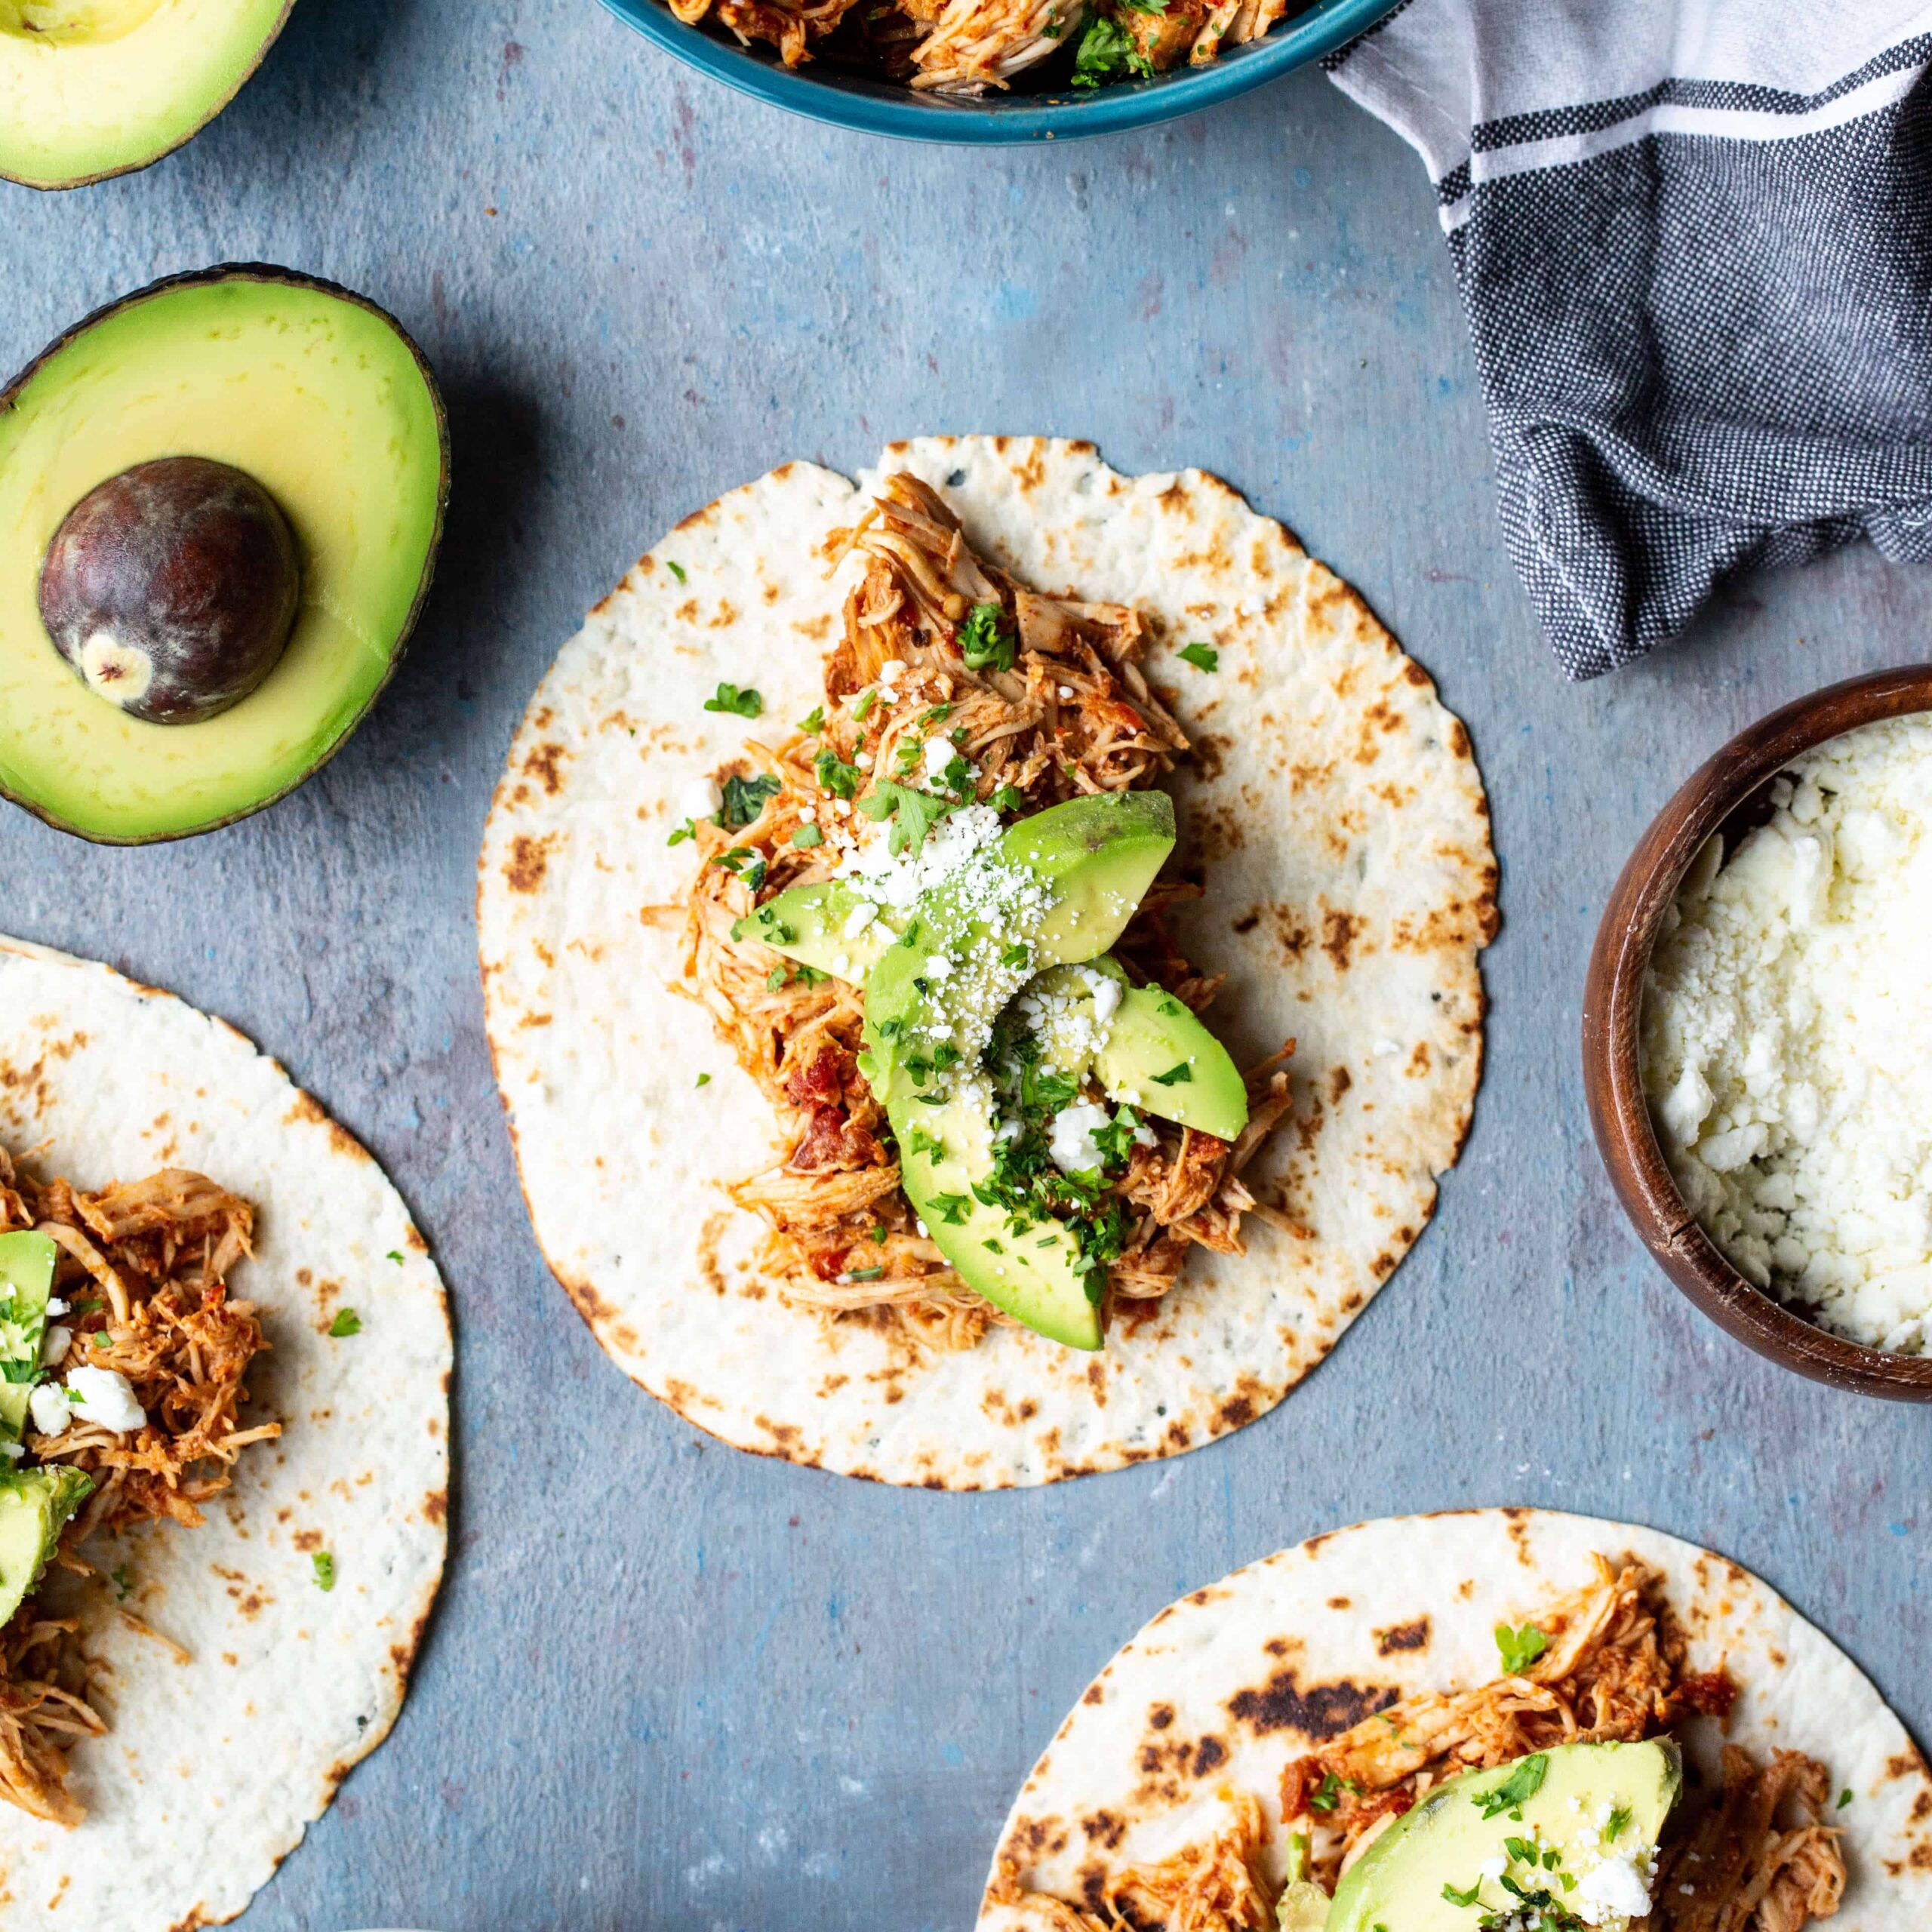
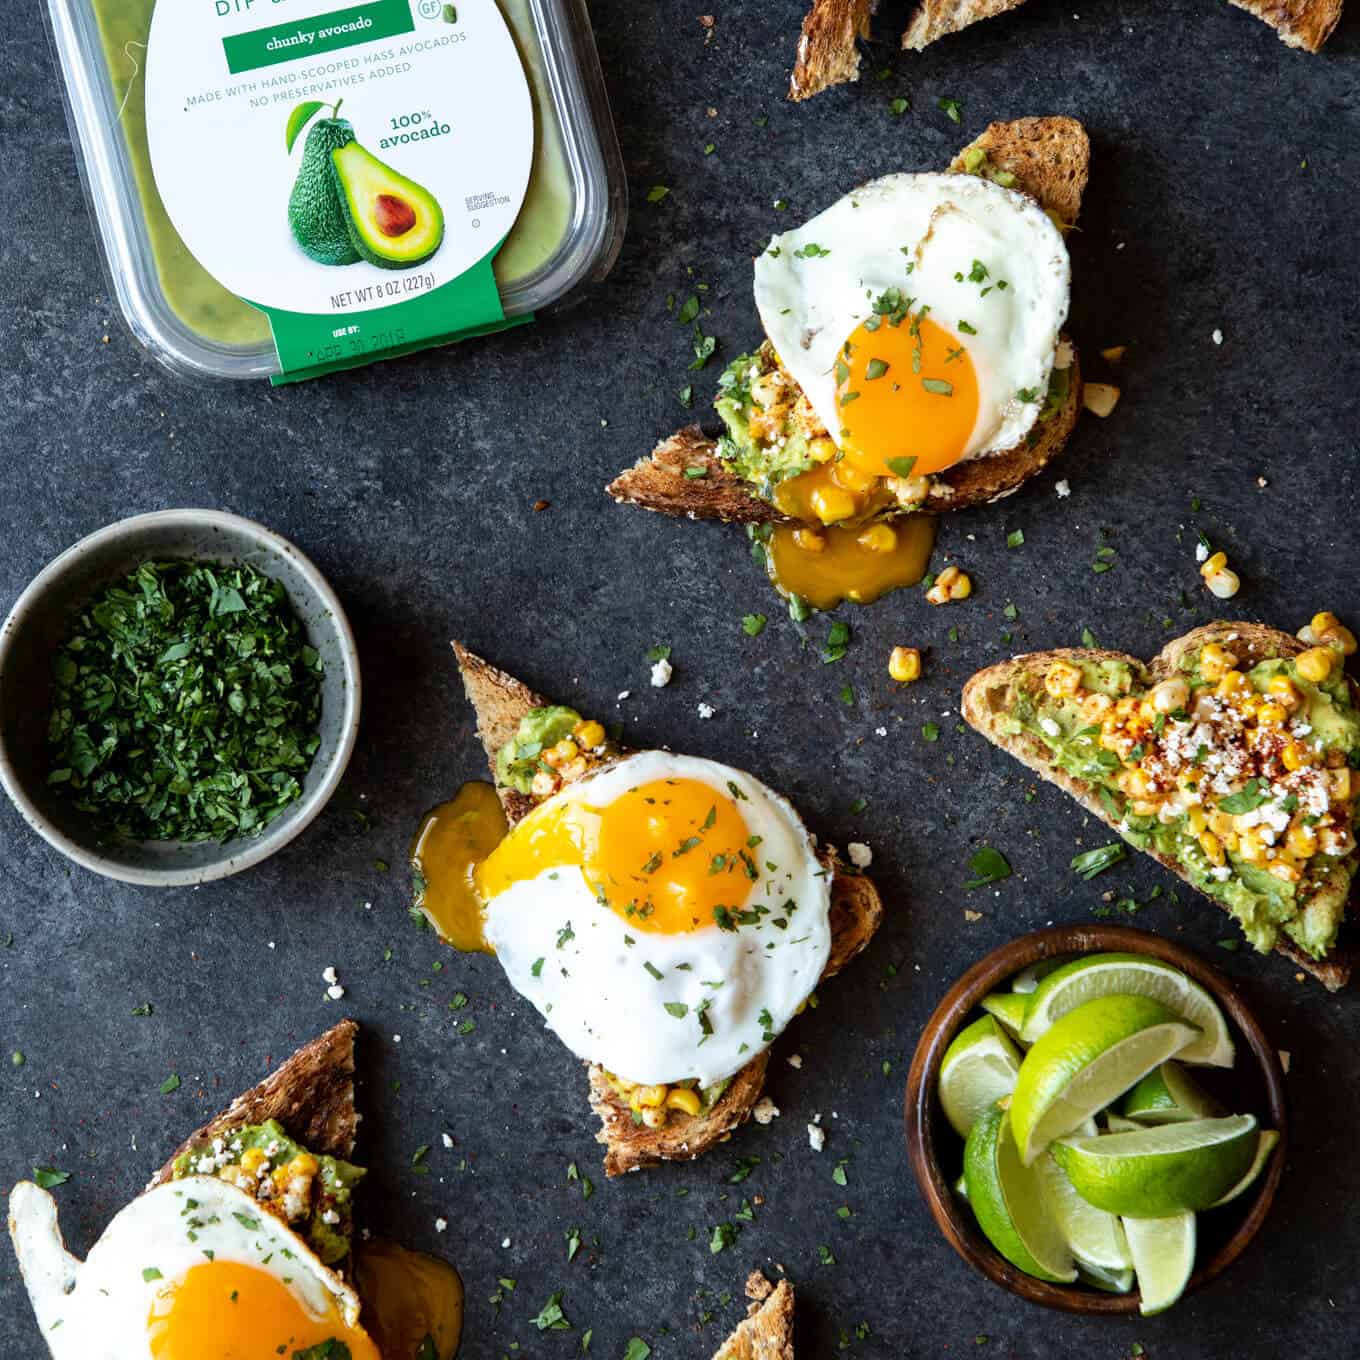
 When you're ready to serve up and devour these Healthy Turkey Bacon Wrapped Egg Muffins, I love topping it with some diced up avocado and jarred salsa. If you have guacamole, that'll of course totally work as well!


 It's 3am. Yes, you read that right. 3. AM. Ugh.
 One of my favorite lunches growing up was when my mom would make tuna salad on toast. If things got real crazy, she added a slice of melty cheese into the mix. There was something so divine about the simplicity of her tuna sandwiches. The tuna salad itself was barely a recipe. Tuna, mayo, salt. That's it. But gosh it's good.
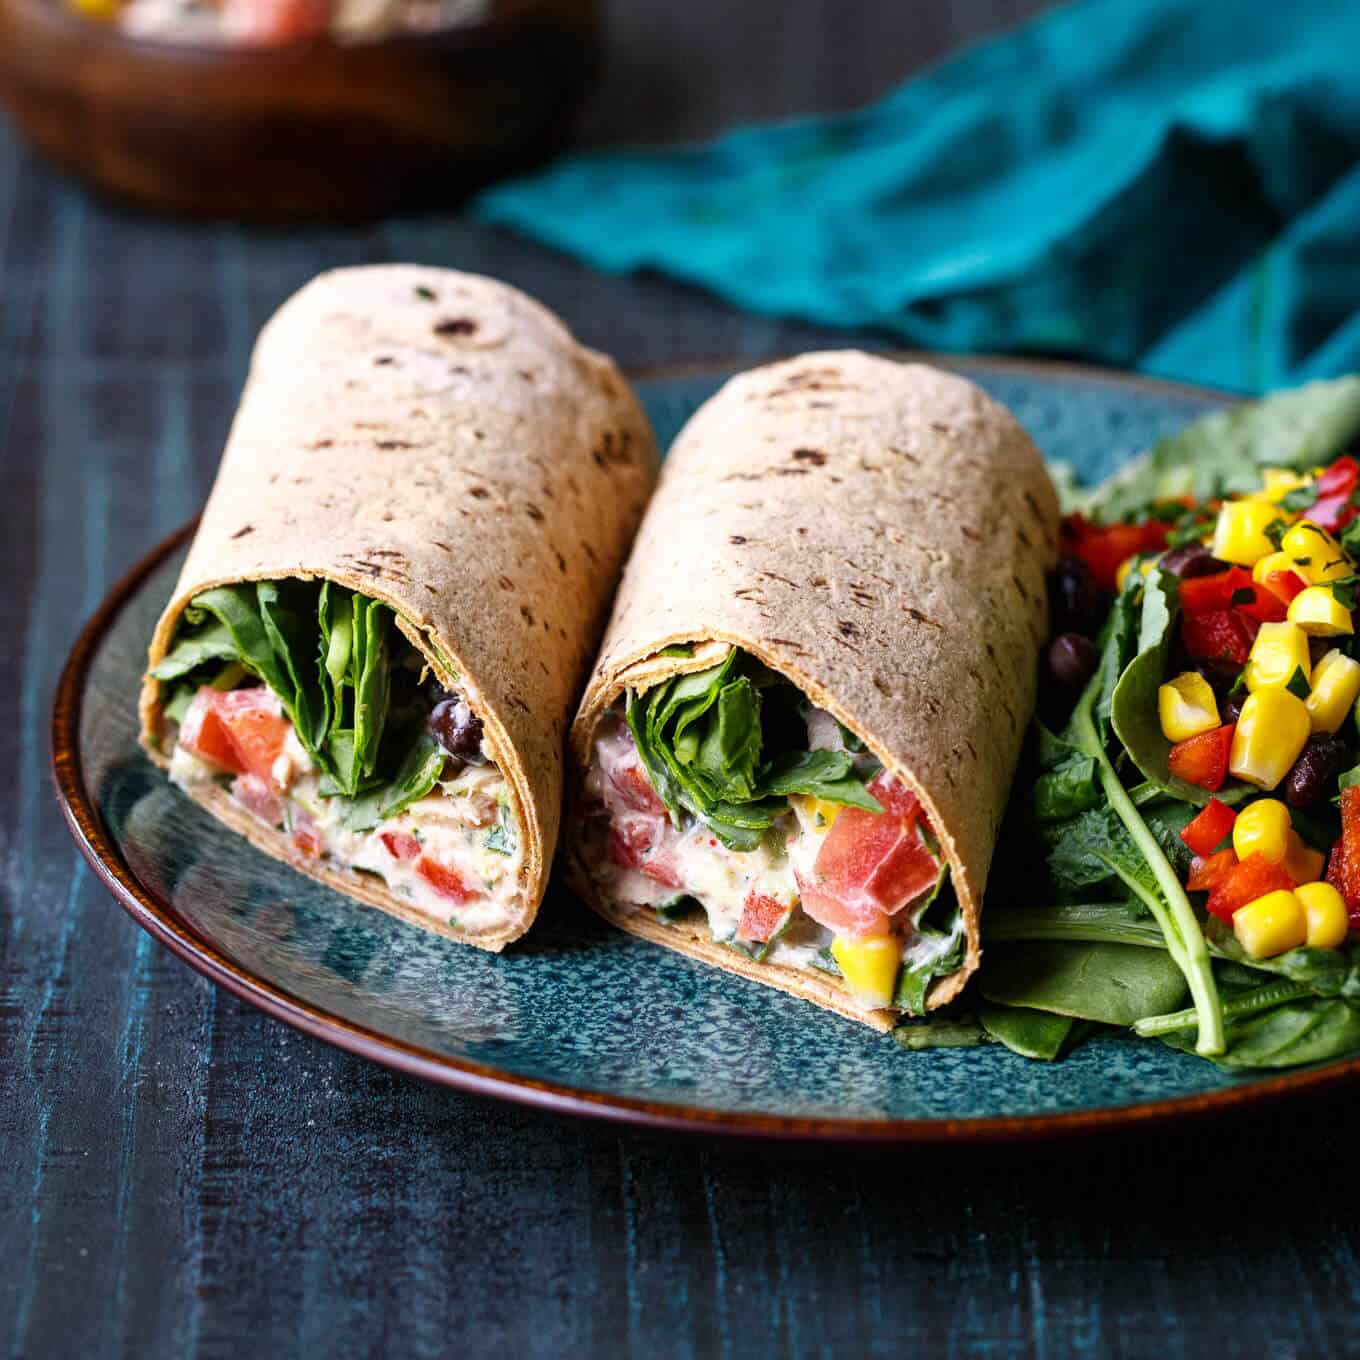
 Just look at all that delicious flavor. Tuna, black beans, red bell pepper, corn, avocado, tomato, and cilantro. HECK yes. And the mayo? It's been replaced with guilt-free Greek yogurt, spiked with a few southwest spices to give it some serious flavor.
 A wrap, however, is only as good as the wrap itself. Thankfully, I'm covered in that department with


 2 days. Just 48 hours before another school year begins. The beginning of each school year usually coincides with a need to go on a bit of a diet. Summers filled with lots of parties, ice cream, and elastic shorts don't really equate to a body that can fit into clothes with a defined waistline.
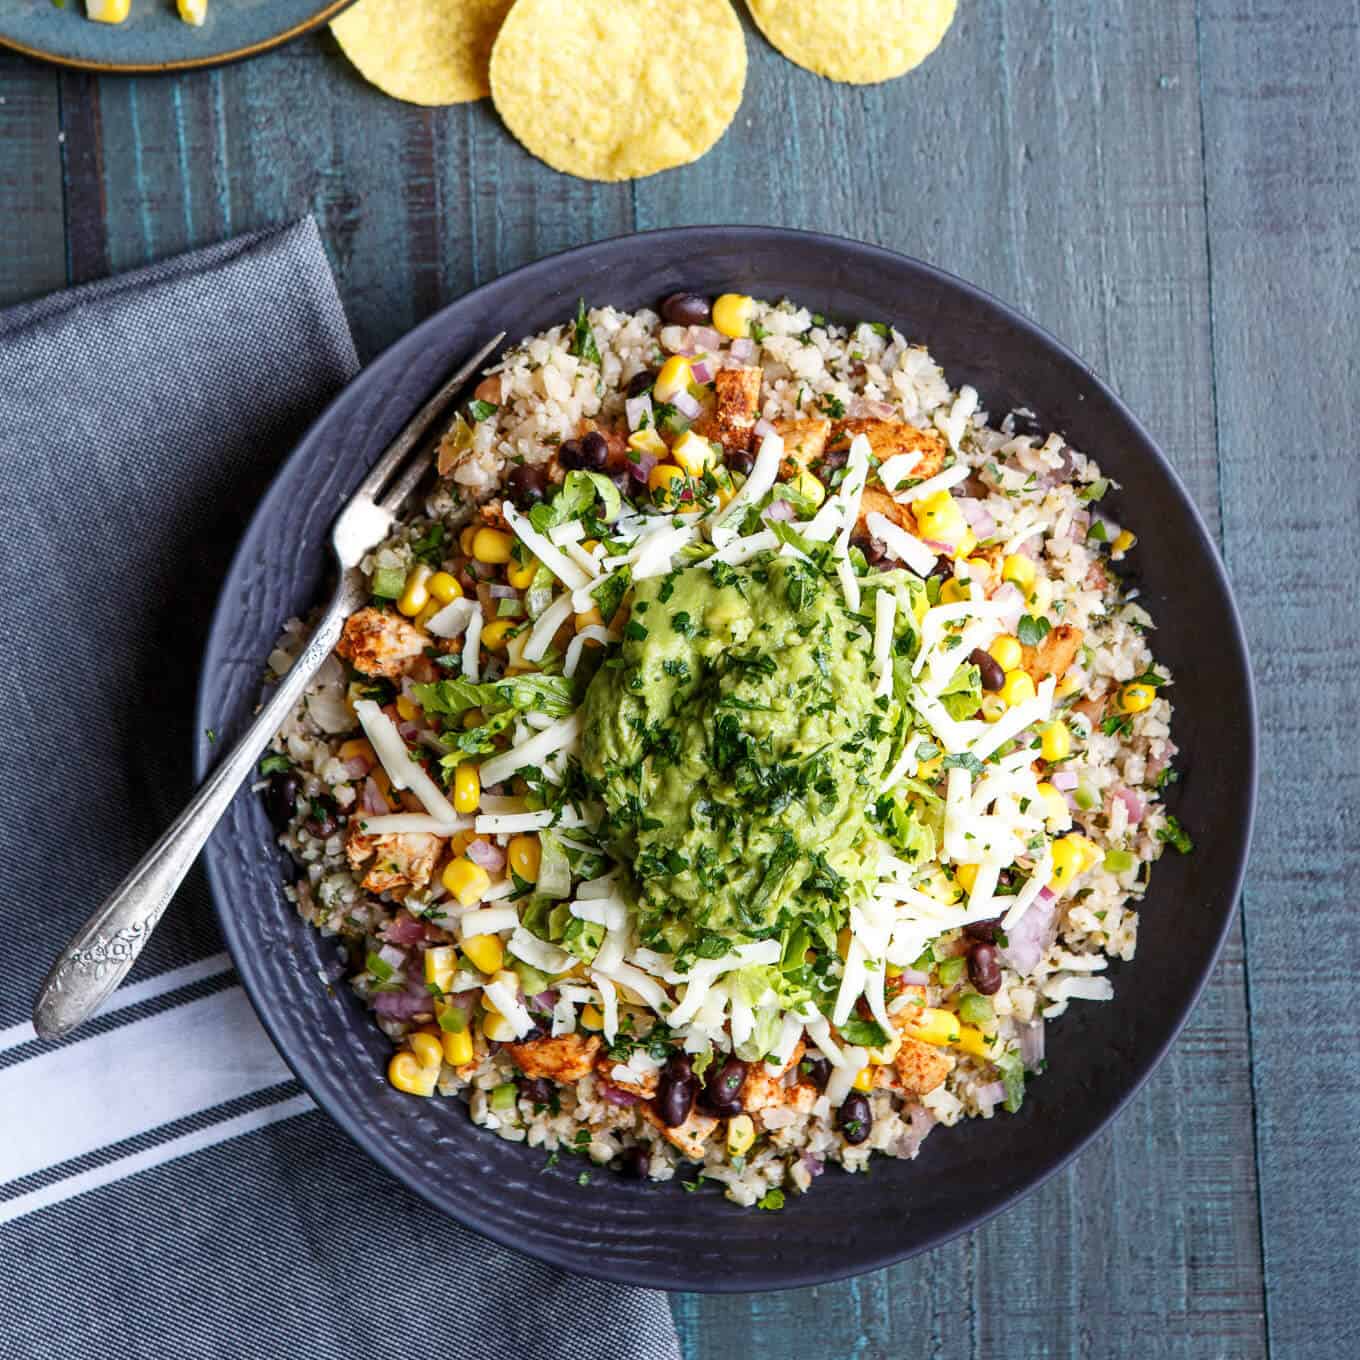
 Is anyone else kinda obsessed with Chipotle? I'm pretty sure Asheley and I grab takeout from there at least once a week. I love that I can feel pretty healthy about grabbing a salad or burrito bowl. But I always feel a little bit guilty about all that rice. I know it's not great for me. So these Healthy Cauliflower Rice Burrito Bowls are the PERFECT solution.
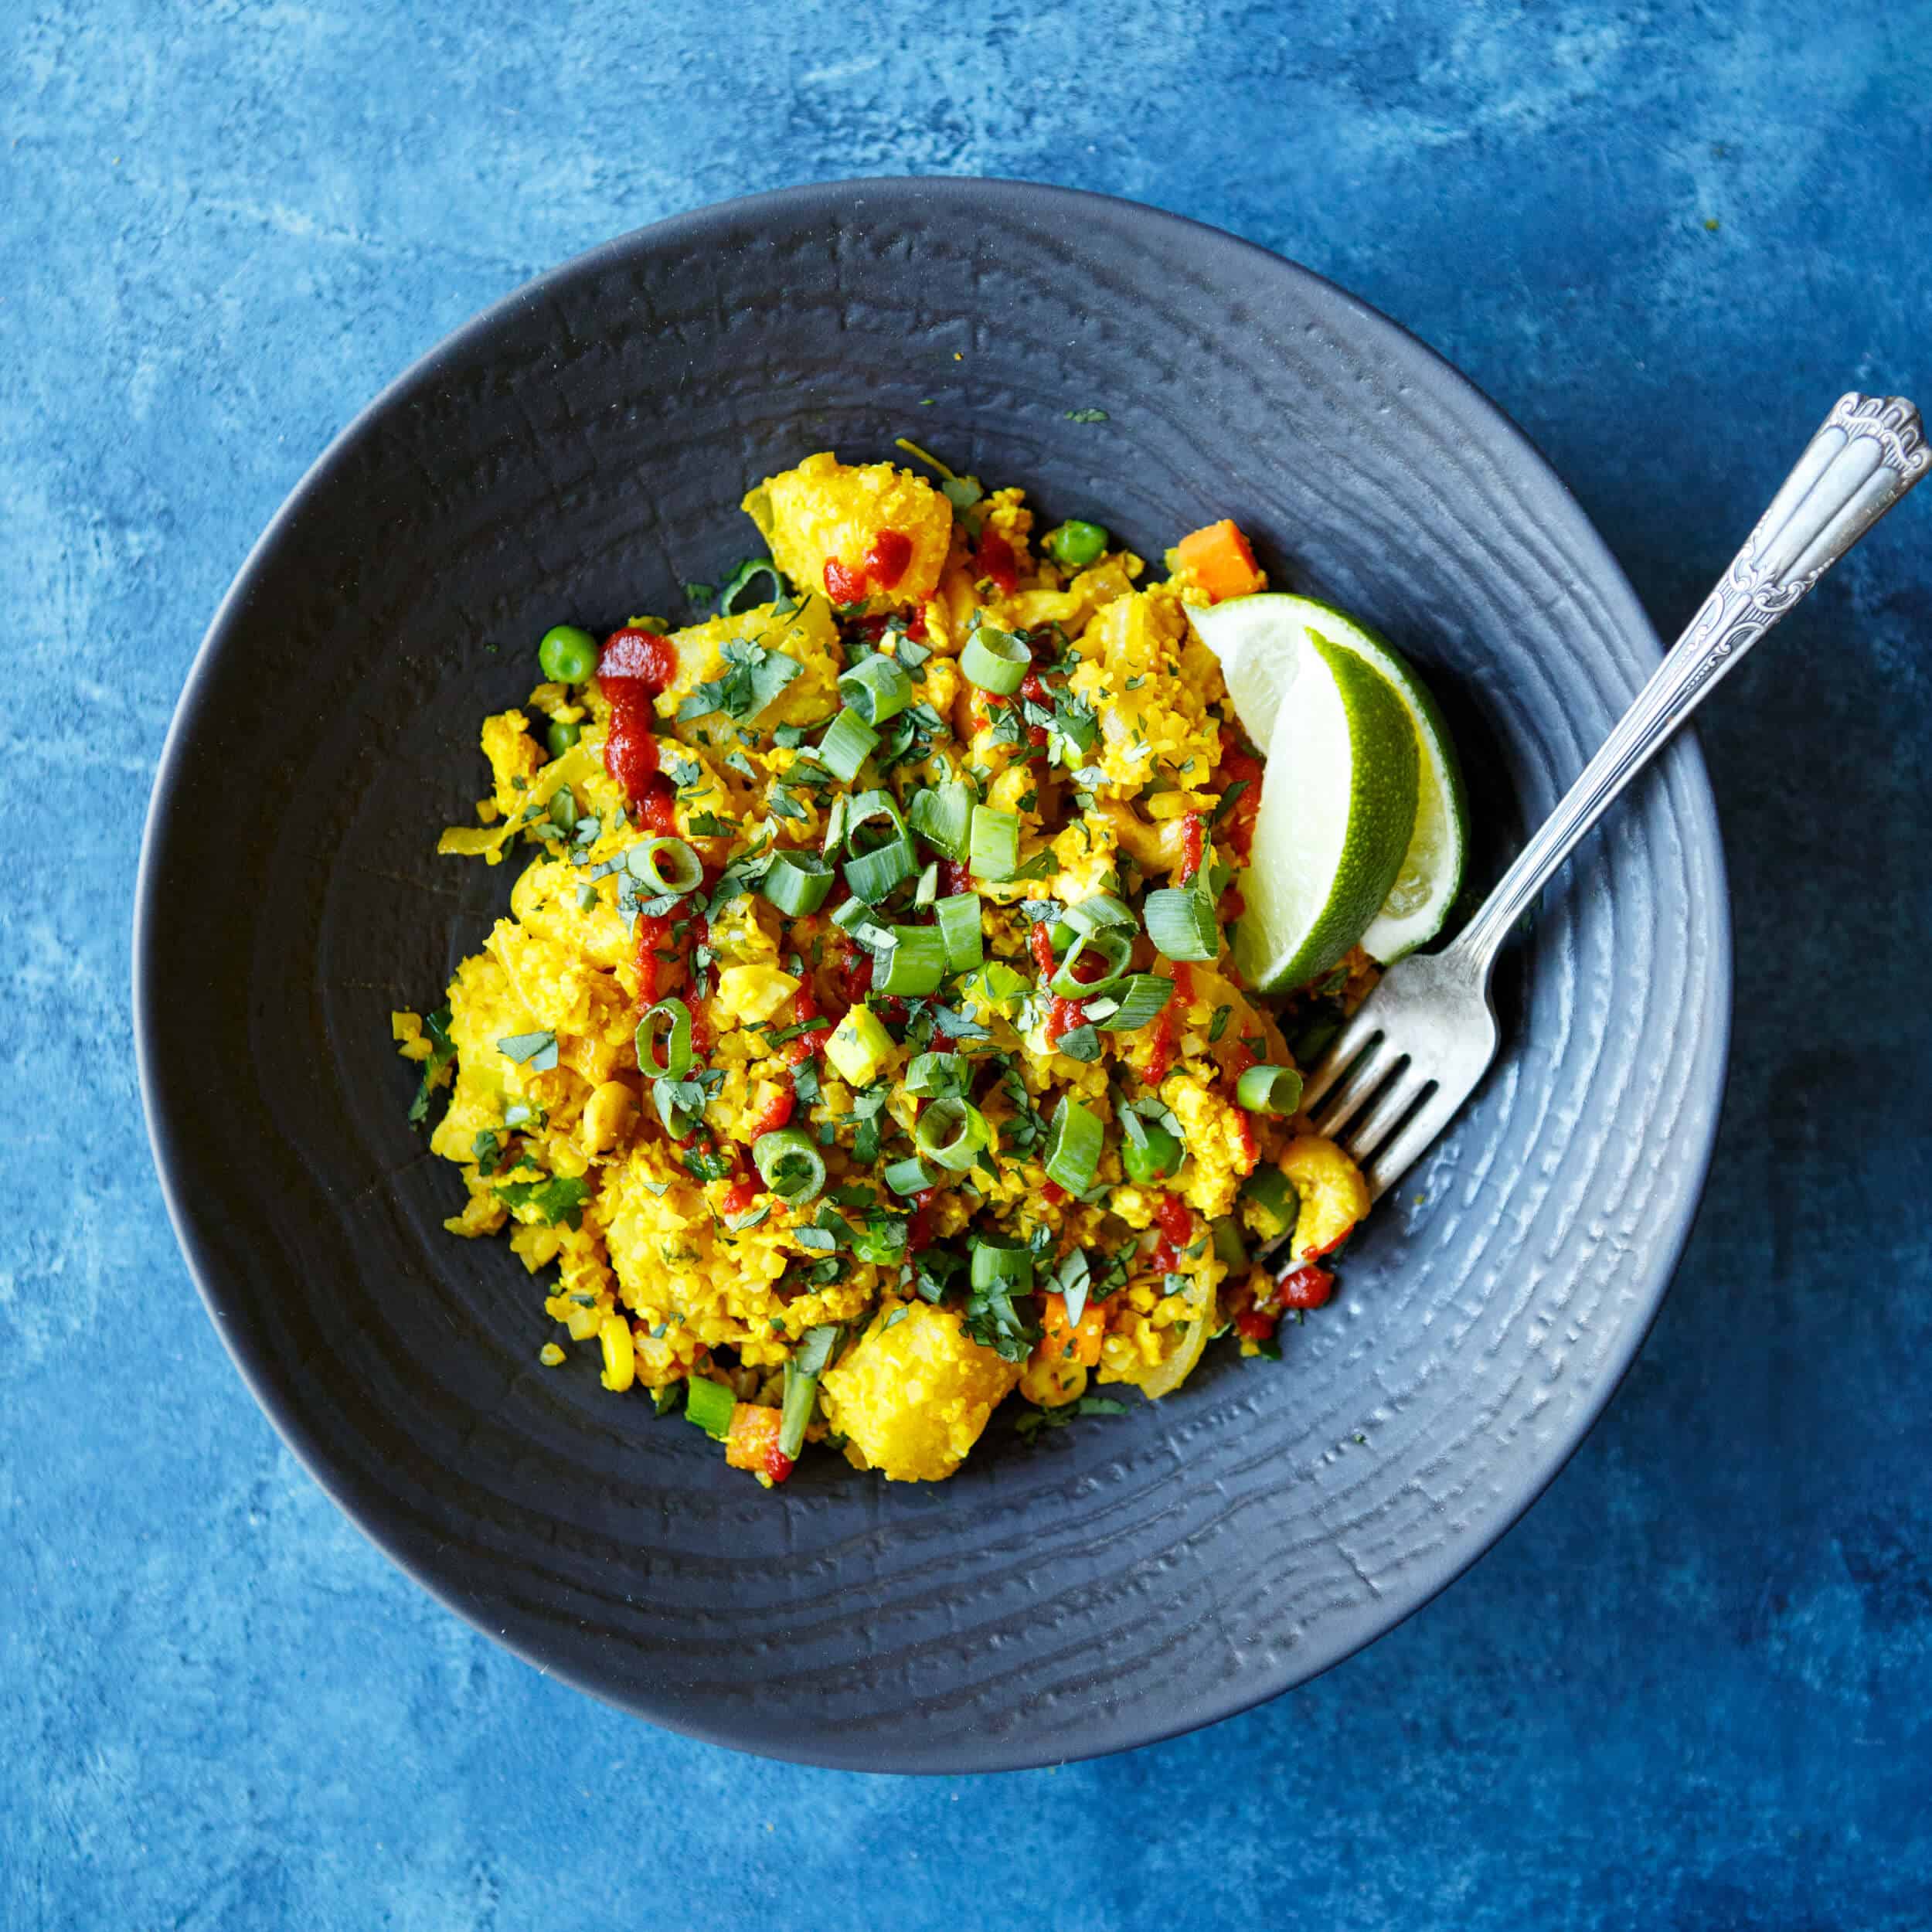
 The best part of these Healthy Cauliflower Rice Burrito Bowls? The toppings, of course.
 Just look at all that topping goodness. And that Cilantro Lime Cauliflower Rice. Doesn't it look just like actual rice?! Best of all, this cauliflower rice actually takes way less time than making the real stuff. It's done in under 15 minutes! BAM.
